B. Updating the BIOS
When updating the BIOS, choose the location where the BIOS file is saved. The follow procedure assumes that you save the BIOS file to a floppy disk.
Step 1:
1.Insert the floppy disk containing the BIOS file into the floppy disk drive. In the main menu of
• The Save Main BIOS to Drive option allows you to save the current BIOS file.
•
•If the BIOS update file is saved to a hard drive in RAID/AHCI mode or a hard drive attached to an independent IDE/SATA controller, use the <End> key during the POST to access
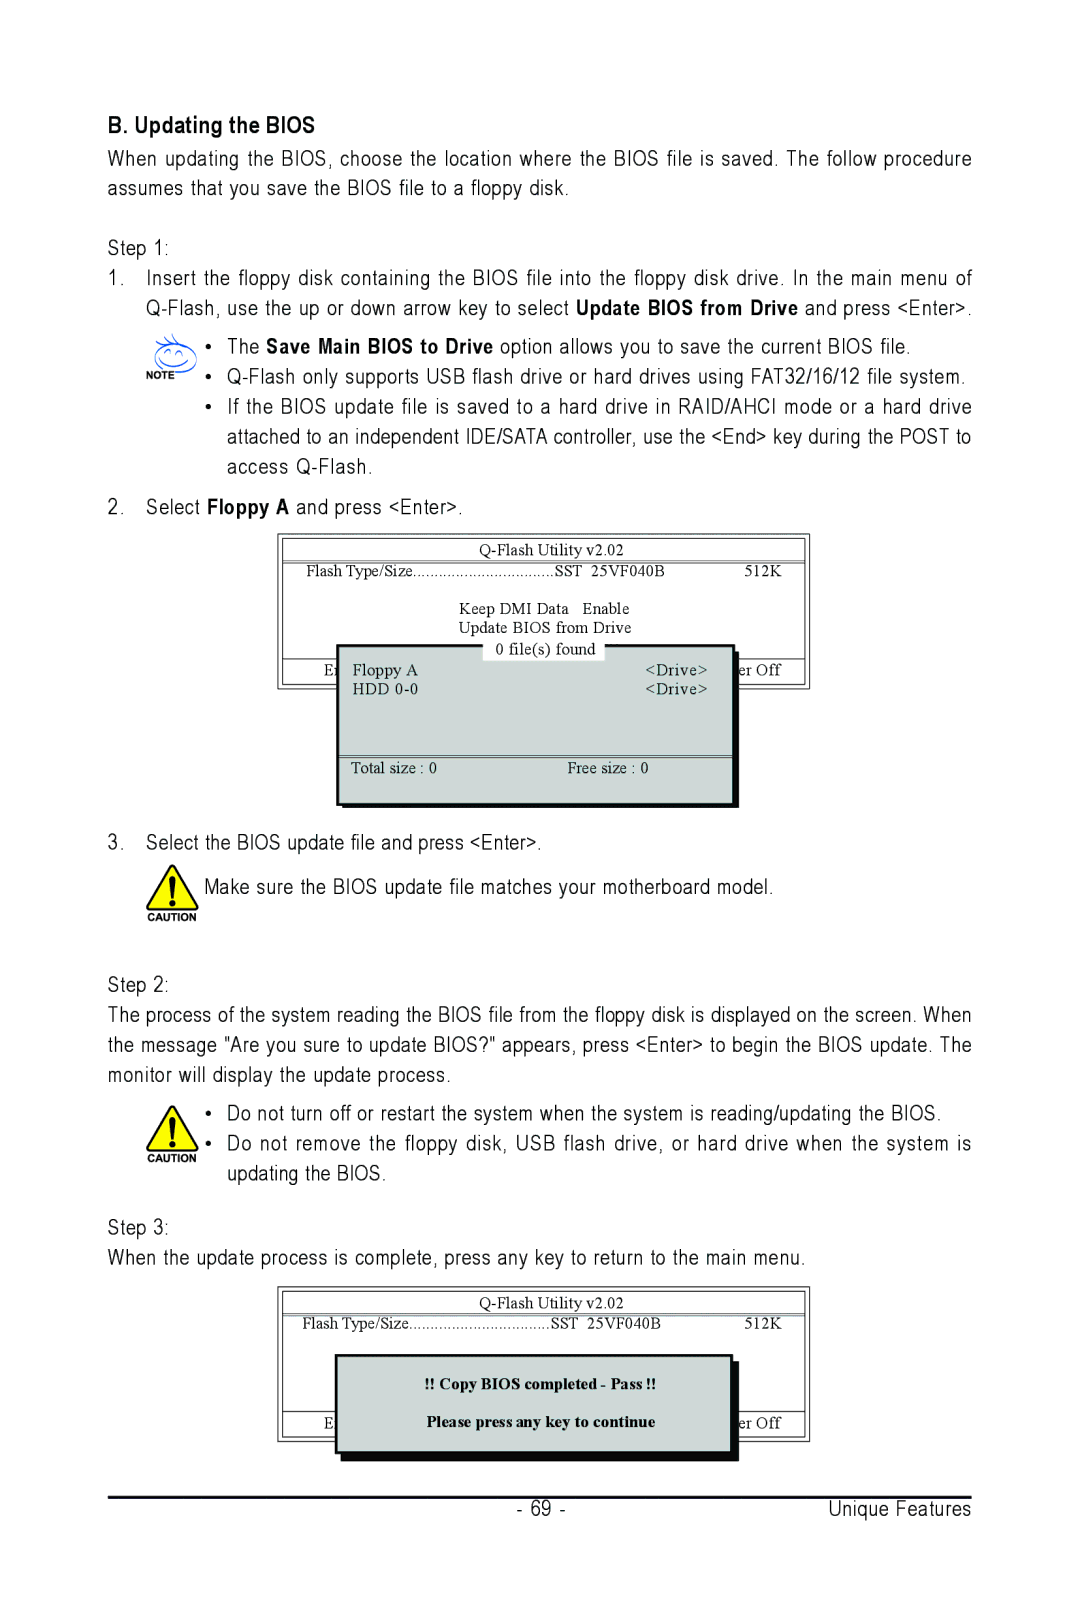
2.Select Floppy A and press <Enter>.
| Flash Type/Size | SST 25VF040B | ||||
|
|
|
| Keep DMI Data Enable | ||
|
|
|
| Update BIOS from Drive | ||
|
|
|
|
| 0 file(s) found |
|
|
|
|
|
| <Drive> | |
|
|
| EnterFloppy A |
|
| |
|
|
| HDD |
|
| <Drive> |
|
|
| ||||
|
|
| ||||
512K
Off
Total size : 0 | Free size : 0 |
3.Select the BIOS update file and press <Enter>.
![]() Make sure the BIOS update file matches your motherboard model.
Make sure the BIOS update file matches your motherboard model.
Step 2:
The process of the system reading the BIOS file from the floppy disk is displayed on the screen. When the message "Are you sure to update BIOS?" appears, press <Enter> to begin the BIOS update. The monitor will display the update process.
•Do not turn off or restart the system when the system is reading/updating the BIOS.
•Do not remove the floppy disk, USB flash drive, or hard drive when the system is updating the BIOS.
Step 3:
When the update process is complete, press any key to return to the main menu.
Flash Type/Size | SST 25VF040B | 512K |
Keep DMI Data | Enable |
|
!! Copy BIOS completed - Pass !!
Please press any key to continue | Off |
- 69 - | Unique Features |