PX875P PRO/ PX875P
Hardware Installation
This section will assist you in quickly installing your system hardware. Wear a wrist ground strap before handling components. Electrostatic discharge may damage your system components.
CPU Processor Installation
This mainboard supports Intel® Pentium® 4 processors using a Socket 478. Before building your system, we suggest you visit the Intel website and review the processor installation procedures. http://www.intel.com
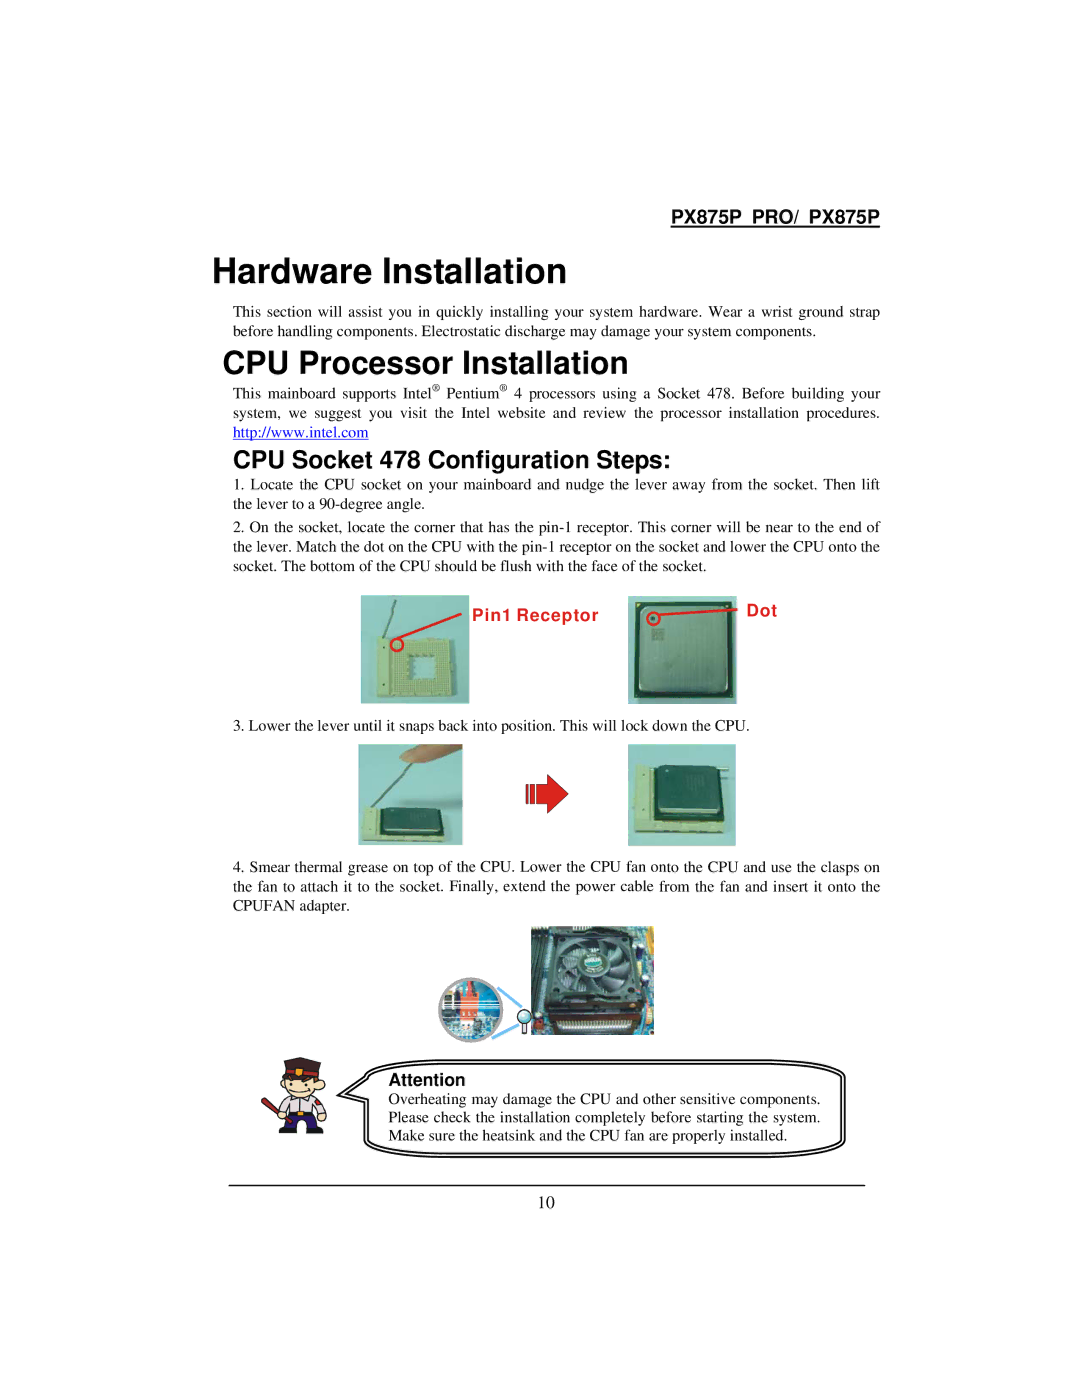
CPU Socket 478 Configuration Steps:
1.Locate the CPU socket on your mainboard and nudge the lever away from the socket. Then lift the lever to a
2.On the socket, locate the corner that has the
Pin1 Receptor | Dot |
3.Lower the lever until it snaps back into position. This will lock down the CPU.
4.Smear thermal grease on top of the CPU. Lower the CPU fan onto the CPU and use the clasps on the fan to attach it to the socket. Finally, extend the power cable from the fan and insert it onto the CPUFAN adapter.
Attention
Overheating may damage the CPU and other sensitive components.
Please check the installation completely before starting the system.
Make sure the heatsink and the CPU fan are properly installed.
10