AUTO-CALIBRATION PROCEDURE
Model: TEMPSTAR GP, & TEMPSTAR TGP
This procedure must be completed every time you replace either a control board or a modulating valve.
AUTO - CALIBRATION
1.Turn the unit OFF at the main power switch and let stand for one minute.
2.Remove the lower front panel and set aside.
3.Remove the cover of the rectangular control box.
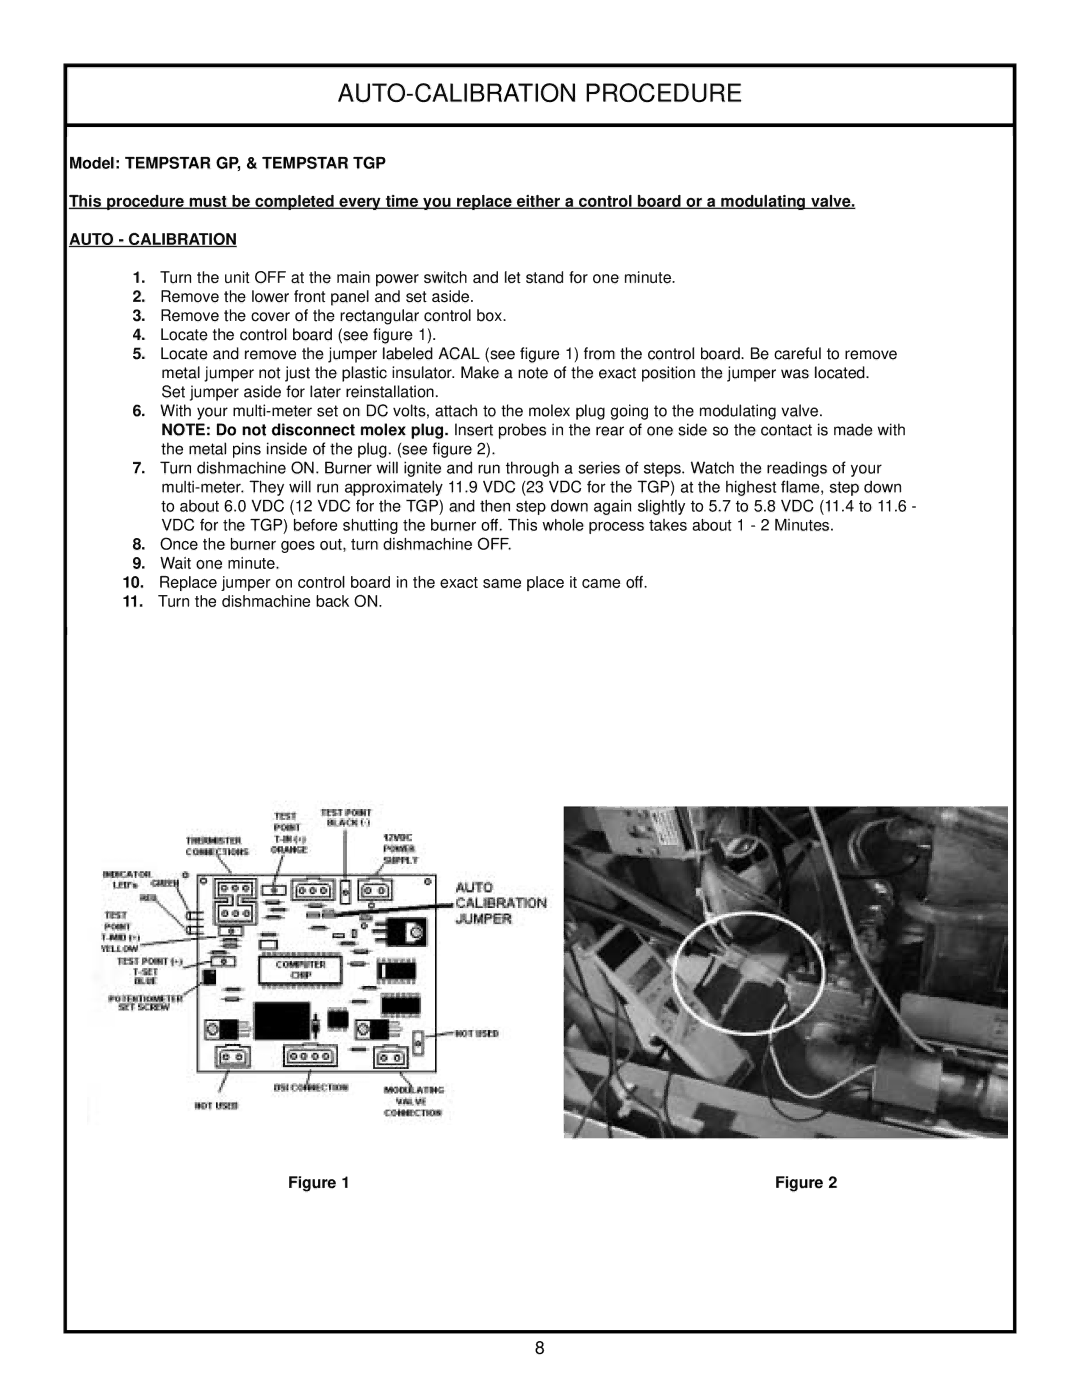
4.Locate the control board (see figure 1).
5.Locate and remove the jumper labeled ACAL (see figure 1) from the control board. Be careful to remove metal jumper not just the plastic insulator. Make a note of the exact position the jumper was located. Set jumper aside for later reinstallation.
6.With your
NOTE: Do not disconnect molex plug. Insert probes in the rear of one side so the contact is made with the metal pins inside of the plug. (see figure 2).
7.Turn dishmachine ON. Burner will ignite and run through a series of steps. Watch the readings of your
8.Once the burner goes out, turn dishmachine OFF.
9.Wait one minute.
10.Replace jumper on control board in the exact same place it came off.
11.Turn the dishmachine back ON.
Figure 1 | Figure 2 |
|
|
8
