7.At the end of the delayed period, the DELAY indicator word will go off and the oven will begin to heat.
8.At the end of the clock controlled Cook Time, the oven will shut offautomatically, "End" will appear in the display and a beep will be heard four times. Press the Stop/Clear pad.
If the program is not cancelled, there will be one beep every 30 seconds for five minutes. (If you wish to change the beeps at the end of clock controlled cooking, see page 7.)
Drying tselect models)
For best results, use the drying rack provided with your
range. It allows air to circulate evenly around the food.
The convection fan will operate during the drying procedure,
Setting the Controls for Drying
1.Press the Drying pad.
•000, the oven icon and convection fan icon _ will appear.
2.Press the Preset (0) pad for 140°F. or press the appropriate number pads for the desired drying temperature.
•The temperature may be set between
•If the temperature is set for under 100°F or over 200°F, the control will beep twice and default to 100°F or 200°F respectively.
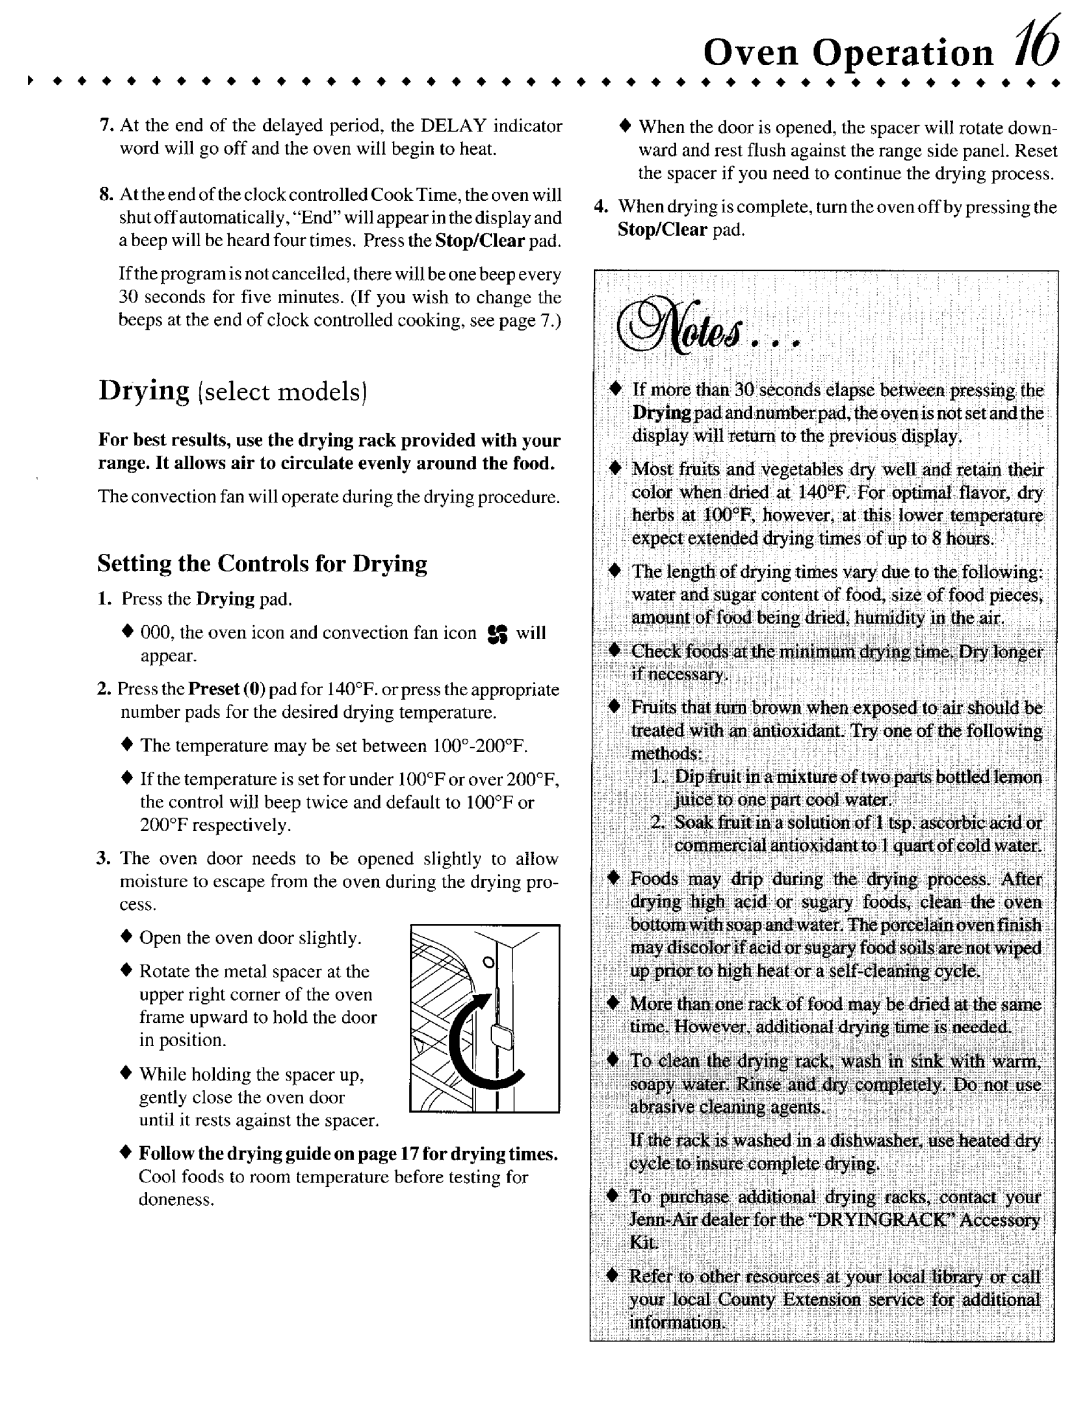
3.The oven door needs to be opened slightly to allow
moisture to escape from the oven during the drying pro- cess.
• Open the oven door slightly. |
Oven Operation /6
•When the door is opened, the spacer will rotate down- ward and rest flush against the range side panel. Reset the spacer if you need to continue the drying process.
4.When drying is complete, turn the oven off by pressing the Stop/Clear pad.
•If more than 3Oseconds elapse between pressing the Dryingpad and number pad. _ovenis notset andthe
display :willreturn to the previous display.
•Most fruits and _¢egetables dry well and retain their
color when dried at 140°F. For optimal flavor, dry herbs at 100°F. however, at this lower temperature
expect extended drying times of up tO 8 hours.
¢The leng_ of drying times vary due to the following:
:water and sugar content of food, size Of food pieces_ amount of food being dried, hu_dity in the air.
• Che_ foOds:at:th_ | _ fl_:i_g time: D_ longe_ |
if neceSsary. |
|
upper right corner of the oven frame upward to hold the door in position.
• While holding the spacer up, |
|
|
| |
• | gently close the oven door | __O |
|
|
Rotate the metal spacer at the |
|
| ||
| until it rests against the spacer. |
|
|
|
• | Follow the drying guide on page 17 for drying times, | ' | ito:_u_ :cOmpletedrying | |
| Cool foods to room temperature | before testing for | ..... | |
doneness.
