UX-A7DVD
Consists of CA-UXA7DVD and SP-UXA7DVD
UX-A7DVD
Important for Laser Products
Precautions
Introduction
Contents
Main Unit
Location of the Buttons and Controls
Main unit
Display window on the electronic swing panel
Display window
Remote Control
See pages in parentheses for details
About Discs
Playable Disc Types
Disc Structure
About audio formats
Putting the Batteries into the Remote Control
Connecting Antennas
Getting Started
Unpacking
Connecting Speakers
You can connect the speakers using the speaker cords
AM antenna
To connect an outdoor AM antenna
Connecting a TV
To remove the speaker grilles
To select the color system
Speaker grilles are removable as illustrated below
Connecting Other Equipment
Adjusting the Voltage Selector
To connect analog audio equipment
Setting the DVD Player
Go to the next page to start the setting
To select the On-screen language for the setting menu-Step
Go to To select the monitor type on the next
To select the monitor type-Step
Go to To select the output signal type on the next
Guidelines to select the monitor type
To select the output signal type-Step
Guidelines to select the output signal type
Playback Output signals
Disc
To show the clock when the unit is turned on
Setting the Clock
To turn off the clock indication
Remote control
Basic and Common Operations
Turning On the Power
To turn off the unit automatically Auto Power Off
Adjusting the Volume
To turn down the volume level temporarily
Selecting the Sources and Starting Play
To listen to the sound from external equipment, press
Adjusting the Tone
Reinforcing the Bass Sound
Changing the Display Illumination
To select the illumination color
To create your favorite colors
To change the display brightness
Adjusting the Audio Input Level Prohibiting Disc Ejection
On the main unit only
Listening to FM and AM Broadcasts
Remote control
10 0 +10
Tuning in to a Station
Setting the AM Tuner Interval Spacing
To change the FM reception mode
Presetting Stations
Tuning in to a Preset Station
Press the number buttons to select a preset number
Press SET again
Playing Back Discs
DVD
On-screen guide icons
Loading a Disc
To prevent screen burn-out with the screen saver
To go to another chapter
DVD Basic Operations
To show the on-screen indication
SVCD/VCD/Audio CD Basic Operations
To increase the DVD’s sound level
Current disc information
Disc playing information
To go to another track
To stop play for a moment, press DVD #¥8 or 8 on
While playing a disc
To erase the on-screen indication, press on Screen
MP3 Basic Operations
About MP3 disc
Unavailable functions for MP3 disc
Available for MP3
Searching for a Particular Point
To go to another group
Forward search
Reverse search
When playing a DVD
Playing Back by Using the Disc Menu
When playing a Svcd or VCD
PBC operation concept
Repeating Playback
Repeat play
On the remote control only Press Play Mode during play
B repeat play
For SVCD, VCD, or Audio CD
Press Cursor 3/2 to move to A-B Repeat
Press Play Mode
Programming the Playing Order Program Play
Press Cursor 3/2 to move to PROGRAM, then press Enter
To program other titles, tracks, or groups, repeat step
To modify the program
To check the programed contents
To exit from the program play
Playing at Random-Random Play
To exit from the random play
Press Cursor 3/2 to move to RANDOM, then press Enter
To skip the playing title, track, or group, press ¢
Playing Back Tapes
To play both sides-Reverse mode
Playing Back a Tape
Special Disc Playback
Functions in this section do not work for MP3 discs
To erase the on-screen indication, press Play Mode
Press Cursor 3/2 to move to Chap SEARCH, then press Enter
Enter a chapter number by pressing the number buttons 0 to
Press Cursor 3/2 to move to Time SEARCH, then press Enter
Viewing the Desired Chapters/Tracks- Digest
To change angle views
Selecting Multi-Angle Views
To show all angle views
Selecting the Audio Language or Sound
Selecting the Subtitle Language
Playing a Still Picture/Frame-by-Frame
Playing Back in Slow-Motion-Slow
Zooming in the Picture-Zoom
Enjoying Virtual Surround Sound
You can zoom a picture by 2 times
To go back to normal play, press Zoom while holding
Recording
DVD Tape FM/AM AUX/MD
To clean the heads, capstans, and pinch rollers
Before You Start Recording on a Tape
To protect your recordings
To keep the best recording and playback sound quality
Recording a Disc onto a Tape -Disc Synchronized Recording
Prepare a disc
Press REC on the main unit
To stop recording, press
When you press REC while pausing a track
Recording Other Sources onto a Tape
To record a single track during play
To record from external equipment
Using the Microphone
Digital
To adjust the key
If howling or squealing feedback occurs while using
Singing Along Karaoke
To apply an echo to your voice
Changing the DVD Initial Settings
TOP Menu
Basic Procedure
Setting menu
Changing the Various Audio Settings
Changing the Initial Language Settings
More about Down MIX
Changing the Display Settings
Changing the System Settings
On the System menu, you can change the following settings
More about Compression
Setting the parental lock
On the remote control only Press Enter while holding down
Unlocking the Parental Lock Temporarily
Press Cursor 5/∞ to select YES, then press
Using the Timers
Display
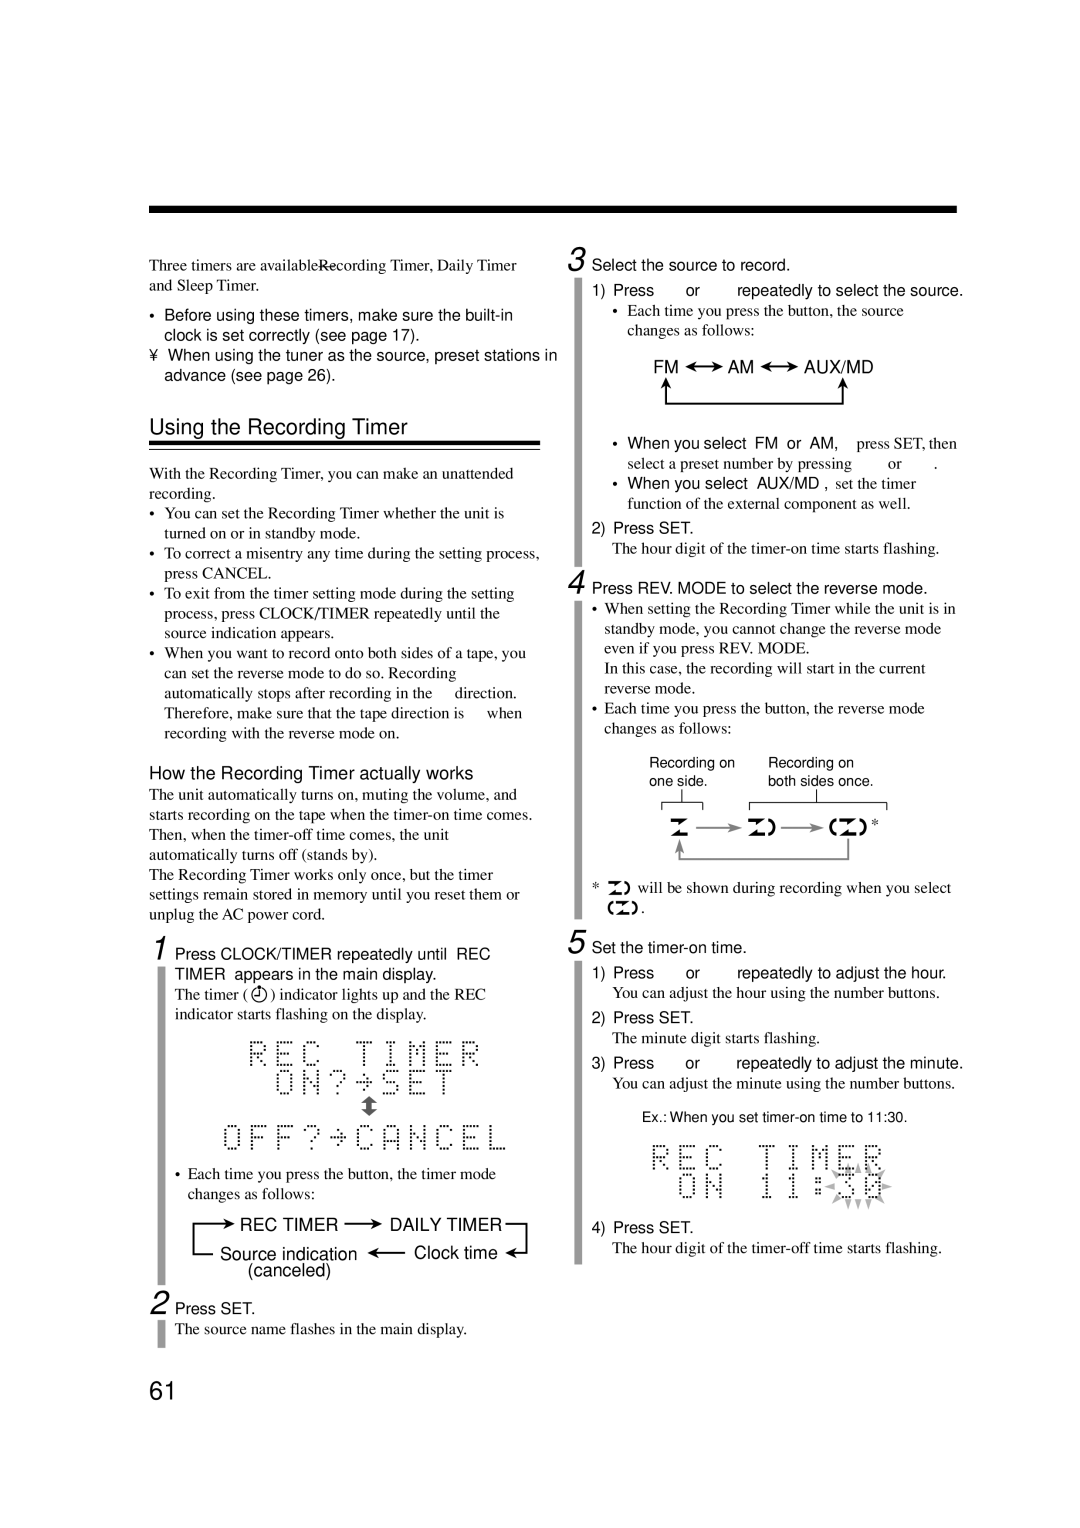
Using the Recording Timer
How the Recording Timer actually works
How the Daily Timer actually works
Using the Daily Timer
To turn off the Recording Timer after its setting is done
Volume setting appears in the main display
To turn off the Daily Timer after its setting is done
To turn on the Daily Timer again
You can also use the source selecting buttons
Using the Sleep Timer
How the Sleep Timer actually works
Timer Priority
Press Sleep
Using AV Compu Link Control System
Set AV Compulink Mode in the System menu as follows
AV Compu Link Connection
One-touch DVD play
Maintenance
Cleaning the unit
General Notes
Handling discs
Troubleshooting
Symptom
Possible Cause
Action
Disc Tape
Table of Language Codes
Table of Country/Area Codes
Zimbabwe
Specifications
230V
127V
110V

 REC TIMER
  DAILY TIMER
 Clock time
  (canceled)
 AM
AM 
 AUX/MD