To adjust the picture character (VFP)
The VFP (Video Fine Processor) function allows you to adjust the picture character according to the type of programming, picture tone or personal preferences.
1 During playback, press VFP - PROGRESSIVE SCAN.
The VFP mode selection window appears on the TV screen.
2 Press 2/3 to select the desired preset.
Each time you press the button, the VFP mode changes as follows.
Set the video type most suitable to the current program or the room conditions.

 NORMAL
 CINEMA
 USER 1
 USER 2

Selected preset
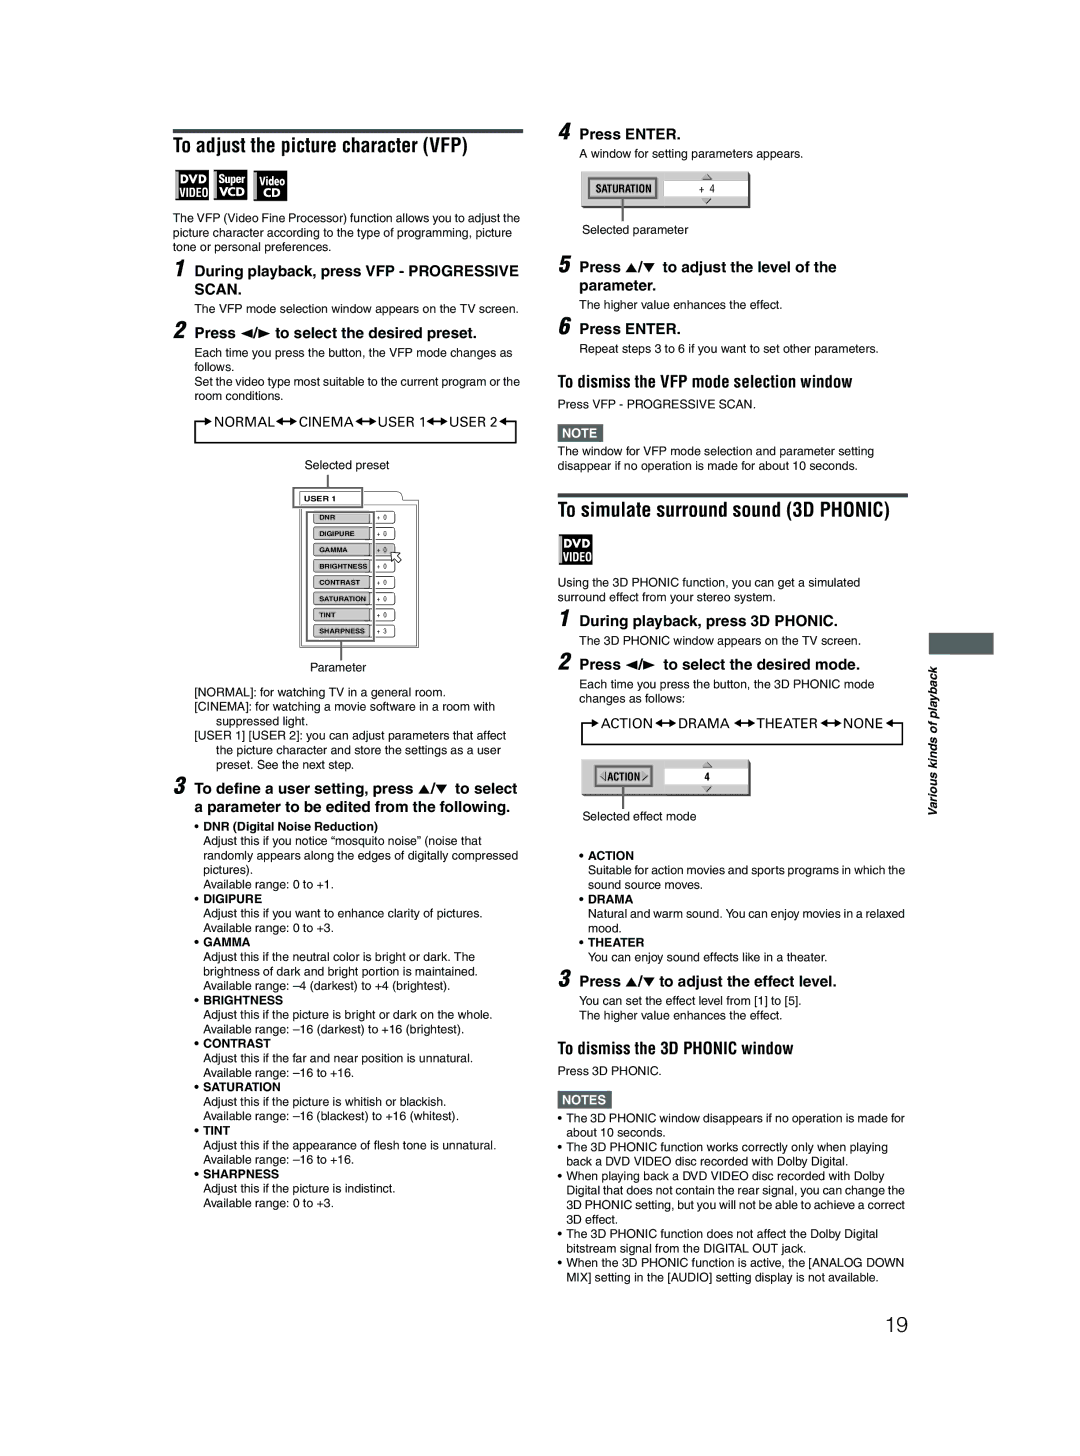
USER 1
DNR | + 0 |
DIGIPURE | + 0 |
GAMMA | + 0 |
BRIGHTNESS | + 0 |
CONTRAST | + 0 |
SATURATION | + 0 |
TINT | + 0 |
SHARPNESS | + 3 |
Parameter
[NORMAL]: for watching TV in a general room.
[CINEMA]: for watching a movie software in a room with suppressed light.
[USER 1] [USER 2]: you can adjust parameters that affect the picture character and store the settings as a user preset. See the next step.
3 To define a user setting, press 5/∞ to select a parameter to be edited from the following.
•DNR (Digital Noise Reduction)
Adjust this if you notice “mosquito noise” (noise that randomly appears along the edges of digitally compressed pictures).
Available range: 0 to +1.
•DIGIPURE
Adjust this if you want to enhance clarity of pictures. Available range: 0 to +3.
•GAMMA
Adjust this if the neutral color is bright or dark. The brightness of dark and bright portion is maintained. Available range:
•BRIGHTNESS
Adjust this if the picture is bright or dark on the whole. Available range:
•CONTRAST
Adjust this if the far and near position is unnatural. Available range:
•SATURATION
Adjust this if the picture is whitish or blackish. Available range:
•TINT
Adjust this if the appearance of flesh tone is unnatural. Available range:
•SHARPNESS
Adjust this if the picture is indistinct. Available range: 0 to +3.
4 Press ENTER.
A window for setting parameters appears.
SATURATION | + 4 |
Selected parameter
5 Press 5/∞ to adjust the level of the parameter.
The higher value enhances the effect.
6 Press ENTER.
Repeat steps 3 to 6 if you want to set other parameters.
To dismiss the VFP mode selection window
Press VFP - PROGRESSIVE SCAN.
NOTE![]()
The window for VFP mode selection and parameter setting disappear if no operation is made for about 10 seconds.
To simulate surround sound (3D PHONIC)
Using the 3D PHONIC function, you can get a simulated surround effect from your stereo system.
1 During playback, press 3D PHONIC.
The 3D PHONIC window appears on the TV screen.
2 Press 2/3 to select the desired mode.
Each time you press the button, the 3D PHONIC mode changes as follows:
 ACTION
 DRAMA
DRAMA 
 THEATER
 NONE
NONE

![]()
![]() ACTION
ACTION![]()
![]() +45
+45
Selected effect mode
•ACTION
Suitable for action movies and sports programs in which the sound source moves.
•DRAMA
Natural and warm sound. You can enjoy movies in a relaxed mood.
•THEATER
You can enjoy sound effects like in a theater.
3 Press 5/∞ to adjust the effect level.
You can set the effect level from [1] to [5].
The higher value enhances the effect.
To dismiss the 3D PHONIC window
Press 3D PHONIC.
NOTES![]()
•The 3D PHONIC window disappears if no operation is made for about 10 seconds.
•The 3D PHONIC function works correctly only when playing back a DVD VIDEO disc recorded with Dolby Digital.
•When playing back a DVD VIDEO disc recorded with Dolby Digital that does not contain the rear signal, you can change the 3D PHONIC setting, but you will not be able to achieve a correct 3D effect.
•The 3D PHONIC function does not affect the Dolby Digital bitstream signal from the DIGITAL OUT jack.
•When the 3D PHONIC function is active, the [ANALOG DOWN MIX] setting in the [AUDIO] setting display is not available.
Various kinds of playback
19