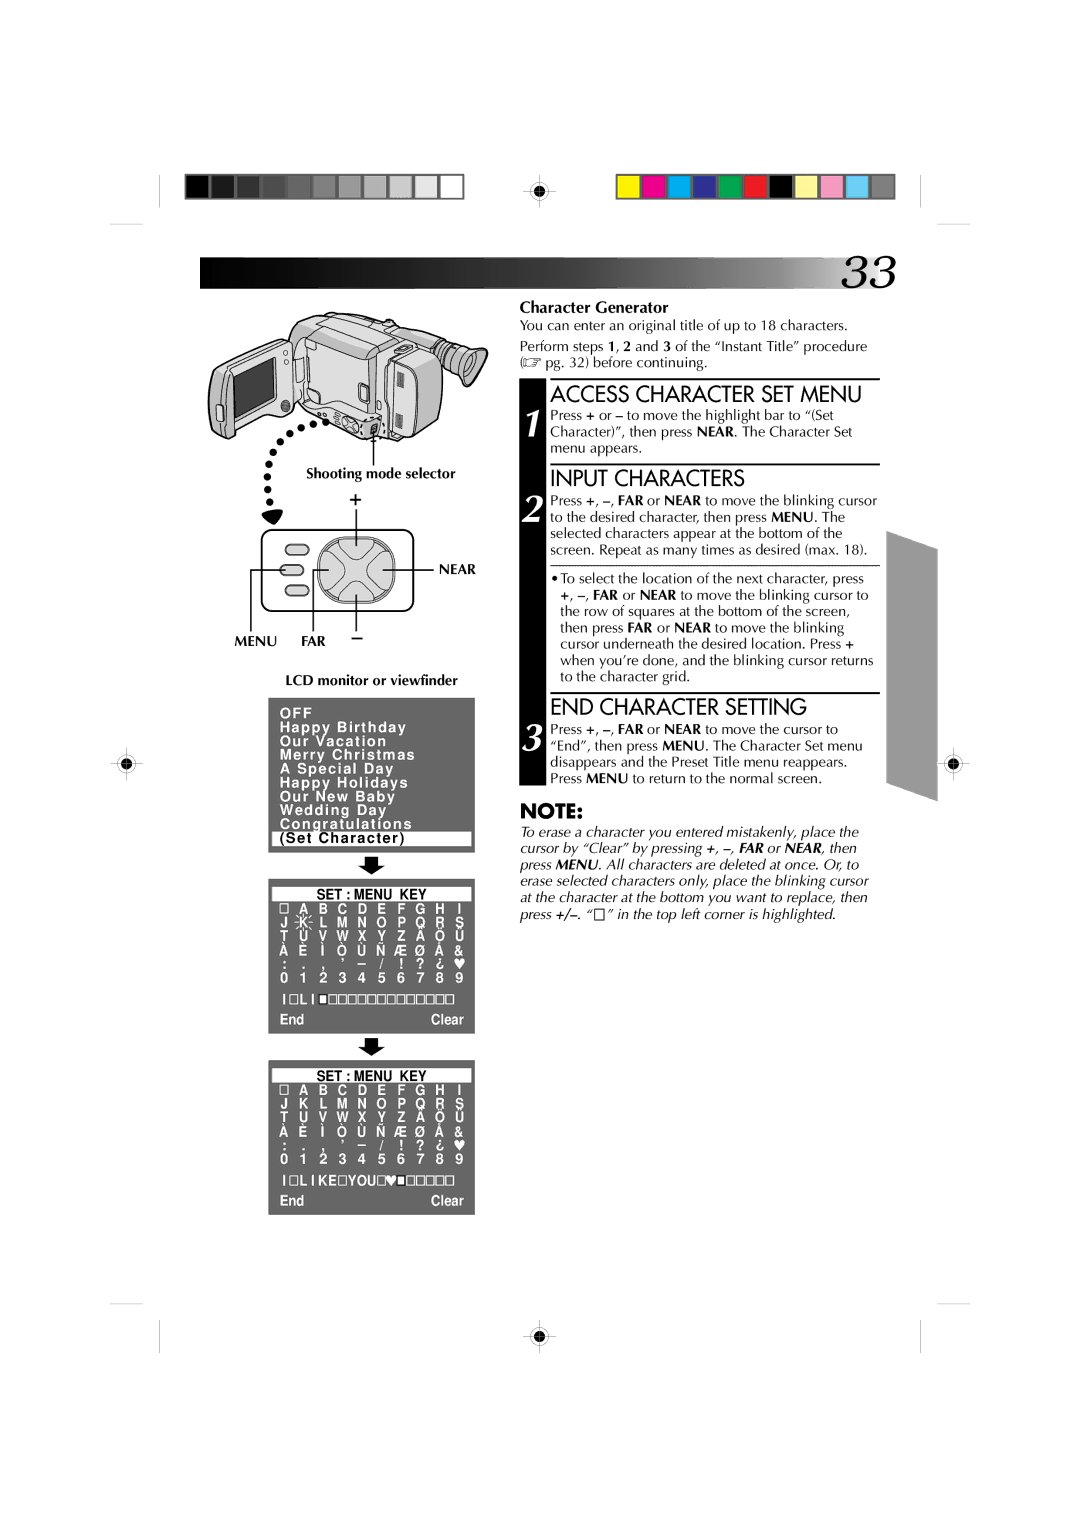
Shooting mode selector
+
NEAR
MENU FAR –
LCD monitor or viewfinder
OFF
Happy Birthday
Our Vacation
Merry Christmas
A Special Day
Happy Holidays
Our New Baby
Wedding Day
Congratulations
(Set Character)
|
|
| SET : MENU KEY |
|
| |||||
| A |
| B C D E F G | H | I | |||||
J | K |
| L M N O P Q R S | |||||||
T | U |
| V | W X | Y | Z | Ä | Ö | Ü | |
À | È | Ì | Ò | Ù Ñ | Æ Ø | Å | & |
| ||
: . |
| , | ’ | – | / | ! | ? | ¿ | ♥ | |
0 | 1 |
| 2 | 3 | 4 | 5 | 6 | 7 | 8 | 9 |
I | L I |
|
|
|
|
|
|
|
| |
End |
|
|
|
|
|
|
| Clear | ||
|
|
|
|
|
| |||||
|
|
| SET : MENU KEY |
|
| |||||
| A |
| B C D E F G | H | I | |||||
J | K |
| L M N O P Q R S | |||||||
T | U |
| V | W X | Y | Z | Ä | Ö | Ü | |
À | È | Ì | Ò | Ù Ñ | Æ Ø | Å | & |
| ||
: . |
| , | ’ | – | / | ! | ? | ¿ | ♥ | |
0 | 1 |
| 2 | 3 | 4 | 5 | 6 | 7 | 8 | 9 |
I ![]() L I KE
L I KE ![]() YOU
YOU![]() ♥
♥![]()
![]()
![]()
![]()
![]()
![]()
![]()
EndClear
![]()
![]()
![]() 33
33
Character Generator
You can enter an original title of up to 18 characters.
Perform steps 1, 2 and 3 of the “Instant Title” procedure (☞ pg. 32) before continuing.
ACCESS CHARACTER SET MENU
1 Press + or – to move the highlight bar to “(Set Character)”, then press NEAR. The Character Set menu appears.
INPUT CHARACTERS
2 Press +, –, FAR or NEAR to move the blinking cursor
to the desired character, then press MENU. The selected characters appear at the bottom of the screen. Repeat as many times as desired (max. 18).
•To select the location of the next character, press +,
END CHARACTER SETTING
3 Press +,
NOTE:
To erase a character you entered mistakenly, place the cursor by “Clear” by pressing +, ![]() ” in the top left corner is highlighted.
” in the top left corner is highlighted.
