12

 EN
EN


 RECORDING

 Basic
Basic Recording


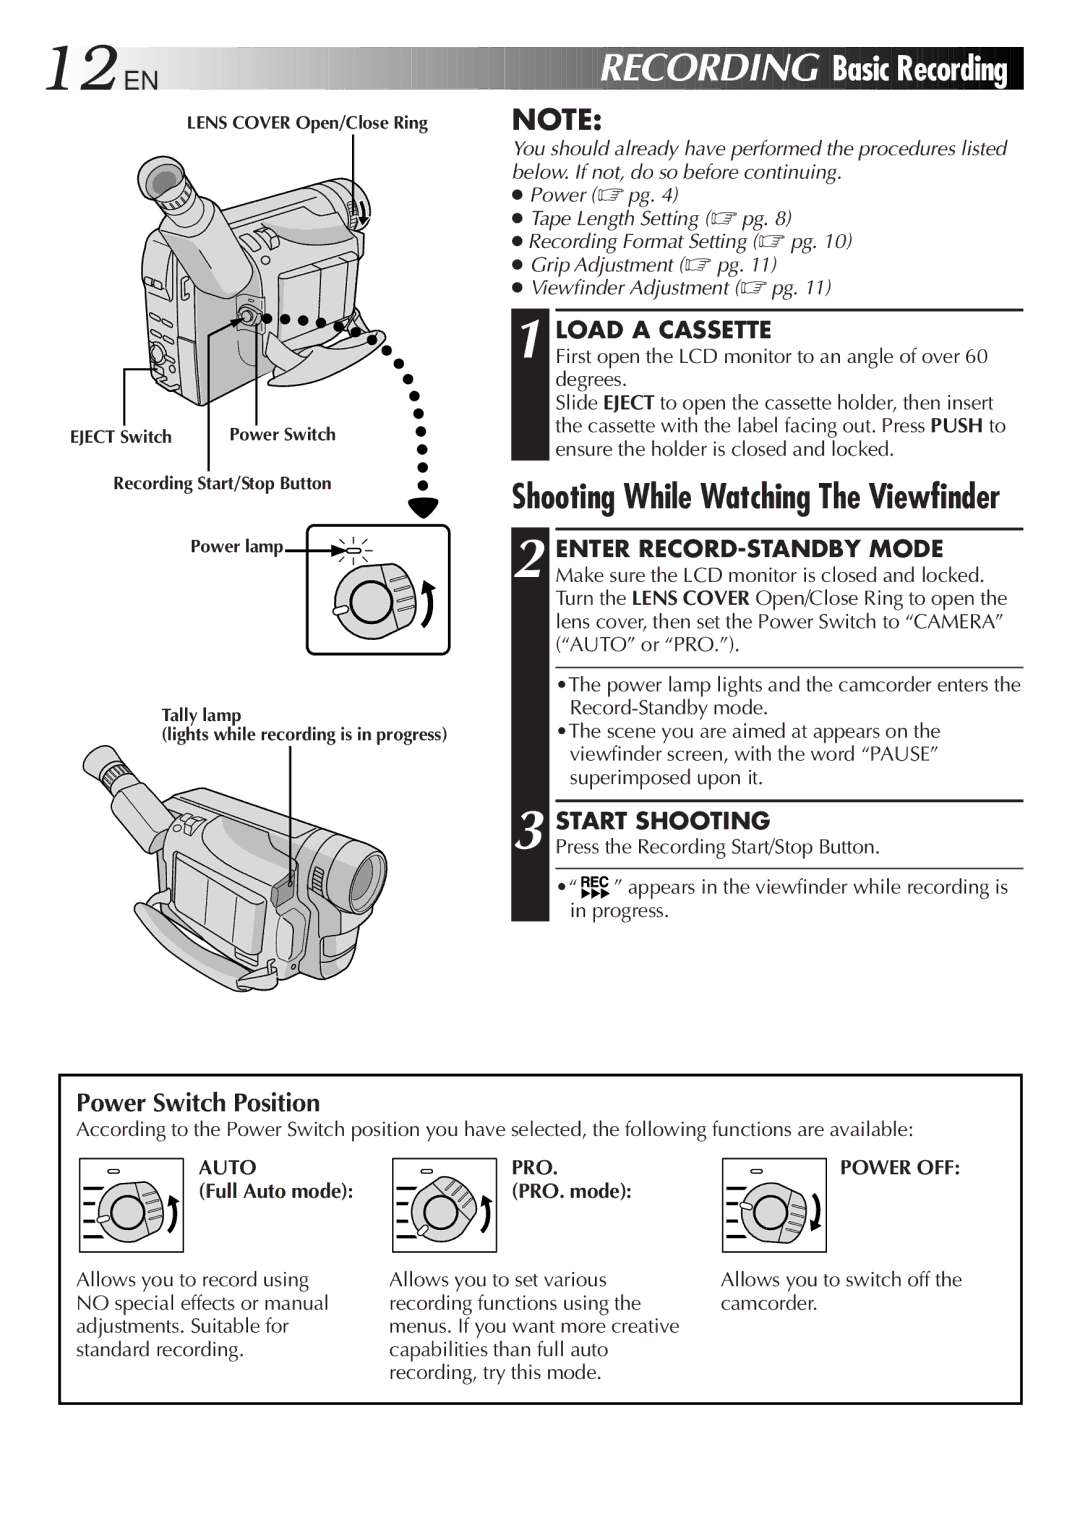
LENS COVER Open/Close Ring | NOTE: |
EJECT Switch | Power Switch |
Recording Start/Stop Button
Power lamp![]()
![]()
Tally lamp
(lights while recording is in progress)
You should already have performed the procedures listed below. If not, do so before continuing.
●Power (☞ pg. 4)
●Tape Length Setting (☞ pg. 8)
●Recording Format Setting (☞ pg. 10)
●Grip Adjustment (☞ pg. 11)
●Viewfinder Adjustment (☞ pg. 11)
1 LOAD A CASSETTE
First open the LCD monitor to an angle of over 60 degrees.
Slide EJECT to open the cassette holder, then insert the cassette with the label facing out. Press PUSH to ensure the holder is closed and locked.
Shooting While Watching The Viewfinder
2 ENTER
•The power lamp lights and the camcorder enters the
•The scene you are aimed at appears on the viewfinder screen, with the word “PAUSE” superimposed upon it.
3 START SHOOTING
Press the Recording Start/Stop Button.
•“ ![]()
![]() ” appears in the viewfinder while recording is in progress.
” appears in the viewfinder while recording is in progress.
Power Switch Position
According to the Power Switch position you have selected, the following functions are available:
AUTO
(Full Auto mode):
PRO.
(PRO. mode):
POWER OFF:
Allows you to record using NO special effects or manual adjustments. Suitable for standard recording.
Allows you to set various recording functions using the menus. If you want more creative capabilities than full auto recording, try this mode.
Allows you to switch off the camcorder.