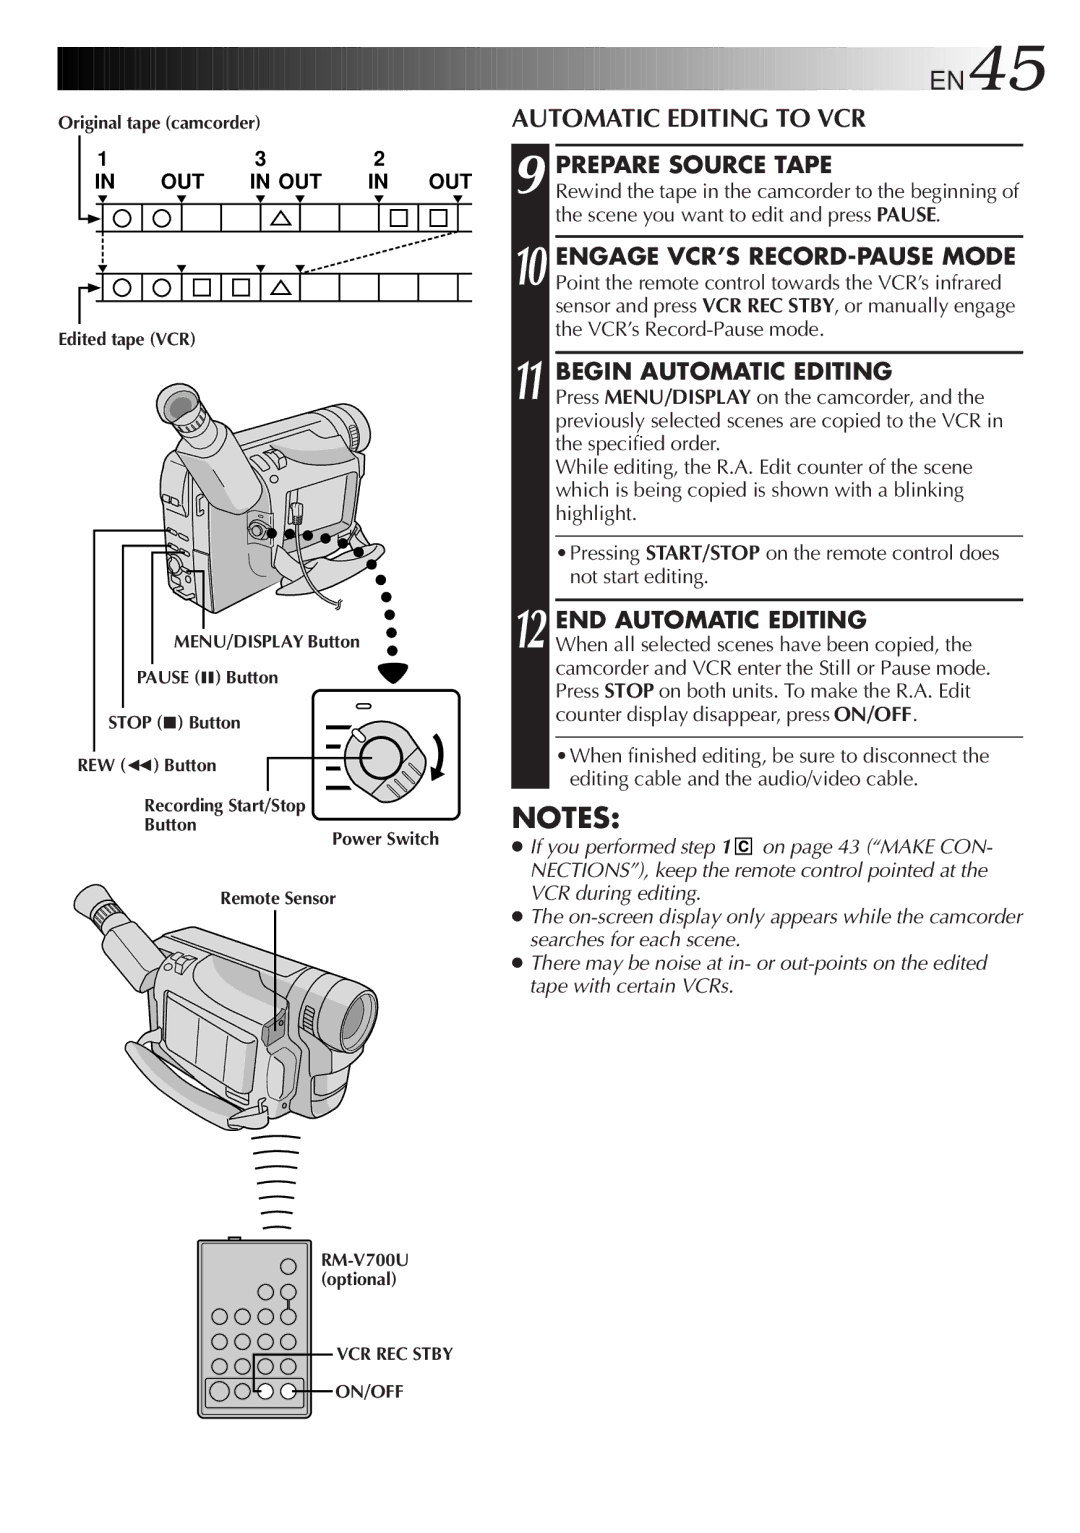
Original tape (camcorder) |
|
|
|
| |||||||||
| 1 |
|
| 3 |
| 2 |
|
| |||||
|
|
| IN | OUT | IN OUT | IN OUT | |||||||
|
|
|
|
|
|
|
|
|
|
|
|
|
|
|
|
|
|
|
|
|
|
|
|
|
|
|
|
|
|
|
|
|
|
|
|
|
|
|
|
|
|
|
|
|
|
|
|
|
|
|
|
|
|
|
|
|
|
|
|
|
|
|
|
|
|
|
|
|
|
|
|
|
|
|
|
|
|
|
|
|
|
|
|
|
|
|
|
|
|
|
|
|
|
|
|
|
|
Edited tape (VCR)
MENU/DISPLAY Button
PAUSE (6) Button
STOP (5) Button
REW (2) Button
Recording Start/Stop
Button
Power Switch
Remote Sensor
VCR REC STBY
![]() ON/OFF
ON/OFF
![]()
![]()
![]()
![]()
![]()
![]()
![]()
![]()
![]()
![]()
![]()
![]()
![]()
![]()
![]()
![]()
![]()
![]()
![]()
![]()
![]()
![]()
![]()
![]()
![]()
![]()
![]()
![]()
![]()
![]()
![]()
![]()
![]()
![]()
![]()
![]()
![]()
![]()
![]()
![]()
![]()
![]()
![]()
![]()
![]()
![]()
![]()
![]()
![]()
![]()
![]()
![]()
![]()
![]()
![]()
![]()
![]()
![]() EN45
EN45![]()
![]()
AUTOMATIC EDITING TO VCR
9 PREPARE SOURCE TAPE
Rewind the tape in the camcorder to the beginning of the scene you want to edit and press PAUSE.
10 ENGAGE VCR’S
11 BEGIN AUTOMATIC EDITING
Press MENU/DISPLAY on the camcorder, and the previously selected scenes are copied to the VCR in the specified order.
While editing, the R.A. Edit counter of the scene which is being copied is shown with a blinking highlight.
•Pressing START/STOP on the remote control does not start editing.
12 END AUTOMATIC EDITING
When all selected scenes have been copied, the camcorder and VCR enter the Still or Pause mode. Press STOP on both units. To make the R.A. Edit counter display disappear, press ON/OFF.
•When finished editing, be sure to disconnect the editing cable and the audio/video cable.
NOTES:
●If you performed step 1 ![]() on page 43 (“MAKE CON- NECTIONS”), keep the remote control pointed at the VCR during editing.
on page 43 (“MAKE CON- NECTIONS”), keep the remote control pointed at the VCR during editing.
●The
●There may be noise at in- or