Connections
Do not connect the power cord until all other connections have been made.
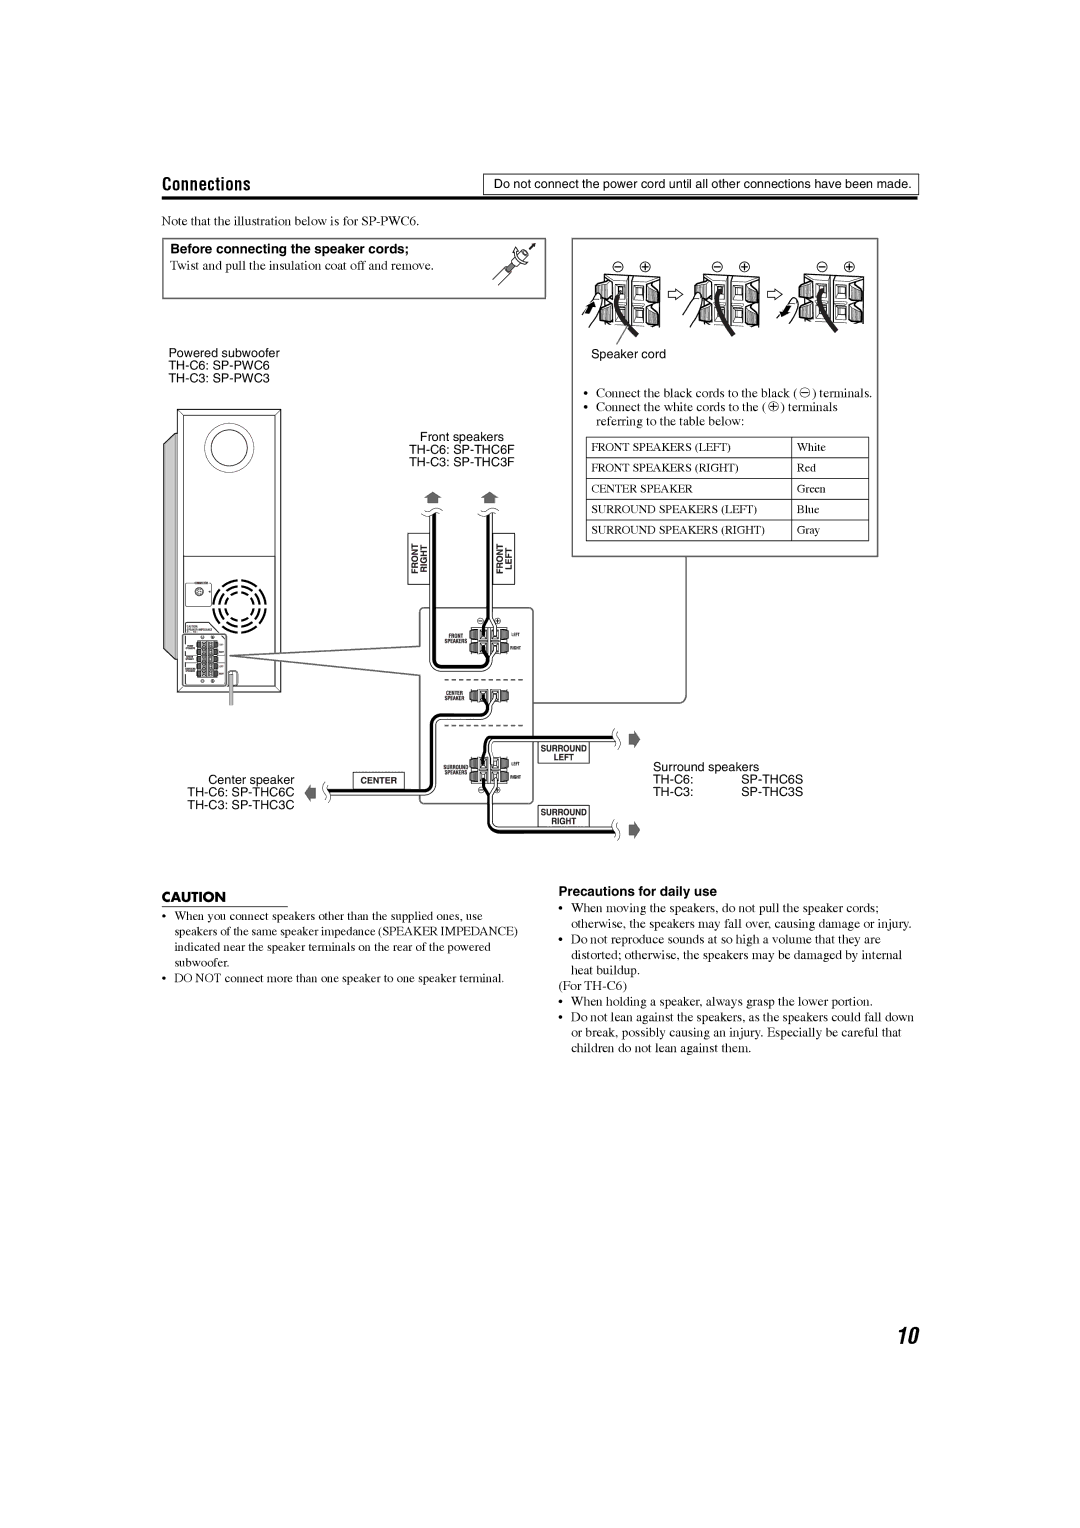
Note that the illustration below is for
Before connecting the speaker cords;
Twist and pull the insulation coat off and remove.
Powered subwoofer |
CAUTION: |
SPEAKER IMPEDANCE |
4Ω 16Ω |
Front speakers
Speaker cord
•Connect the black cords to the black (r) terminals.
•Connect the white cords to the (q) terminals referring to the table below:
FRONT SPEAKERS (LEFT) | White |
|
|
FRONT SPEAKERS (RIGHT) | Red |
|
|
CENTER SPEAKER | Green |
|
|
SURROUND SPEAKERS (LEFT) | Blue |
|
|
SURROUND SPEAKERS (RIGHT) | Gray |
|
|
Surround speakers
Center speaker
TH-C6: SP-THC6S
CAUTION
•When you connect speakers other than the supplied ones, use speakers of the same speaker impedance (SPEAKER IMPEDANCE) indicated near the speaker terminals on the rear of the powered subwoofer.
•DO NOT connect more than one speaker to one speaker terminal.
Precautions for daily use
•When moving the speakers, do not pull the speaker cords; otherwise, the speakers may fall over, causing damage or injury.
•Do not reproduce sounds at so high a volume that they are distorted; otherwise, the speakers may be damaged by internal heat buildup.
(For
•When holding a speaker, always grasp the lower portion.
•Do not lean against the speakers, as the speakers could fall down or break, possibly causing an injury. Especially be careful that children do not lean against them.
10