32ENSPECIALFEATURES

32RemoteRemote A/B Code SwitchingREMOVE POWER SUPPLYENSET REMOTE CONTROL CODERE-SUPPLY POWERManual backgroundManual backgroundManual backgroundManual backgroundManual backgroundManual backgroundManual backgroundManual backgroundManual backgroundManual backgroundManual backgroundManual backgroundManual backgroundManual backgroundManual backgroundManual backgroundManual backgroundManual backgroundManual backgroundManual backgroundManual backgroundManual backgroundManual backgroundManual backgroundManual backgroundManual backgroundManual backgroundManual backgroundManual backgroundManual backgroundManual backgroundManual backgroundManual backgroundManual backgroundManual backgroundManual backgroundManual backgroundManual backgroundManual backgroundManual backgroundManual backgroundManual backgroundManual backgroundManual backgroundManual backgroundManual backgroundManual backgroundManual backgroundManual backgroundManual backgroundManual backgroundManual backgroundManual backgroundManual backgroundManual backgroundManual backgroundManual backgroundManual backgroundManual backgroundManual backgroundManual backgroundManual backgroundManual backgroundManual backgroundManual backgroundManual backgroundSPECIALManual backgroundManual backgroundFEATManual backgroundURESManual backgroundManual background

Remote

Control

Functions

VCR

NUMBER "1"

1


2

3


4


5

6


7

"2"

8

9


NUMBER


0


1

STOP

3

2

4

Remote A/B Code Switching

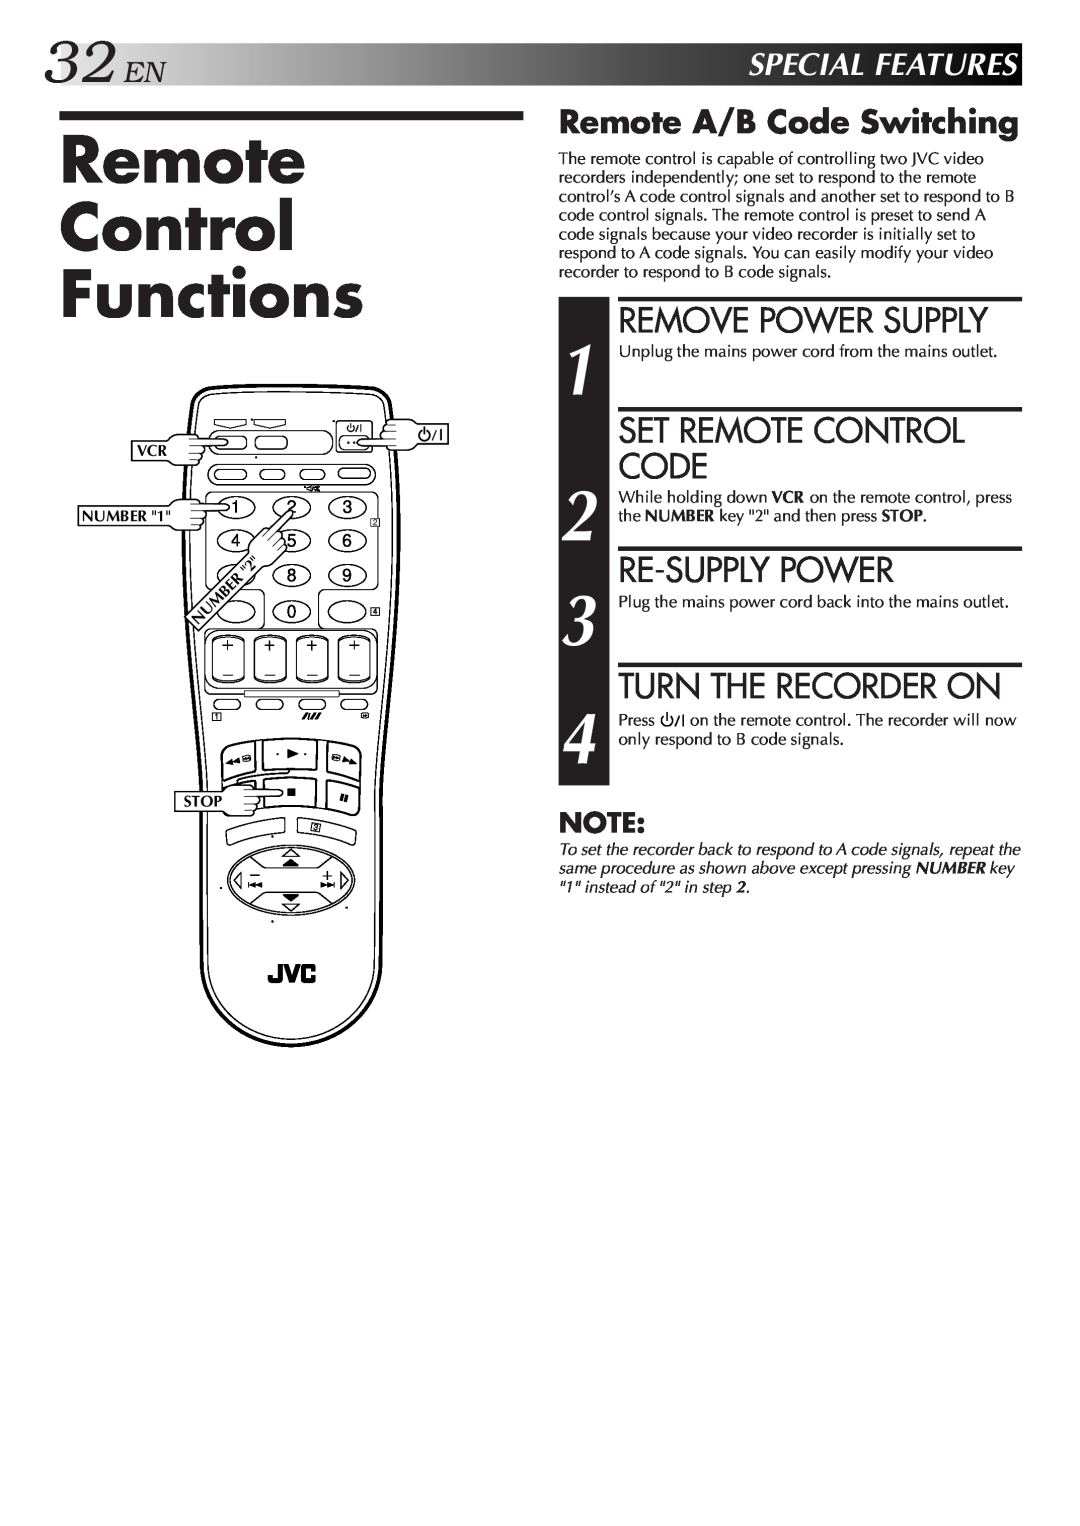
The remote control is capable of controlling two JVC video recorders independently; one set to respond to the remote control’s A code control signals and another set to respond to B code control signals. The remote control is preset to send A code signals because your video recorder is initially set to respond to A code signals. You can easily modify your video recorder to respond to B code signals.

REMOVE POWER SUPPLY

1 Unplug the mains power cord from the mains outlet.

SET REMOTE CONTROL CODE

2 While holding down VCR on the remote control, press the NUMBER key "2" and then press STOP.

RE-SUPPLY POWER

3 Plug the mains power cord back into the mains outlet.

TURN THE RECORDER ON

4 Press Manual backgroundManual backgroundManual background on the remote control. The recorder will now only respond to B code signals.

NOTE:

To set the recorder back to respond to A code signals, repeat the same procedure as shown above except pressing NUMBER key "1" instead of "2" in step 2.
Page 32
Image 32
JVC HR-DD857MS specifications Remote Control Functions, Remove Power Supply, Set Remote Control Code, Re-Supply Power