3
SELECT LANGUAGE
Press OK. The Language Set display appears on the front display panel and/or on the screen.
If you are referring to the front display panel
Press %Þ to select your language code.
Language Code |
|
|
| |
ENGLISH | : 01 | NORSK | : 08 | |
DEUTSCH | : 02 | SUOMI | : 09 | |
FRANCAIS | : 03 | DANSK | : 10 | |
ITALIANO | : 04 | POLSKI | : 11 | |
CASTELLANO : 05 | E TINA | : 12 | ||
NEDERLANDS : 06 | MAGYAR | : 13 | ||
SVENSKA | : 07 |
|
|
|
(Ex.) DEUTSCH is selected for SUISSE | ||||
International telephone | Language code | |||
country code |
|
|
|
|
|
|
|
|
|
|
|
|
|
|
|
|
|
|
|
| EN |
| 5 | |
|
|
|
|
|
|
| |||
|
|
|
|
|
| ||||
|
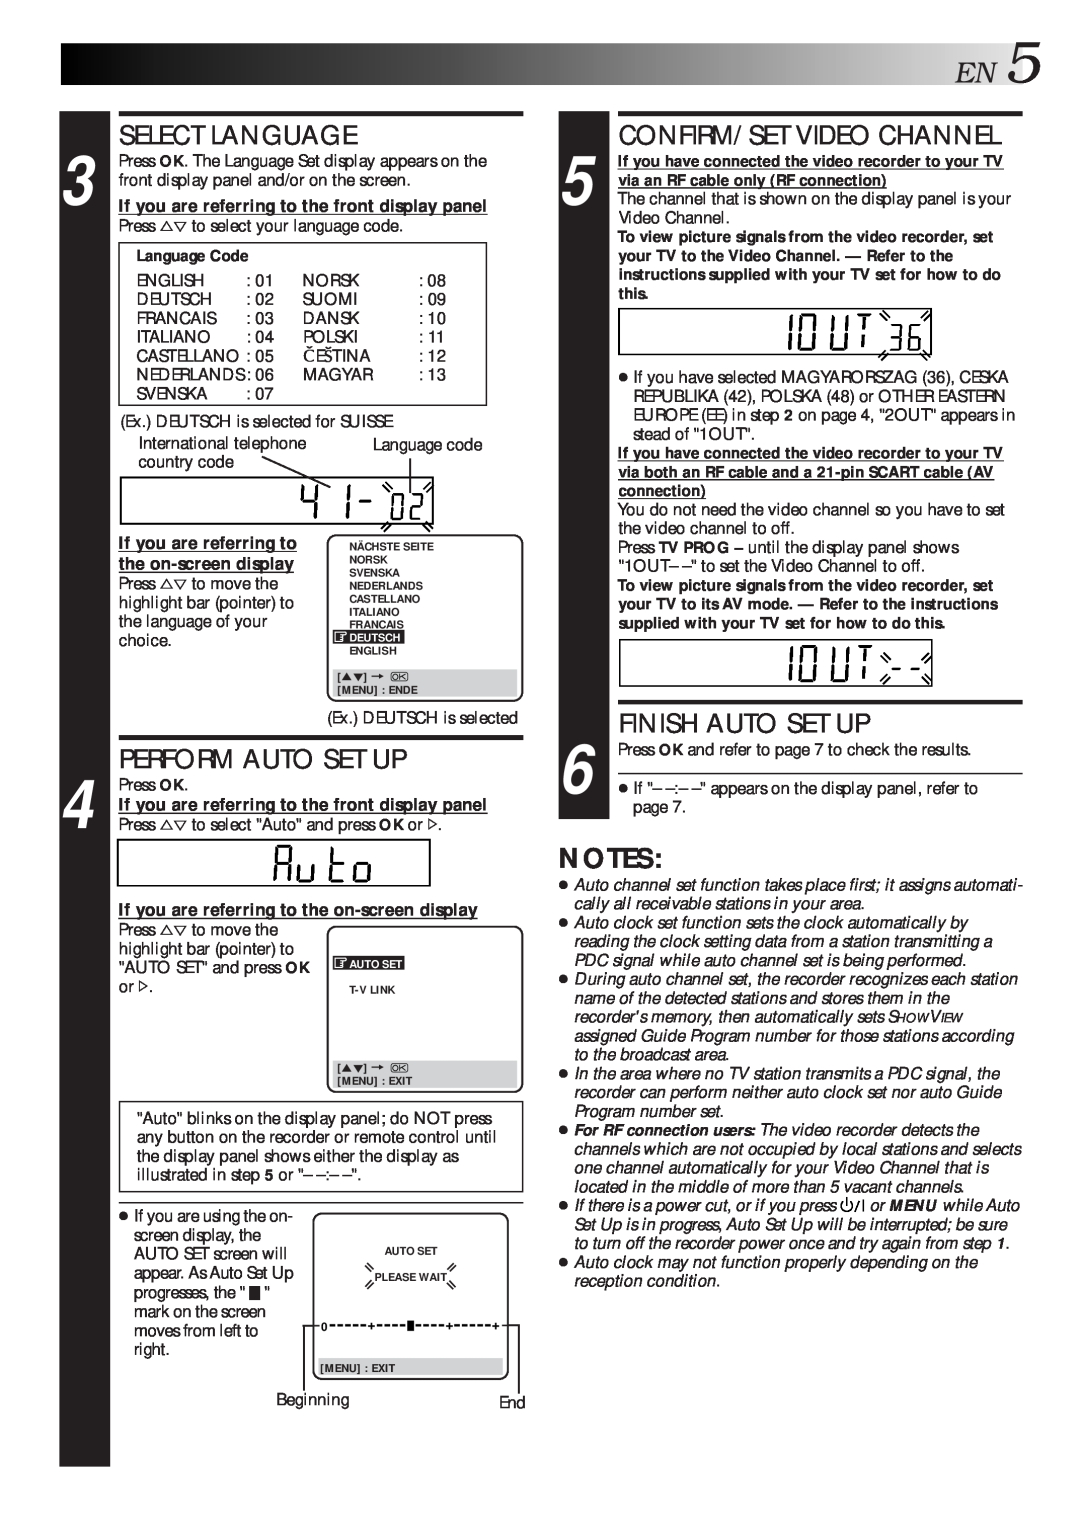
| 5 | CONFIRM/SET VIDEO CHANNEL | ||||||
|
| If you have connected the video recorder to your TV | |||||||
|
| via an RF cable only (RF connection) | |||||||
|
| The channel that is shown on the display panel is your | |||||||
|
|
| Video Channel. | ||||||
|
|
| To view picture signals from the video recorder, set | ||||||
|
|
| your TV to the Video Channel. — Refer to the | ||||||
|
|
| instructions supplied with your TV set for how to do | ||||||
|
|
| this. | ||||||
|
|
|
|
| |||||
|
|
|
|
|
|
|
|
|
|
|
|
| ● If you have selected MAGYARORSZAG (36), CESKA | ||||||
|
|
| REPUBLIKA (42), POLSKA (48) or OTHER EASTERN | ||||||
|
|
| EUROPE (EE) in step 2 on page 4, "2OUT" appears in | ||||||
|
|
| stead of "1OUT". | ||||||
|
|
| If you have connected the video recorder to your TV | ||||||
|
|
| via both an RF cable and a | ||||||
|
|
| connection) | ||||||
|
|
| You do not need the video channel so you have to set | ||||||
|
|
| the video channel to off. | ||||||
If you are referring to the
Press %Þ to move the highlight bar (pointer) to the language of your choice.
NÄCHSTE SEITE
NORSK
SVENSKA
NEDERLANDS
CASTELLANO
ITALIANO
FRANCAIS
![]() DEUTSCH
DEUTSCH
ENGLISH
[5°] = ![]()
[MENU] : ENDE
(Ex.) DEUTSCH is selected
Press TV PROG – until the display panel shows |
"1OUT– |
To view picture signals from the video recorder, set |
your TV to its AV mode. — Refer to the instructions |
supplied with your TV set for how to do this. |
FINISH AUTO SET UP |
4
PERFORM AUTO SET UP
Press OK.
If you are referring to the front display panel
Press %Þ to select "Auto" and press OK or #.
If you are referring to the
Press %Þ to move the |
|
|
highlight bar (pointer) to |
|
|
"AUTO SET" and press OK | AUTO SET |
|
| ||
or #. | ||
|
|
|
| [5°] = |
|
| [MENU] : EXIT | |
"Auto" blinks on the display panel; do NOT press any button on the recorder or remote control until the display panel shows either the display as illustrated in step 5 or "–
6 | Press OK and refer to page 7 to check the results. | |
|
| |
| ● If "– | |
|
| page 7. |
NOTES:
● Auto channel set function takes place first; it assigns automati- | |
cally all receivable stations in your area. |
|
● Auto clock set function sets the clock automatically by | |
reading the clock setting data from a station transmitting a | |
PDC signal while auto channel set is being performed. | |
● During auto channel set, the recorder recognizes each station | |
name of the detected stations and stores them in the | |
recorder's memory, then automatically sets SHOWVIEW | |
assigned Guide Program number for those stations according | |
to the broadcast area. |
|
● In the area where no TV station transmits a PDC signal, the | |
recorder can perform neither auto clock set nor auto Guide | |
Program number set. |
|
● For RF connection users: The video recorder detects the | |
channels which are not occupied by local stations and selects | |
one channel automatically for your Video Channel that is | |
located in the middle of more than 5 vacant channels. | |
● If there is a power cut, or if you press | or MENU while Auto |
●If you are using the on- screen display, the AUTO SET screen will appear. As Auto Set Up
progresses, the " ![]() " mark on the screen moves from left to right.
" mark on the screen moves from left to right.
AUTO SET
PLEASE WAIT
0 | + | + | + |
[MENU] : EXIT
Set Up is in progress, Auto Set Up will be interrupted; be sure |
to turn off the recorder power once and try again from step 1. |
● Auto clock may not function properly depending on the |
reception condition. |
BeginningEnd