7
SELECT “EDIT” FOR PICTURE CONTROL SET MODE
Follow the “Picture Control” section on page 26, then select “EDIT.”
If you are using a JVC Master Edit
If you are not using a JVC Master Edit Control- equipped camcorder — go to step 9.
NOTE:
When you select “EDIT” to dub tapes, be sure to select “AUTO” or (“NORM” when “VIDEO CALIBRATION” is set to “OFF”) after you finish dubbing the tapes.
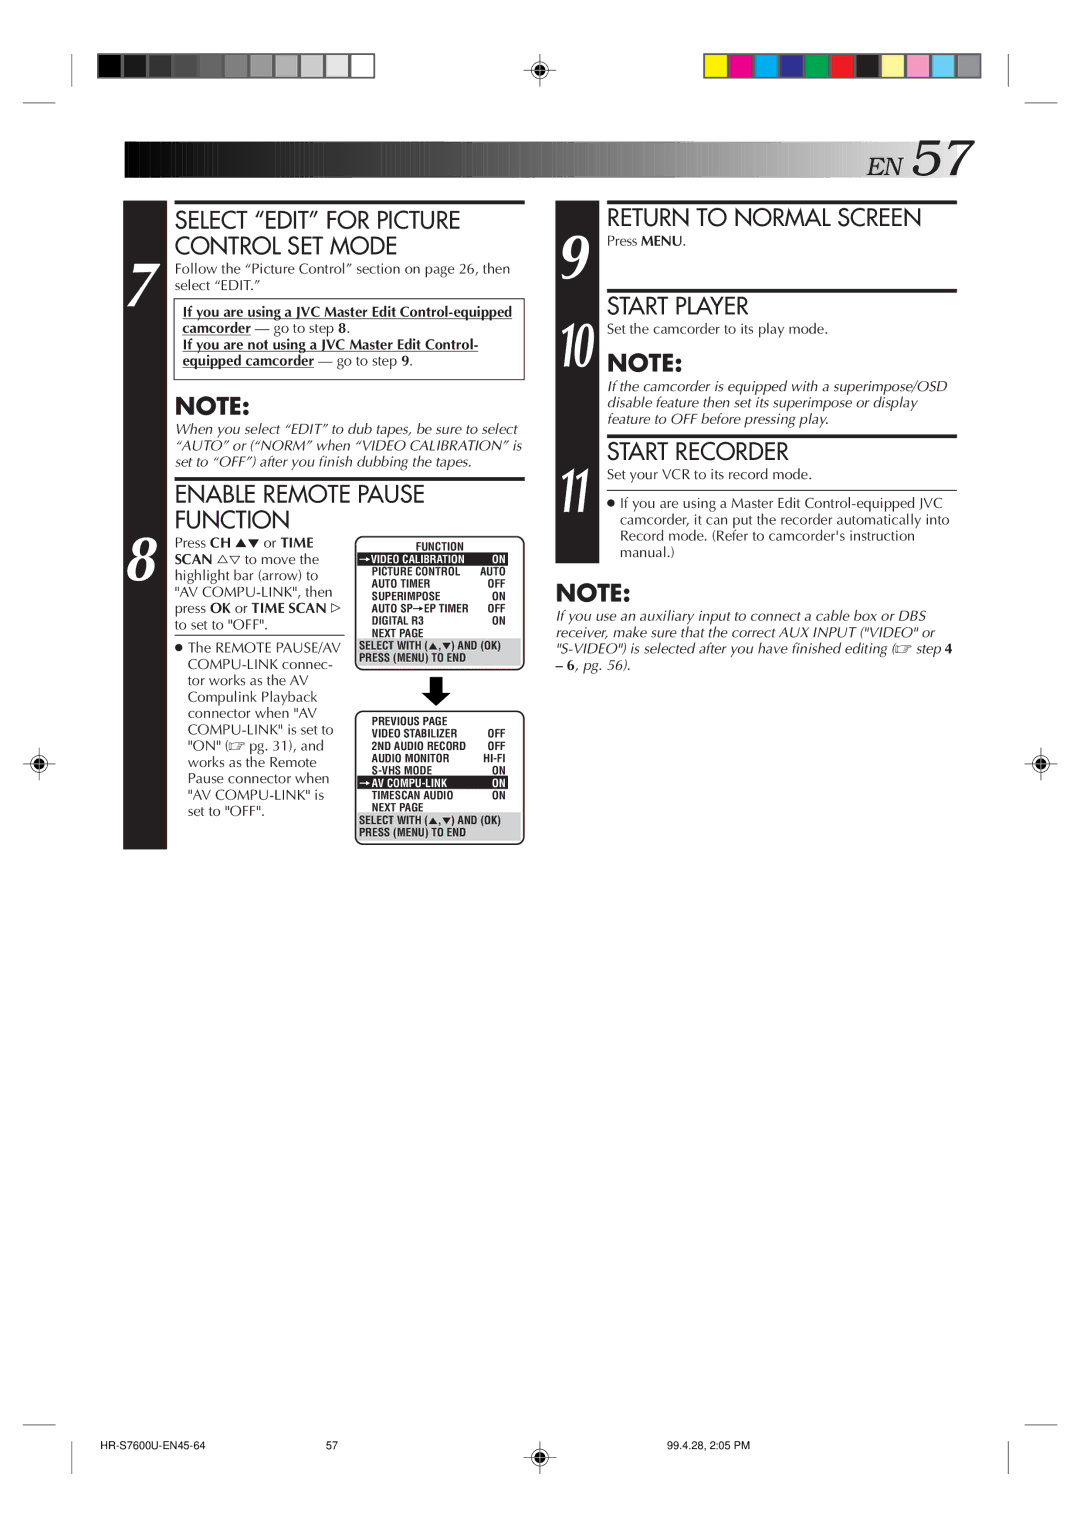
ENABLE REMOTE PAUSE
FUNCTION
![]()
![]()
![]()
![]()
![]()
![]()
![]()
![]()
![]()
![]()
![]()
![]()
![]()
![]()
![]()
![]()
![]()
![]()
![]()
![]()
![]()
![]()
![]()
![]()
![]()
![]()
![]()
![]()
![]()
![]()
![]()
![]()
![]()
![]()
![]()
![]()
![]()
![]()
![]()
![]()
![]()
![]()
![]()
![]()
![]()
![]() EN
EN![]()
![]() 57
57![]()
9 | RETURN TO NORMAL SCREEN |
Press MENU. | |
10 | START PLAYER |
NOTE:Set the camcorder to its play mode. | |
| If the camcorder is equipped with a superimpose/OSD |
| disable feature then set its superimpose or display |
| feature to OFF before pressing play. |
|
|
11 | START RECORDER |
Set your VCR to its record mode. | |
| |
● If you are using a Master Edit | |
camcorder, it can put the recorder automatically into |
8
Press CH 5° or TIME SCAN %Þ to move the highlight bar (arrow) to "AV
●The REMOTE PAUSE/AV
FUNCTION |
|
=VIDEO CALIBRATION | ON |
PICTURE CONTROL | AUTO |
AUTO TIMER | OFF |
SUPERIMPOSE | ON |
AUTO SP=EP TIMER | OFF |
DIGITAL R3 | ON |
NEXT PAGE |
|
SELECT WITH (5,°) AND (OK)
PRESS (MENU) TO END
PREVIOUS PAGE |
|
VIDEO STABILIZER | OFF |
2ND AUDIO RECORD | OFF |
AUDIO MONITOR | |
ON | |
=AV | ON |
TIMESCAN AUDIO | ON |
NEXT PAGE |
|
SELECT WITH (5,°) AND (OK)
PRESS (MENU) TO END
Record mode. (Refer to camcorder's instruction |
manual.) |
NOTE:
If you use an auxiliary input to connect a cable box or DBS receiver, make sure that the correct AUX INPUT ("VIDEO" or
–6, pg. 56).
57 | 99.4.28, 2:05 PM |