Changing the Aspect Ratio | Setting the Receivable Signal Types |
The setting adjusted applies to all inputs.
•You can change the aspect ratio by pressing ASPECT. (See page 15.)
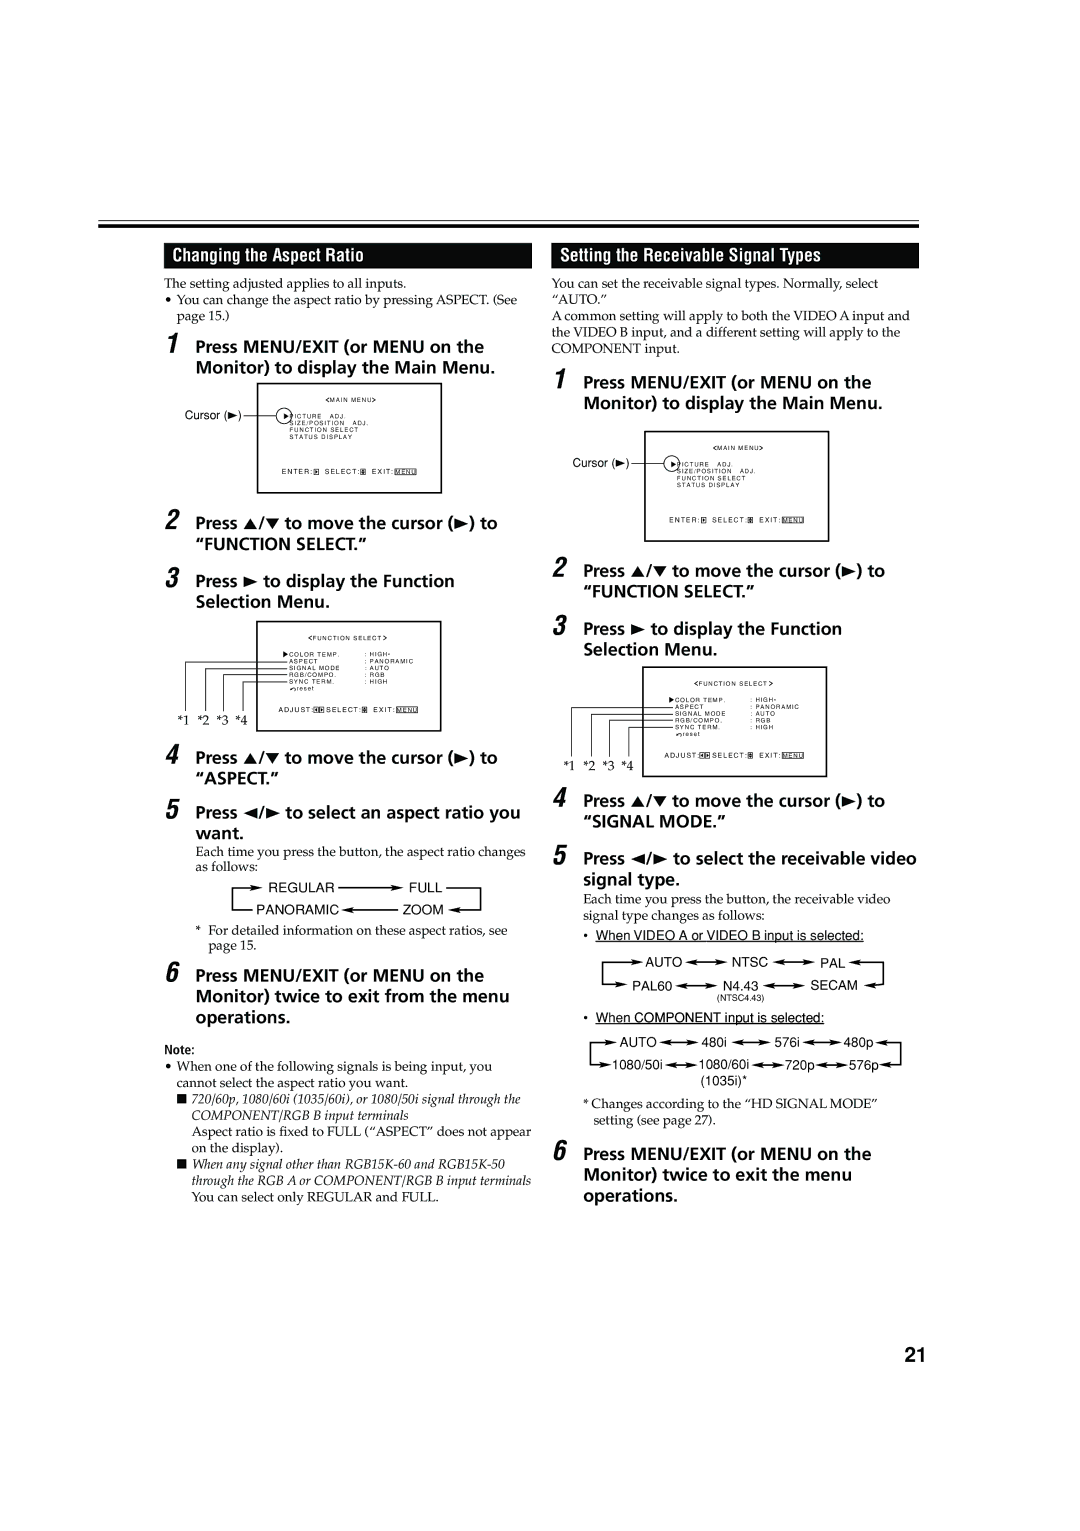
1 Press MENU/EXIT (or MENU on the Monitor) to display the Main Menu.
|
|
|
|
|
| M A I N M E N U |
| |||
Cursor (3) |
|
| P I C T U R E | A D J . |
| |||||
|
|
| ||||||||
|
|
| S I Z E / P O S I T I O N A D J . |
| ||||||
|
|
| F U N C T I O N S E L E C T |
| ||||||
|
|
| S T A T U S D I S P L A Y |
| ||||||
|
|
| E N T E R : |
|
| S E L E C T : |
| E X I T : |
|
|
|
|
|
|
|
| M E N U |
| |||
|
|
|
|
|
|
|
|
|
|
|
2 Press 5/∞ to move the cursor (3) to
“FUNCTION SELECT.”
3 Press 3 to display the Function
Selection Menu.
F U N C T I O N S E L E C T
|
|
|
| C O L O R T E M P . | : H I G H * | |||||
|
|
|
| A S P E C T | : P A N O R A M I C | |||||
|
|
|
| S I G N A L M O D E | : A U T O | |||||
|
|
|
| |||||||
|
|
|
| R G B / C O M P O . | : R G B | |||||
|
|
|
| S Y N C T E R M . | : H I G H | |||||
|
|
|
| r e s e t |
|
|
| |||
|
|
| A D J U S T : |
|
| S E L E C T : |
| E X I T : |
| |
|
|
|
|
| M E N U | |||||
*1 *2 *3 *4
4
5 Press 2/3 to select an aspect ratio you want.
Each time you press the button, the aspect ratio changes as follows:
![]() REGULAR
REGULAR ![]() FULL
FULL
PANORAMIC![]() ZOOM
ZOOM ![]()
*For detailed information on these aspect ratios, see page 15.
6 Press MENU/EXIT (or MENU on the Monitor) twice to exit from the menu operations.
Note:
•When one of the following signals is being input, you cannot select the aspect ratio you want.
■720/60p, 1080/60i (1035/60i), or 1080/50i signal through the COMPONENT/RGB B input terminals
Aspect ratio is fixed to FULL (“ASPECT” does not appear on the display).
■When any signal other than
You can set the receivable signal types. Normally, select “AUTO.”
A common setting will apply to both the VIDEO A input and the VIDEO B input, and a different setting will apply to the COMPONENT input.
1 Press MENU/EXIT (or MENU on the Monitor) to display the Main Menu.
|
|
|
|
|
| M A I N M E N U |
| |||
Cursor (3) |
|
| P I C T U R E | A D J . |
| |||||
|
|
| ||||||||
|
|
| S I Z E / P O S I T I O N A D J . |
| ||||||
|
|
| F U N C T I O N S E L E C T |
| ||||||
|
|
| S T A T U S D I S P L A Y |
| ||||||
|
|
| E N T E R : |
|
| S E L E C T : |
| E X I T : |
|
|
|
|
|
|
| M E N U |
| ||||
|
|
|
|
|
|
|
|
|
|
|
2 Press 5/∞ to move the cursor (3) to
“FUNCTION SELECT.”
3 Press 3 to display the Function
Selection Menu.
F U N C T I O N S E L E C T
|
|
|
| C O L O R T E M P . | : H I G H * | ||||||
|
|
|
| A S P E C T | : P A N O R A M I C | ||||||
|
|
|
| S I G N A L M O D E | : A U T O | ||||||
|
|
|
| ||||||||
|
|
|
| R G B / C O M P O . | : R G B | ||||||
|
|
|
| S Y N C T E R M . | : H I G H | ||||||
|
|
|
| r e s e t |
|
|
| ||||
|
|
| A D J U S T : |
|
|
| S E L E C T : |
| E X I T : |
| |
|
|
|
| M E N U | |||||||
*1 *2 *3 *4
4 Press 5/∞ to move the cursor (3) to “SIGNAL MODE.”
5 Press 2/3 to select the receivable video signal type.
Each time you press the button, the receivable video signal type changes as follows:
•When VIDEO A or VIDEO B input is selected:
![]() AUTO
AUTO ![]()
![]() NTSC
NTSC ![]()
![]() PAL
PAL ![]()
![]() PAL60
PAL60 ![]()
![]() N4.43
N4.43 ![]()
![]() SECAM
SECAM ![]()
(NTSC4.43)
•When COMPONENT input is selected:
![]() AUTO
AUTO ![]()
![]() 480i
480i ![]()
![]() 576i
576i ![]()
![]() 480p
480p![]()
![]() 1080/50i
1080/50i![]()
![]() 1080/60i
1080/60i ![]()
![]() 720p
720p![]()
![]() 576p
576p![]() (1035i)*
(1035i)*
*Changes according to the “HD SIGNAL MODE” setting (see page 27).
6 Press MENU/EXIT (or MENU on the Monitor) twice to exit the menu operations.
21