EDITING (VHS DECK) | EN 45 |
Edit From A Camcorder
You can use a camcorder as the source player and your unit as the recording deck.
Slide the TV/VCR/DVD switch on the remote control to the right.
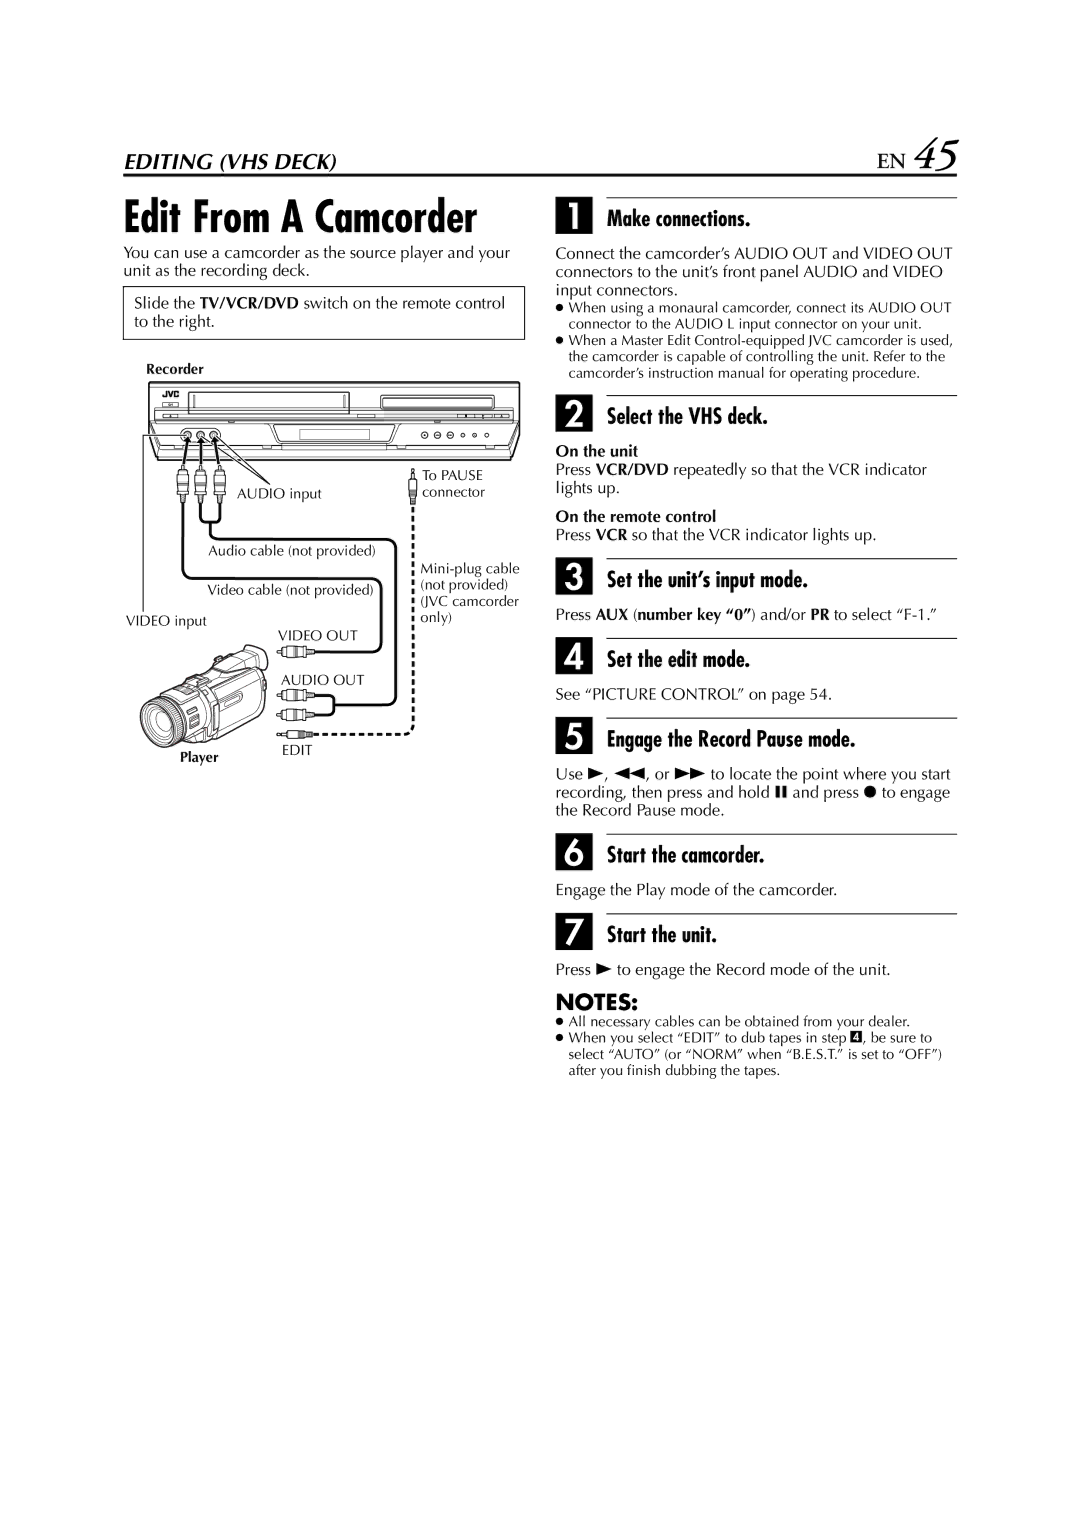
Recorder
| To PAUSE | |
AUDIO input | connector | |
Audio cable (not provided) |
| |
| ||
Video cable (not provided) | (not provided) | |
(JVC camcorder | ||
| ||
VIDEO input | only) |
VIDEO OUT
AUDIO OUT
Player EDIT
A Make connections.
Connect the camcorder’s AUDIO OUT and VIDEO OUT connectors to the unit’s front panel AUDIO and VIDEO input connectors.
●When using a monaural camcorder, connect its AUDIO OUT connector to the AUDIO L input connector on your unit.
●When a Master Edit
B Select the VHS deck.
On the unit
Press VCR/DVD repeatedly so that the VCR indicator lights up.
On the remote control
Press VCR so that the VCR indicator lights up.
C Set the unit’s input mode.
Press AUX (number key “0”) and/or PR to select
D Set the edit mode.
See “PICTURE CONTROL” on page 54.
E Engage the Record Pause mode.
Use 4, 3, or 5 to locate the point where you start recording, then press and hold 9 and press 7 to engage the Record Pause mode.
F Start the camcorder.
Engage the Play mode of the camcorder.
G Start the unit.
Press 4 to engage the Record mode of the unit.
NOTES:
●All necessary cables can be obtained from your dealer.
●When you select “EDIT” to dub tapes in step D, be sure to select “AUTO” (or “NORM” when “B.E.S.T.” is set to “OFF”) after you finish dubbing the tapes.