|
|
|
|
| GETTING STARTED | EN 13 | |
How To Attach The Core Filter |
|
|
|
|
| ||
|
|
|
| Power | |||
|
| ||||||
Attach the core filters to the cables. The core |
|
|
|
|
|
|
|
| This camcorder’s | ||||||
filter reduces interference. |
| ||||||
| lets you choose the most appropriate source of | ||||||
1 Release the stoppers on both ends of the |
| ||||||
| power. Do not use provided power supply units | ||||||
core filter. |
| with other equipment. | |||||
Stopper ![]()
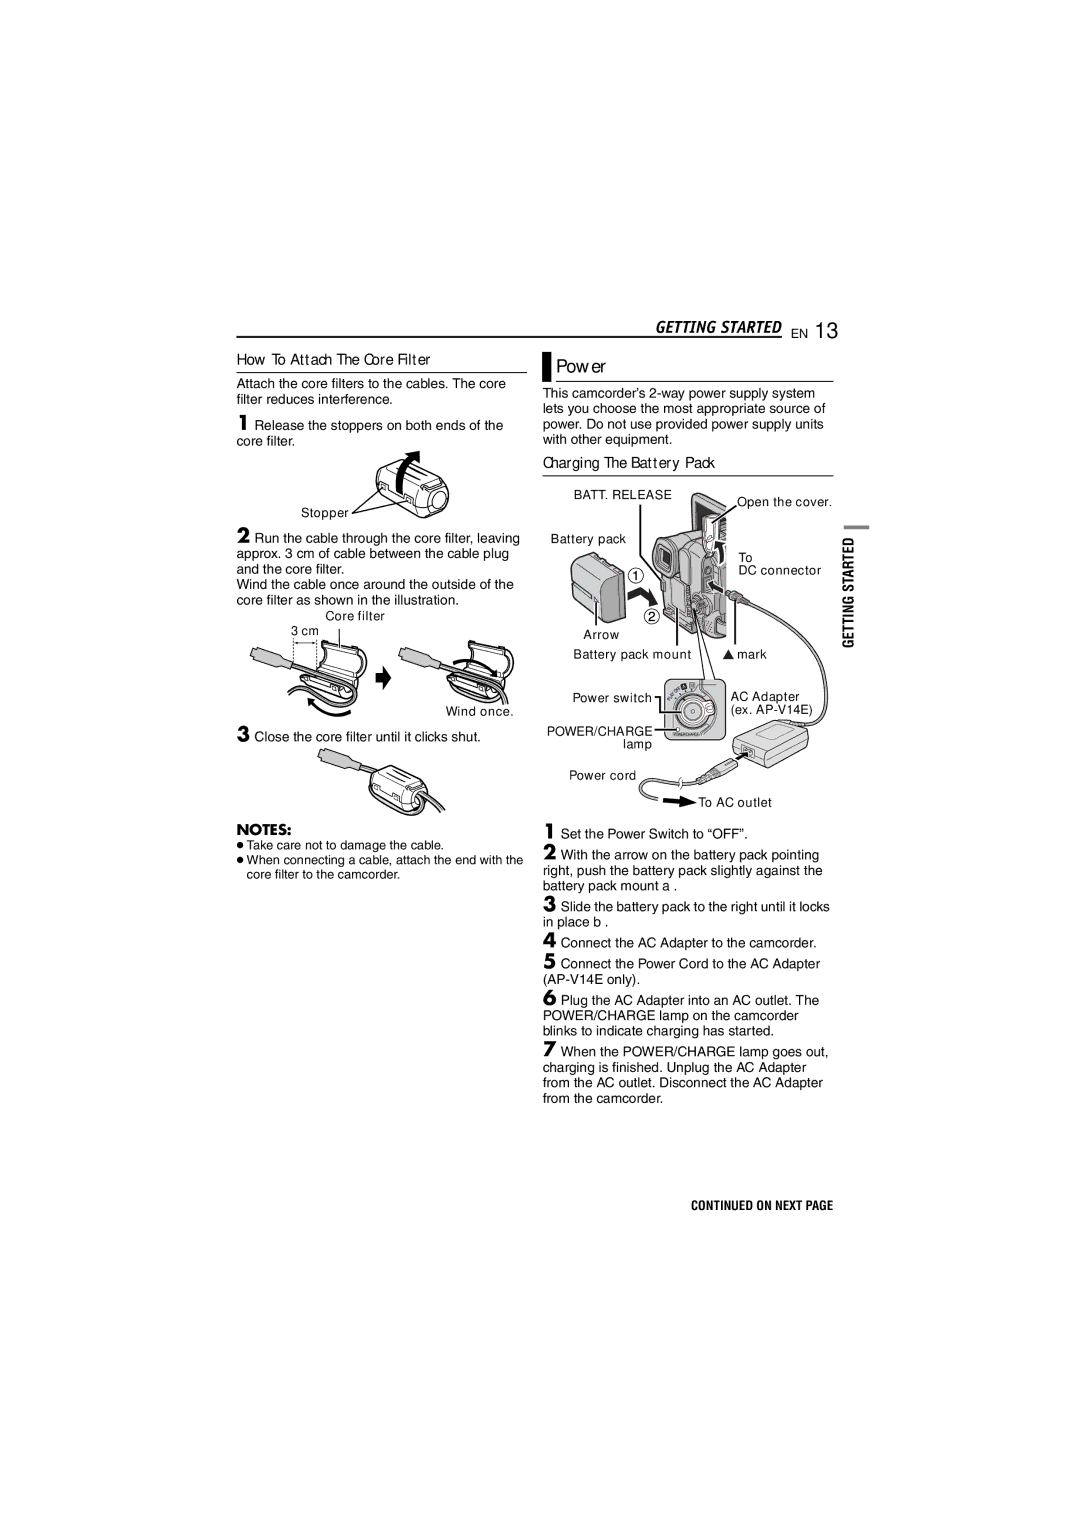
2 Run the cable through the core filter, leaving approx. 3 cm of cable between the cable plug and the core filter.
Wind the cable once around the outside of the core filter as shown in the illustration.
Core filter
3 cm
Wind once.
3 Close the core filter until it clicks shut.
NOTES:
●Take care not to damage the cable.
●When connecting a cable, attach the end with the core filter to the camcorder.
Charging The Battery Pack
BATT. RELEASE | Open the cover. |
|
|
| |
Battery pack |
| STARTED |
| To | |
| DC connector |
|
Arrow |
| GETTING |
|
| |
Battery pack mount | mark |
|
Power switch | AC Adapter |
|
| (ex. |
|
POWER/CHARGE |
|
|
lamp |
|
|
Power cord
To AC outlet
1 Set the Power Switch to “OFF”.
2 With the arrow on the battery pack pointing right, push the battery pack slightly against the battery pack mount a.
3 Slide the battery pack to the right until it locks in place b.
4
5 Connect the Power Cord to the AC Adapter
6 Plug the AC Adapter into an AC outlet. The POWER/CHARGE lamp on the camcorder blinks to indicate charging has started.
7 When the POWER/CHARGE lamp goes out, charging is finished. Unplug the AC Adapter from the AC outlet. Disconnect the AC Adapter from the camcorder.
CONTINUED ON NEXT PAGE
