SECTION 3
DISASSEMBLY
3.1Disassembly procedure
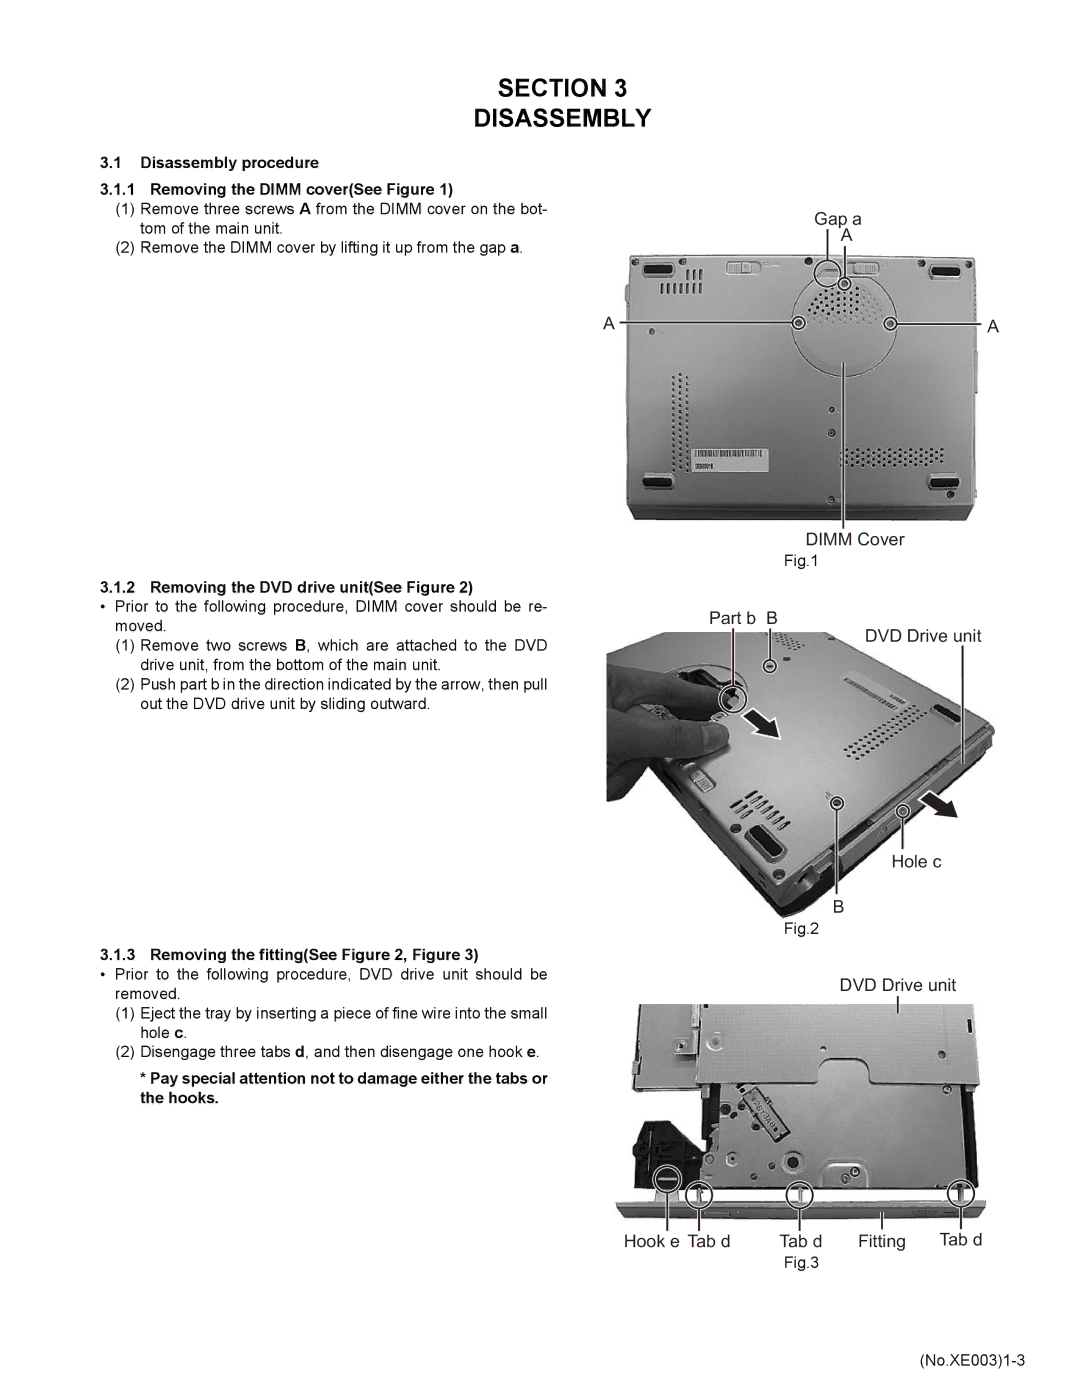
3.1.1 Removing the DIMM cover(See Figure 1)
(1)Remove three screws A from the DIMM cover on the bot- tom of the main unit.
(2)Remove the DIMM cover by lifting it up from the gap a.
Gap a
A
A![]()
![]() A
A
3.1.2 Removing the DVD drive unit(See Figure 2)
•Prior to the following procedure, DIMM cover should be re- moved.
(1)Remove two screws B, which are attached to the DVD drive unit, from the bottom of the main unit.
(2)Push part b in the direction indicated by the arrow, then pull out the DVD drive unit by sliding outward.
3.1.3 Removing the fitting(See Figure 2, Figure 3)
•Prior to the following procedure, DVD drive unit should be removed.
(1)Eject the tray by inserting a piece of fine wire into the small hole c.
(2)Disengage three tabs d, and then disengage one hook e.
*Pay special attention not to damage either the tabs or the hooks.
DIMM Cover
Fig.1
Part b B
DVD Drive unit
Hole c
B
Fig.2
DVD Drive unit
Hook e Tab d | Tab d | Fitting | Tab d |
Fig.3
