Preparation Procedure
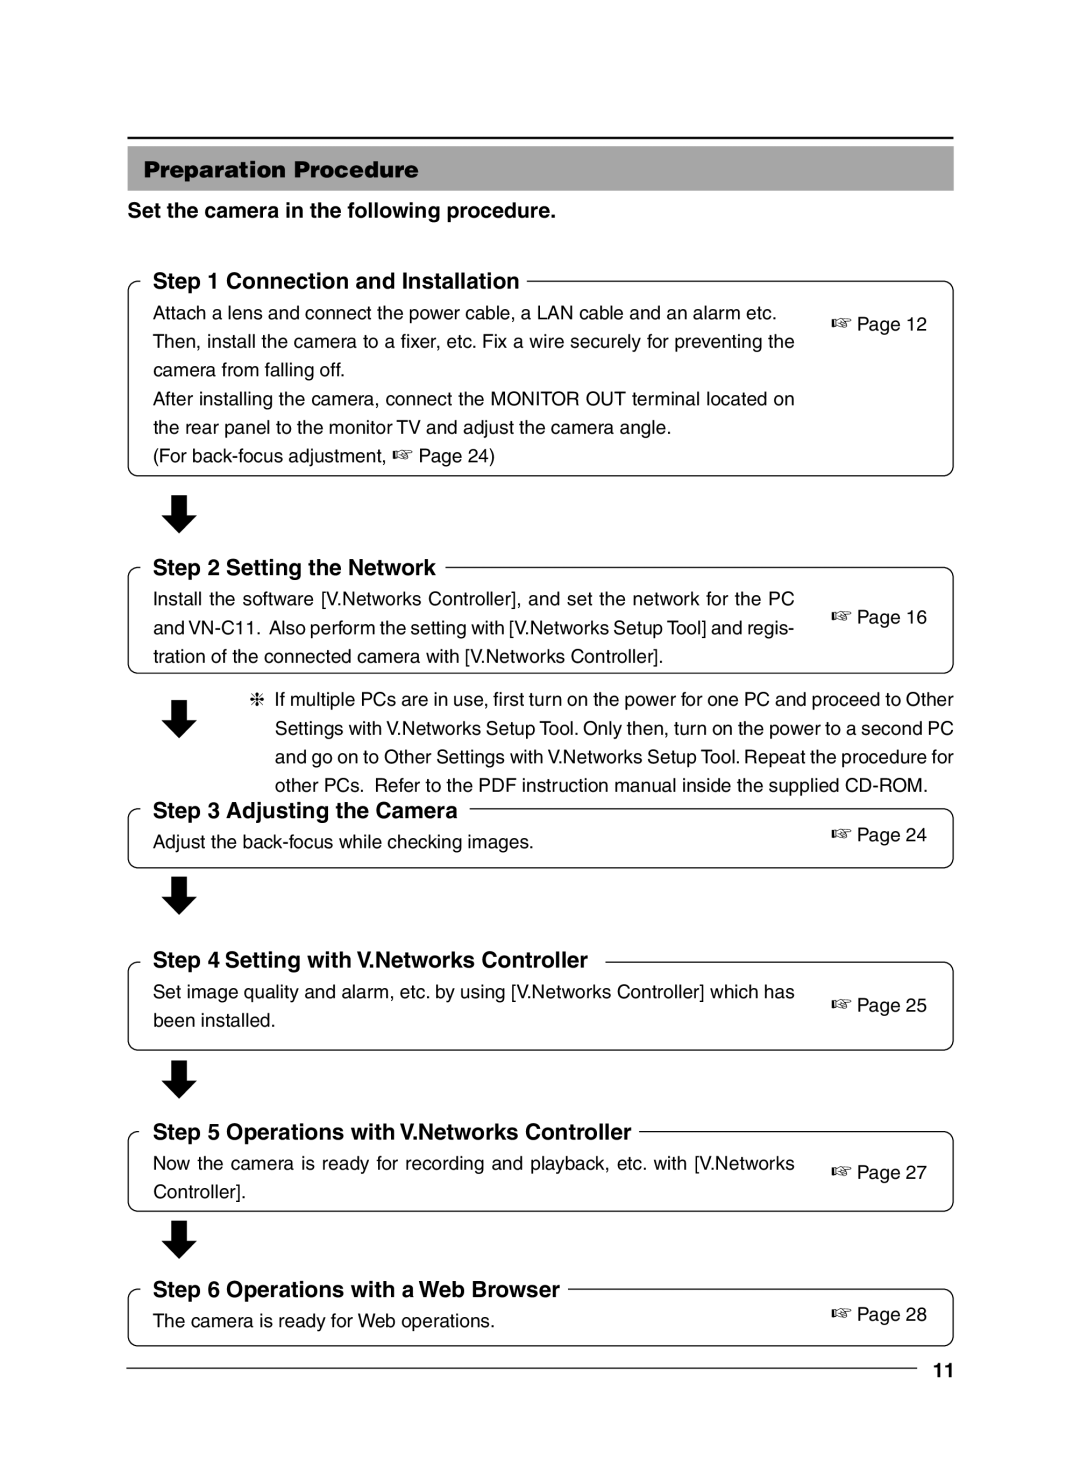
Set the camera in the following procedure.
Step 1 Connection and Installation |
|
| |
Attach a lens and connect the power cable, a LAN cable and an alarm etc. | ☞ Page 12 | ||
Then, install the camera to a fixer, etc. Fix a wire securely for preventing the | |||
| |||
camera from falling off. |
| ||
After installing the camera, connect the MONITOR OUT terminal located on |
| ||
the rear panel to the monitor TV and adjust the camera angle. |
| ||
(For |
| ||
Step 2 Setting the Network
Install the software [V.Networks Controller], and set the network for the PC
and
❈If multiple PCs are in use, first turn on the power for one PC and proceed to Other Settings with V.Networks Setup Tool. Only then, turn on the power to a second PC and go on to Other Settings with V.Networks Setup Tool. Repeat the procedure for
other PCs. Refer to the PDF instruction manual inside the supplied
Step 3 Adjusting the Camera
Adjust the | ☞ Page 24 |
|
Step 4 Setting with V.Networks Controller
Set image quality and alarm, etc. by using [V.Networks Controller] which has been installed.
Step 5 Operations with V.Networks Controller
Now the camera is ready for recording and playback, etc. with [V.Networks Controller].
Step 6 Operations with a Web Browser
The camera is ready for Web operations.
☞Page 25
☞Page 27
☞Page 28
11