Preparations (Step 2 Setting the Network)
Setting the IP Address for
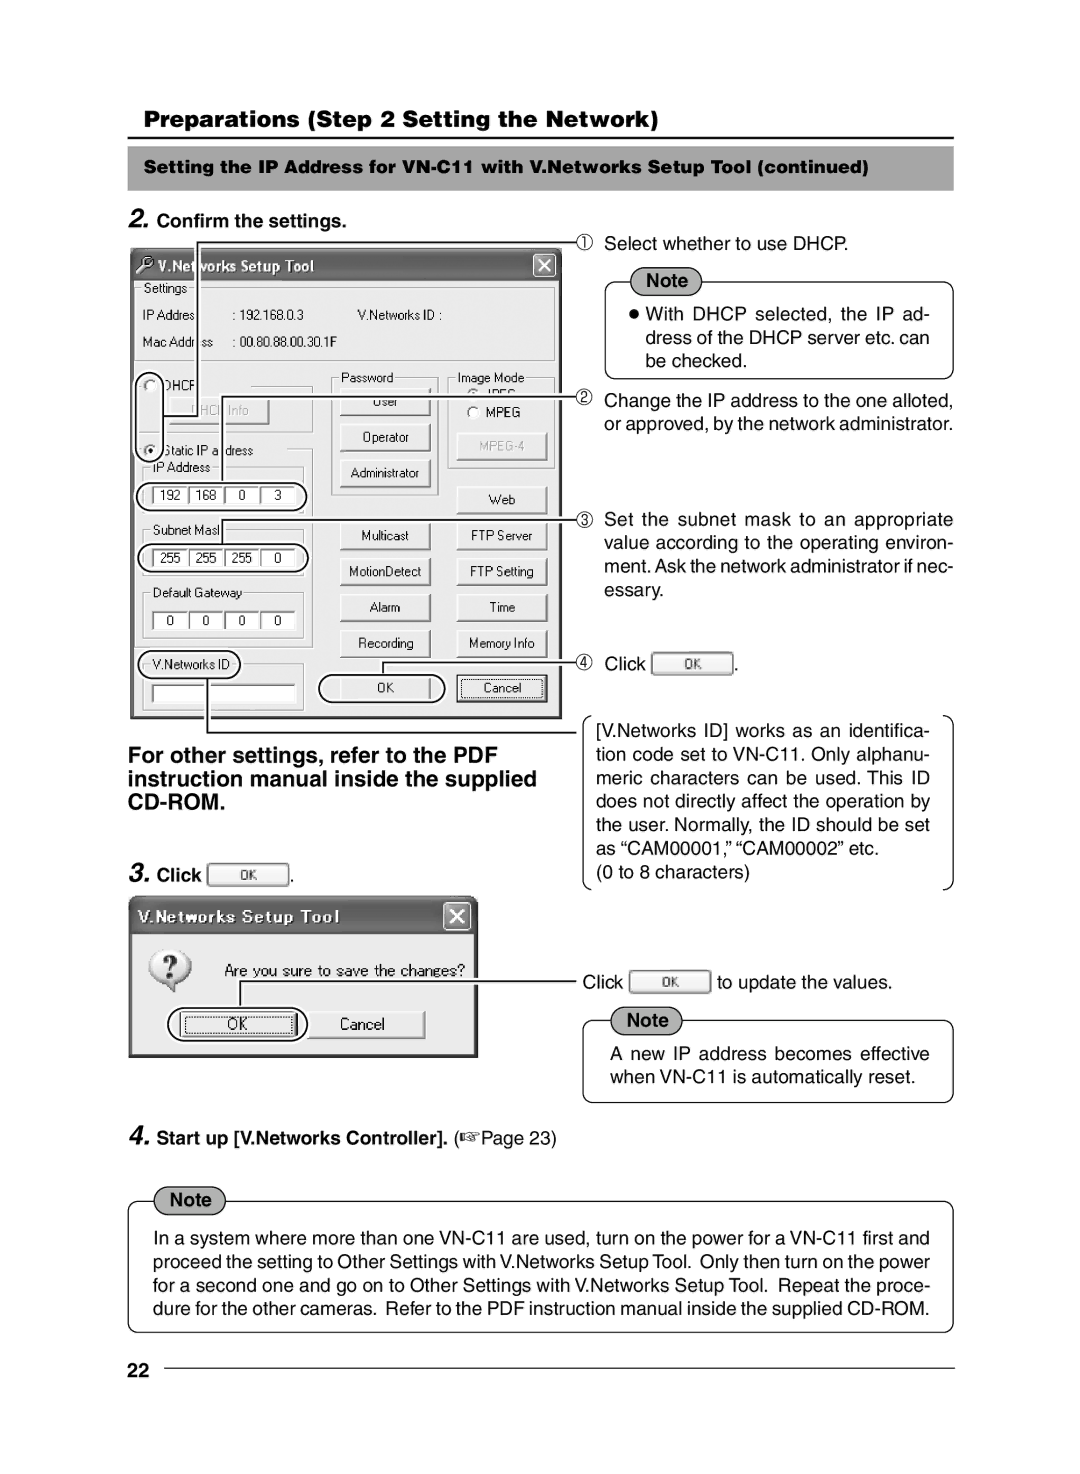
2. Confirm the settings.
For other settings, refer to the PDF instruction manual inside the supplied
3. Click  .
.
Select whether to use DHCP.
Note
●With DHCP selected, the IP ad- dress of the DHCP server etc. can be checked.
Change the IP address to the one alloted, or approved, by the network administrator.
Set the subnet mask to an appropriate value according to the operating environ- ment. Ask the network administrator if nec- essary.
Click ![]() .
.
[V.Networks ID] works as an identifica- tion code set to
(0 to 8 characters)
Click ![]() to update the values.
to update the values.
Note
A new IP address becomes effective when
4. Start up [V.Networks Controller]. (☞Page 23)
Note
In a system where more than one
22