Using the Timers
English
Setting the Daily Timer
(Using the Remote Control)
Once you have set the Daily Timer, the timer will be acti- vated at the same time every day.
The Timer indicator ( ![]() ) on the display shows that the Dai- ly Timer you have set is in effect.
) on the display shows that the Dai- ly Timer you have set is in effect.
•When the Timer Indicator ( ![]() ) is displayed, the timer is activated.
) is displayed, the timer is activated.
•When the Timer Indicator ( ![]() ) is not displayed, the timer is deactivated.
) is not displayed, the timer is deactivated.
2 Setting the OFF time (Example: 13:30).
1.Press the SET button.
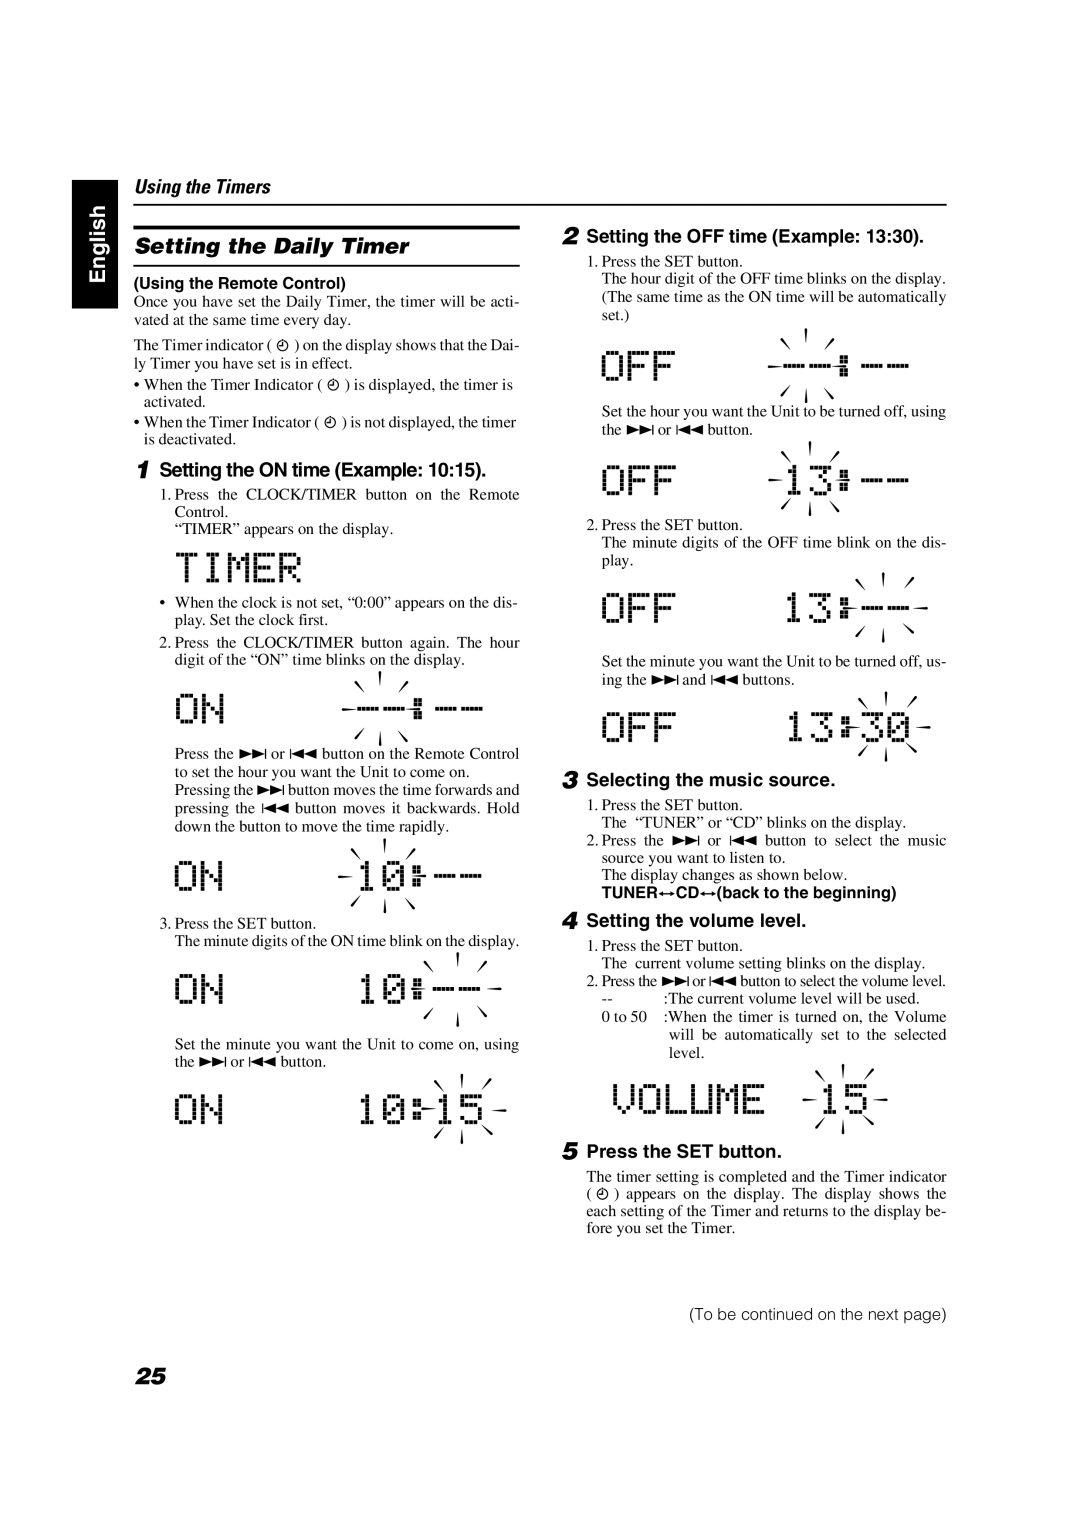
The hour digit of the OFF time blinks on the display. (The same time as the ON time will be automatically set.)
Set the hour you want the Unit to be turned off, using the ¢ or 4 button.
1Setting the ON time (Example: 10:15).
1.Press the CLOCK/TIMER button on the Remote Control.
“TIMER” appears on the display.
•When the clock is not set, “0:00” appears on the dis- play. Set the clock first.
2.Press the CLOCK/TIMER button again. The hour digit of the “ON” time blinks on the display.
Press the ¢ or 4 button on the Remote Control to set the hour you want the Unit to come on. Pressing the ¢ button moves the time forwards and pressing the 4 button moves it backwards. Hold down the button to move the time rapidly.
3.Press the SET button.
The minute digits of the ON time blink on the display.
Set the minute you want the Unit to come on, using the ¢ or 4 button.
2.Press the SET button.
The minute digits of the OFF time blink on the dis- play.
Set the minute you want the Unit to be turned off, us- ing the ¢ and 4 buttons.
3 Selecting the music source.
1.Press the SET button.
The “TUNER” or “CD” blinks on the display.
2.Press the ¢ or 4 button to select the music source you want to listen to.
The display changes as shown below.
TUNERÔCDÔ(back to the beginning)
4 Setting the volume level.
1.Press the SET button.
The current volume setting blinks on the display.
2.Press the ¢or 4 button to select the volume level.
0 to 50 :When the timer is turned on, the Volume will be automatically set to the selected level.
5 Press the SET button.
The timer setting is completed and the Timer indicator ( ![]() ) appears on the display. The display shows the each setting of the Timer and returns to the display be- fore you set the Timer.
) appears on the display. The display shows the each setting of the Timer and returns to the display be- fore you set the Timer.
(To be continued on the next page)
25
