II
CONNECTING DRAIN LINE
•The drain hose should always be properly secured. Failure to properly secure the drain hose can result in flooding and property damage.
•The drain must be installed in accordance with any applicable local codes and regulations.
•Make sure that the drain hose is not stretched, pinched, crushed, or kinked.
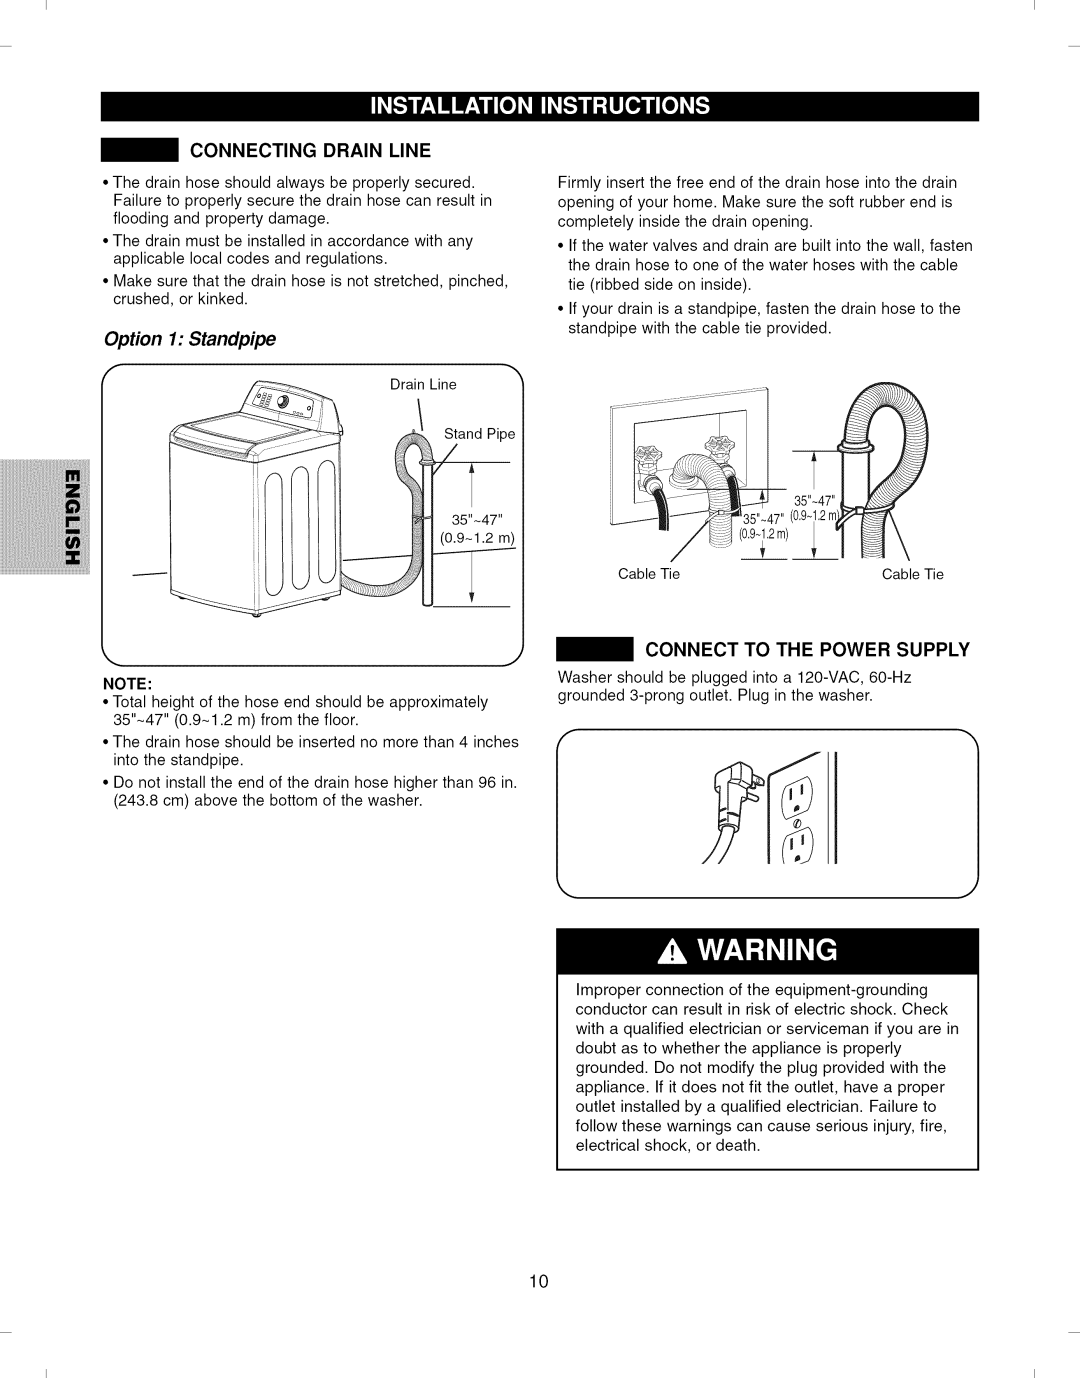
Option 1: Standpipe
F
Drain Line
Stand Pipe
Firmly insert the free end of the drain hose into the drain opening of your home. Make sure the soft rubber end is completely inside the drain opening.
•If the water valves and drain are built into the wall, fasten the drain hose to one of the water hoses with the cable tie (ribbed side on inside).
•If your drain is a standpipe, fasten the drain hose to the standpipe with the cable tie provided.
35"~47"1 |
NOTE:
•Total height of the hose end should be approximately 35"~47" (0.9~1.2 m) from the floor.
•The drain hose should be inserted no more than 4 inches into the standpipe.
•Do not install the end of the drain hose higher than 96 in. (243.8 cm) above the bottom of the washer.
Cable Tie | Cable Tie |
CONNECT TO THE POWER SUPPLY
Washer should be plugged into a
Improper connection of the
10
II