II
nir!_i WARNING: To reduce the risk of fire, electric shock, or injury to persons, read and follow this entire Use & Care Guide, including the Important Safety Instructions, before operating this washer.
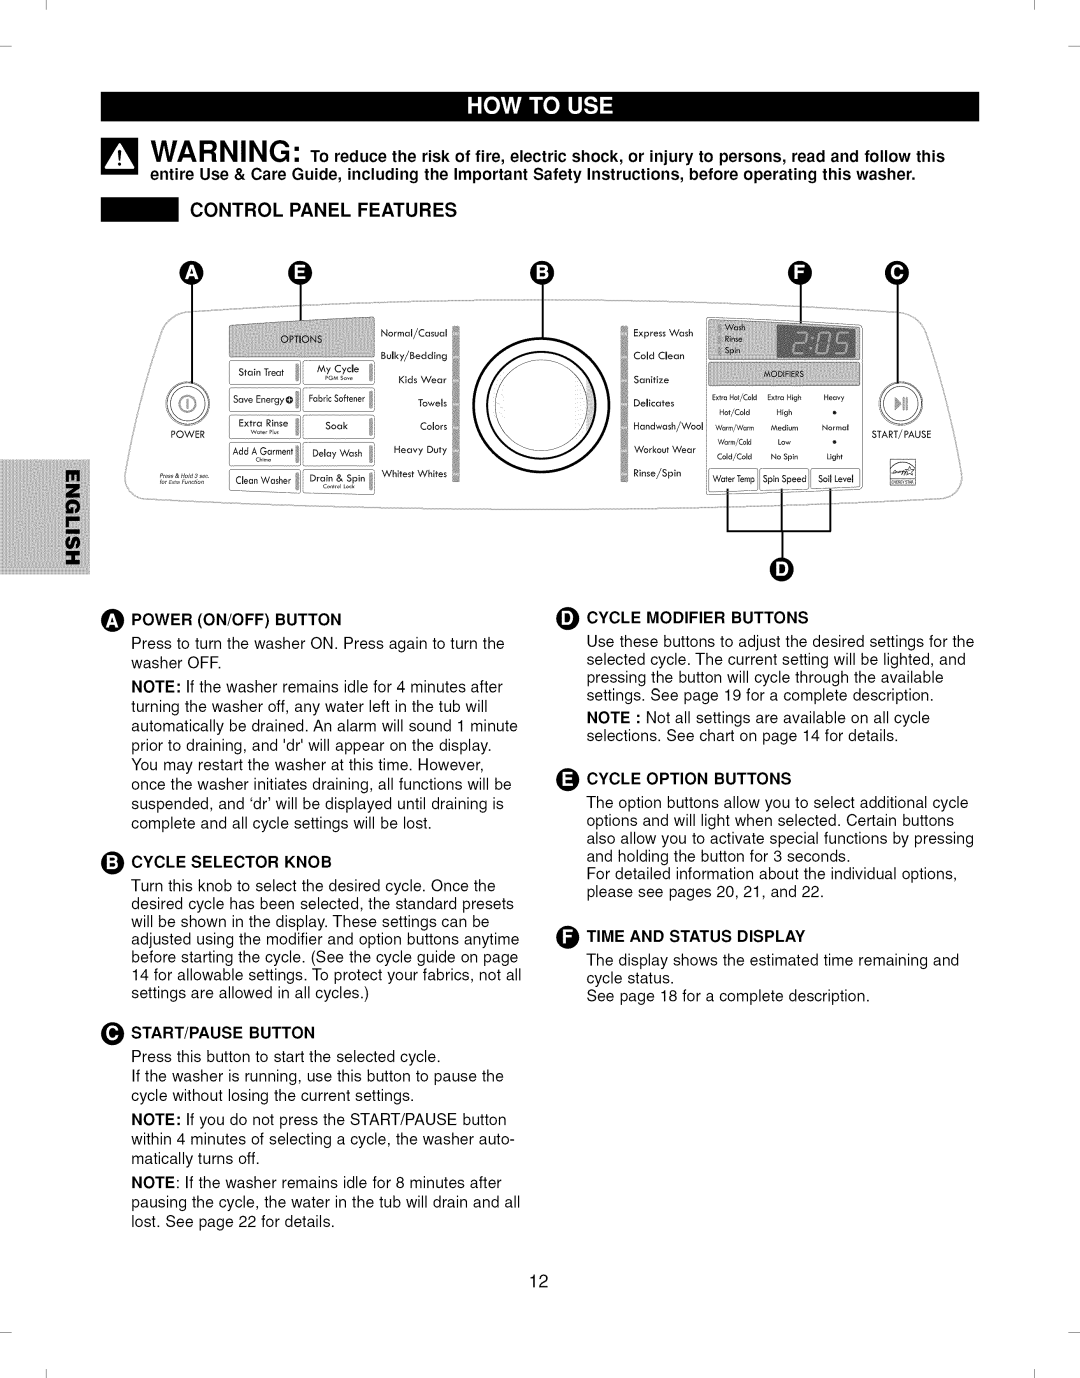
CONTROL PANEL FEATURES
Normal/Casual
Bulky/Beddlng
Stain Treat | _GMSov__ | Kids Wear |
Fob,, ,o,tono,To e,s
POWER Ex,ro_o,oili_inSook,o, Colors
AddAG ..... t i DeleyWash _i HeovyDuty
O POWER (ON/OFF) BUTTON
Press to turn the washer ON. Press again to turn the washer OFF.
NOTE: If the washer remains idle for 4 minutes after turning the washer off, any water left in the tub will automatically be drained. An alarm will sound 1 minute prior to draining, and 'dr'will appear on the display. You may restart the washer at this time. However, once the washer initiates draining, all functions will be suspended, and 'dr'will be displayed until draining is complete and all cycle settings will be lost.
g CYCLE SELECTOR KNOB
Turn this knob to select the desired cycle. Once the desired cycle has been selected, the standard presets will be shown in the display. These settings can be adjusted using the modifier and option buttons anytime before starting the cycle. (See the cycle guide on page 14 for allowable settings. To protect your fabrics, not all settings are allowed in all cycles.)
eSTART/PAUSE BUTTON
Press this button to start the selected cycle.
If the washer is running, use this button to pause the cycle without losing the current settings.
NOTE: If you do not press the START/PAUSE button within 4 minutes of selecting a cycle, the washer auto- matically turns off.
NOTE: If the washer remains idle for 8 minutes after pausing the cycle, the water in the tub will drain and all lost. See page 22 for details.
Express | Wash |
|
|
|
Cold Clean |
|
|
| |
Sanitize |
|
|
|
|
Dellcates |
| Extra Hob/Cold | Extra High | Heavy |
|
|
|
| |
|
| Hot/Cold | High |
|
Handwash/Wool | Warm/Warm | Medium | START/PAUSE | |
|
|
|
| |
Workout | Wear | W_rm/C01d | Low | o |
|
|
| ||
|
| Cold/Cold | No Spin | Light |
e CYCLE MODIFIER BUTTONS
Use these buttons to adjust the desired settings for the selected cycle. The current setting will be lighted, and pressing the button will cycle through the available settings. See page 19 for a complete description.
NOTE • Not all settings are available on all cycle selections. See chart on page 14 for details.
g CYCLE OPTION BUTTONS
The option buttons allow you to select additional cycle options and will light when selected. Certain buttons also allow you to activate special functions by pressing and holding the button for 3 seconds.
For detailed information about the individual options, please see pages 20, 21, and 22.
o TIME AND STATUS DISPLAY
The display shows the estimated time remaining and cycle status.
See page 18 for a complete description.
12
II