Make connections as shown below. | Do not plug in the power lead until | all connec- | |
When connecting the related system components, refer also | |||
tions are completed. |
| ||
to the instruction manuals of the related components. |
| ||
|
|
Caution
Be sure to adhere followings. Or proper ventilation WI/ be blocked causrng damage or fire hazard.
. Do not place any objects imparrrng heat radration onto the top of unt.
lLeave a space around the unrt (from the largest outside dimensron rncludrng pro-
lection) equal or greater than, shown below | Back panel 10 cm | |
Top panel : 50 cm | Side panel : 10 cm | |
Malfunction of microcomputer
If operation IS not possible or erroneous drsplay appears even though all connec- tions have been made properly, reset the mrcrocomputer referrrng to “In case of
drfficulty”-I&
d tube I
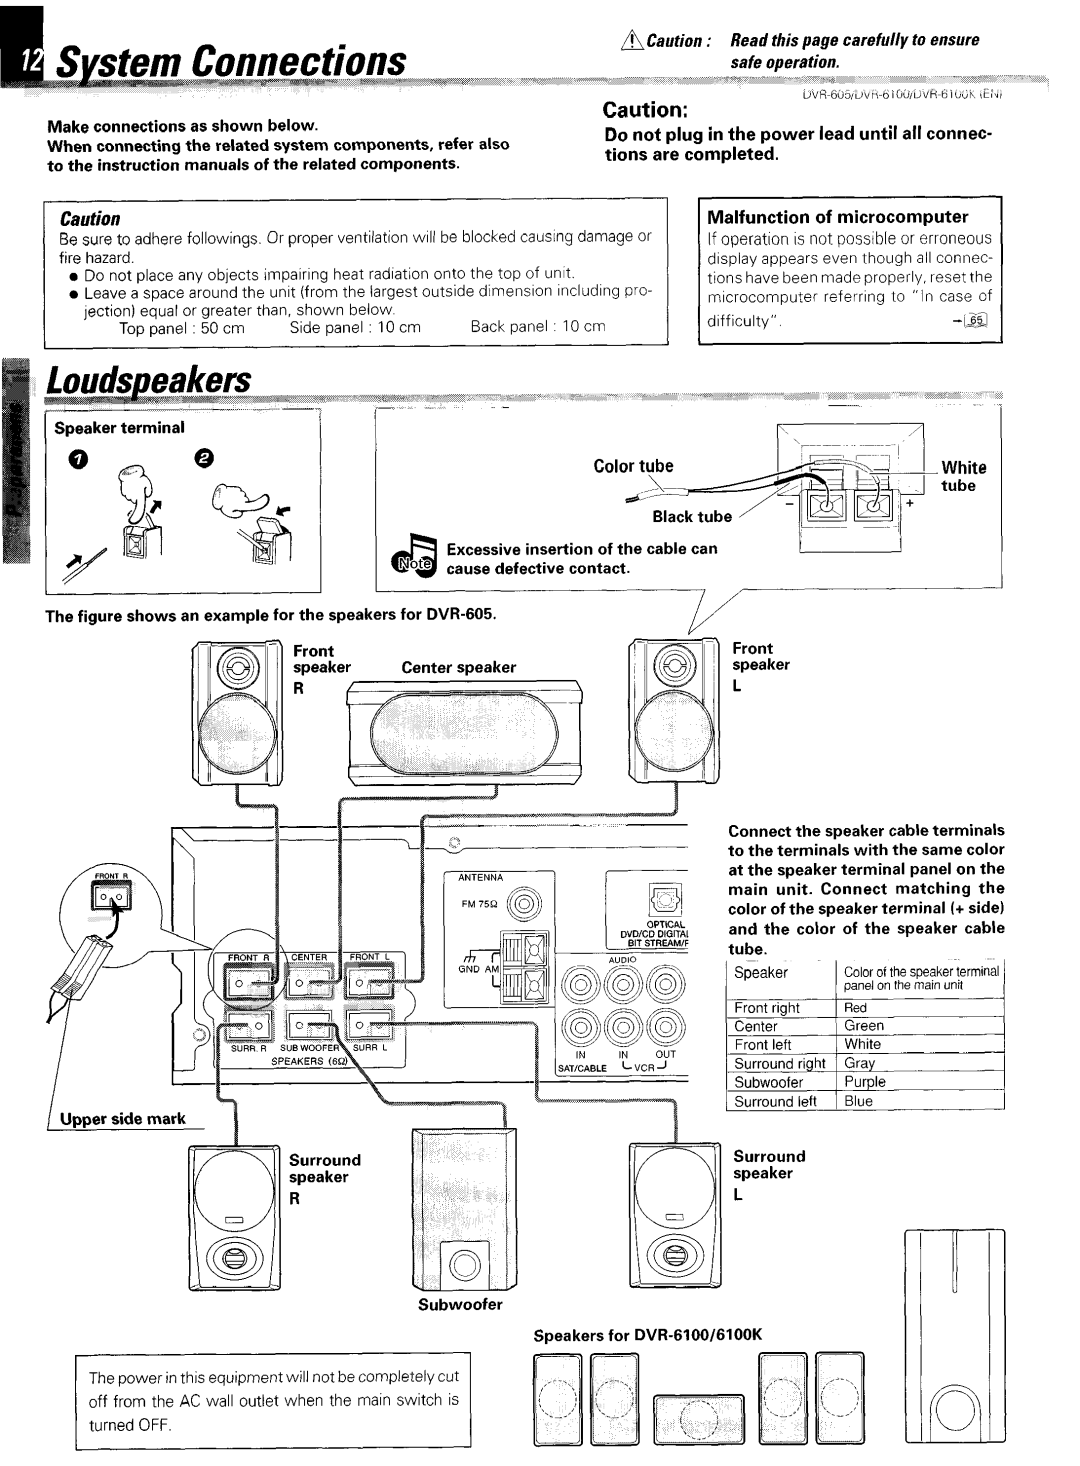
Excessive insertion of the cable can cause defective contact.
I | ’ | I | I |
The figure shows an example for the speakers for DVR-605.
Center speaker
Surround speaker
R
Front speaker
L
Connect the speaker cable terminals to the terminals with the same color at the speaker terminal panel on the main unit. Connect matching the color of the speaker terminal (+ side) and the color of the speaker cable tube.
Speaker | Colorofthespeakerterminal |
| panelon the main unit |
Front right | Red |
Center | Green |
Front left | White |
Surround right | Gray |
Subwoofer | Purple |
Surround left | Blue |
Surround |
|
speaker |
|
L |
|
Subwoofer
Speakers for
The power in this equipment will not be completely cut off from the AC wall outlet when the main switch is