OUTDOOR GRILL CARE

Replacingthe Igniter Battery

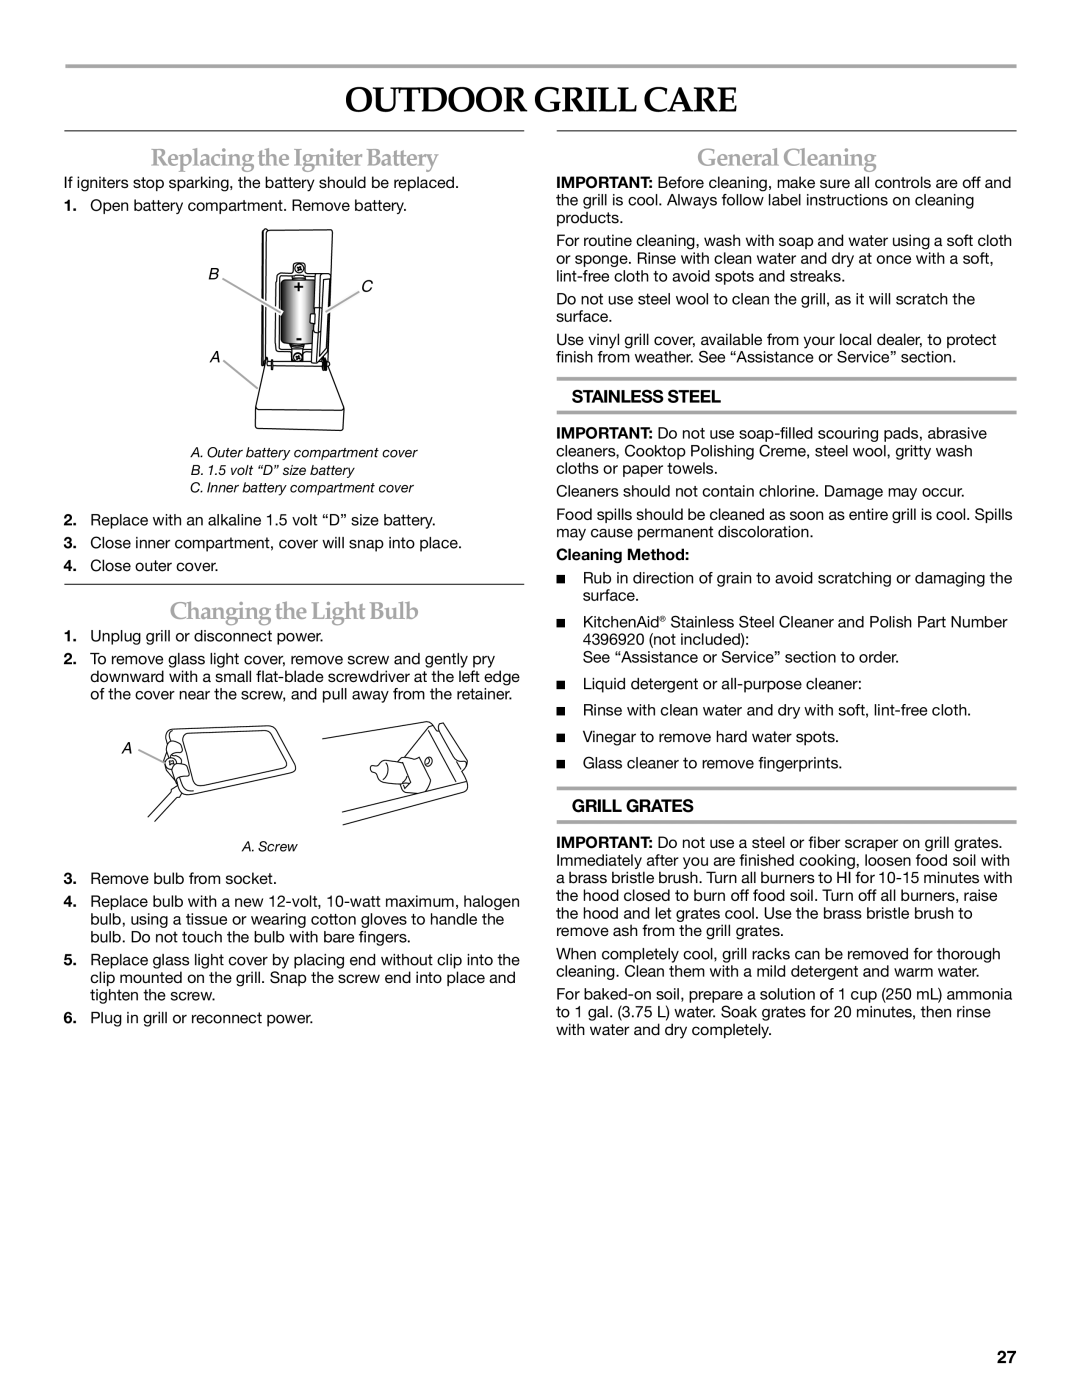
If igniters stop sparking, the battery should be replaced.

1.Open battery compartment. Remove battery.

B

+ C

-

A

A. Outer battery compartment cover

B. 1.5 volt “D” size battery

C. Inner battery compartment cover

2.Replace with an alkaline 1.5 volt “D” size battery.

3.Close inner compartment, cover will snap into place.

4.Close outer cover.

Changing theLight Bulb

1.Unplug grill or disconnect power.

2.To remove glass light cover, remove screw and gently pry downward with a small flat-blade screwdriver at the left edge of the cover near the screw, and pull away from the retainer.

A

A.Screw

3.Remove bulb from socket.

4.Replace bulb with a new 12-volt, 10-watt maximum, halogen bulb, using a tissue or wearing cotton gloves to handle the bulb. Do not touch the bulb with bare fingers.

5.Replace glass light cover by placing end without clip into the clip mounted on the grill. Snap the screw end into place and tighten the screw.

6.Plug in grill or reconnect power.

GeneralCleaning

IMPORTANT: Before cleaning, make sure all controls are off and the grill is cool. Always follow label instructions on cleaning products.

For routine cleaning, wash with soap and water using a soft cloth or sponge. Rinse with clean water and dry at once with a soft, lint-free cloth to avoid spots and streaks.

Do not use steel wool to clean the grill, as it will scratch the surface.

Use vinyl grill cover, available from your local dealer, to protect finish from weather. See “Assistance or Service” section.

STAINLESS STEEL

IMPORTANT: Do not use soap-filled scouring pads, abrasive cleaners, Cooktop Polishing Creme, steel wool, gritty wash cloths or paper towels.

Cleaners should not contain chlorine. Damage may occur.

Food spills should be cleaned as soon as entire grill is cool. Spills may cause permanent discoloration.

Cleaning Method:

Rub in direction of grain to avoid scratching or damaging the surface.

KitchenAid® Stainless Steel Cleaner and Polish Part Number

4396920 (not included):

See “Assistance or Service” section to order.

Liquid detergent or all-purpose cleaner:

Rinse with clean water and dry with soft, lint-free cloth.

Vinegar to remove hard water spots.

Glass cleaner to remove fingerprints.

GRILL GRATES

IMPORTANT: Do not use a steel or fiber scraper on grill grates. Immediately after you are finished cooking, loosen food soil with a brass bristle brush. Turn all burners to HI for 10-15 minutes with the hood closed to burn off food soil. Turn off all burners, raise the hood and let grates cool. Use the brass bristle brush to remove ash from the grill grates.

When completely cool, grill racks can be removed for thorough cleaning. Clean them with a mild detergent and warm water.

For baked-on soil, prepare a solution of 1 cup (250 mL) ammonia to 1 gal. (3.75 L) water. Soak grates for 20 minutes, then rinse with water and dry completely.

27

Page 27
Image 27
KitchenAid KFRS361T, KFRS271T Outdoor Grill Care, Replacingthe Igniter Battery, Changing theLight Bulb, GeneralCleaning

KBNS271T, KFRS365T, KFRS271T, KBNS361T, KFRS361T specifications

The KitchenAid KFRS361T, KBNS361T, KFRS271T, KFRS365T, and KBNS271T models offer a blend of performance, style, and innovative features ideal for any modern kitchen. These refrigerator models exemplify KitchenAid's commitment to quality and user-friendly design, making them popular choices for home chefs and families alike.

One standout feature across these models is their advanced cooling technologies. With the Preserva Food Care System, each of these refrigerators ensures optimal freshness for your food by utilizing two distinct cooling systems that maintain ideal humidity levels and temperatures. This minimizes the mixing of odors and prolongs the shelf life of your ingredients.

The interior layout is designed for both function and convenience. Each model includes adjustable shelves, allowing users to customize their storage space according to their needs. The Slide-Away shelves offer added versatility, enabling users to make room for tall items with ease. Additionally, the Clear Humidity-Controlled Crispers help preserve fruits and vegetables by providing a climate-controlled environment.

Energy efficiency is another highlight, as these refrigerators are ENERGY STAR certified, meaning they consume less energy, which translates into lower utility bills. The integrated LED lighting illuminates the fridge’s interior excellently and is more energy-efficient than traditional lighting options.

Style is equally prioritized in these models. With a sleek stainless steel finish, they fit seamlessly into any kitchen decor, providing a modern aesthetic. The PrintShield Finish helps to resist fingerprints and smudges, keeping the exterior looking pristine with minimal effort.

The models also feature an In-Door-Ice System, which maximizes usable space inside the refrigerator by freeing up shelf space. The ice maker is conveniently located in the door, making it easy to access while ensuring more room for food storage.

Smart technology is also an option in some models, allowing for remote monitoring and temperature adjustments through smartphone applications. This feature promotes convenience and ensures food safety by alerting users to any temperature changes.

Overall, the KitchenAid KFRS361T, KBNS361T, KFRS271T, KFRS365T, and KBNS271T models combine innovative technology with stylish design, making them a perfect addition to any kitchen looking for enhanced functionality and modern elegance. These refrigerators epitomize KitchenAid's focus on quality and reliability, catering to the needs of discerning home cooks.