WARMING SHELF

Cleaning Method:

Liquid detergent or an all-purpose cleaner.

Rinse with clean water and dry with soft, lint-free cloth.

For tough spots or baked-on grease, use Heavy Duty Degreaser Part Number 31552, a commercial degreaser designed for stainless steel.

See “Assistance or Service” section to order.

IMPORTANT: Make sure gas supply is off and all control knobs are in the OFF position. Make sure the side burner is cool.

EXTERIOR

The quality of this material resists most stains and pitting, providing that the surface is kept clean and protected.

Apply stainless steel polish to all non-cooking areas before first use. Reapply after each cleaning to avoid permanent damage to surface.

Cleaning should always be followed by rinsing with clean warm water.

Wipe the surface completely dry with a soft cloth.

For tough spots or baked-on grease, use Heavy Duty Degreaser Part Number 31552, a commercial degreaser designed for stainless steel.

See “Assistance or Service” section to order.

INTERIOR

Discoloration of stainless steel on these parts is to be expected, due to intense heat from the burners. Always rub in the direction of the grain. Cleaning should always be followed by rinsing with clean, warm water.

Cleaning Method:

Liquid detergent or all-purpose cleaner.

Rinse with clean water and dry completely with a soft, lint- free cloth.

A heavy-duty scrub sponge can be used with mild cleaning products.

For small, difficult-to-clean areas, use Heavy Duty Degreaser Part Number 31552, a commercial degreaser designed for stainless steel.

See “Assistance or Service” section to order.

SIDE BURNER CAPS AND GRATE

Cleaning Method:

Clean with a brass bristle brush.

Wash grate using mild detergent, warm water and degreaser.

Rinse with clean water and dry with soft, lint-free cloth.

KitchenAid® Stainless Steel Cleaner and Polish Part Number

4396920 (not included):

See “Assistance or Service” section to order.

U-SHAPED BURNERS

Cleaning Method:

Clean the exterior of the burner with a wire brush.

Clear any clogged burner ports with a straightened paper clip.

Do not use a toothpick as it may break off and clog the port.

Check and clean burner/venturi tubes.

1.Remove grill grates and sear plates.

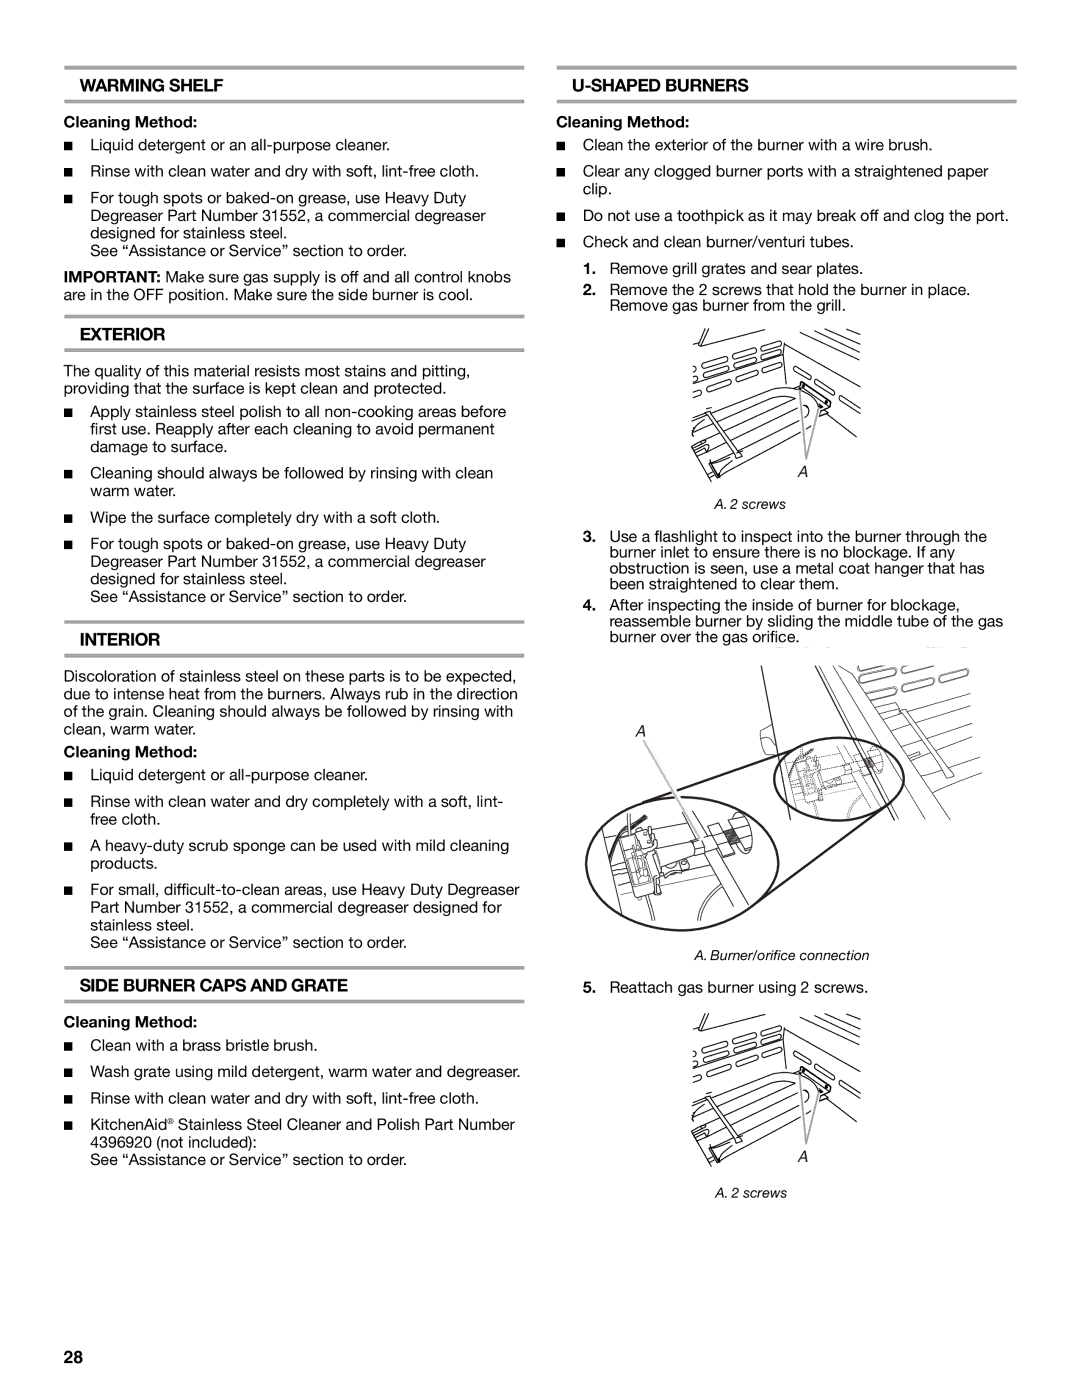
2.Remove the 2 screws that hold the burner in place. Remove gas burner from the grill.

A

A. 2 screws

3.Use a flashlight to inspect into the burner through the burner inlet to ensure there is no blockage. If any obstruction is seen, use a metal coat hanger that has been straightened to clear them.

4.After inspecting the inside of burner for blockage, reassemble burner by sliding the middle tube of the gas burner over the gas orifice.

A

A. Burner/orifice connection

5.Reattach gas burner using 2 screws.

A

A. 2 screws

28

Page 28
Image 28
KitchenAid KBNS361T, KFRS271T, KFRS365T, KFRS361T, KBNS271T installation instructions Warming Shelf

KBNS271T, KFRS365T, KFRS271T, KBNS361T, KFRS361T specifications

The KitchenAid KFRS361T, KBNS361T, KFRS271T, KFRS365T, and KBNS271T models offer a blend of performance, style, and innovative features ideal for any modern kitchen. These refrigerator models exemplify KitchenAid's commitment to quality and user-friendly design, making them popular choices for home chefs and families alike.

One standout feature across these models is their advanced cooling technologies. With the Preserva Food Care System, each of these refrigerators ensures optimal freshness for your food by utilizing two distinct cooling systems that maintain ideal humidity levels and temperatures. This minimizes the mixing of odors and prolongs the shelf life of your ingredients.

The interior layout is designed for both function and convenience. Each model includes adjustable shelves, allowing users to customize their storage space according to their needs. The Slide-Away shelves offer added versatility, enabling users to make room for tall items with ease. Additionally, the Clear Humidity-Controlled Crispers help preserve fruits and vegetables by providing a climate-controlled environment.

Energy efficiency is another highlight, as these refrigerators are ENERGY STAR certified, meaning they consume less energy, which translates into lower utility bills. The integrated LED lighting illuminates the fridge’s interior excellently and is more energy-efficient than traditional lighting options.

Style is equally prioritized in these models. With a sleek stainless steel finish, they fit seamlessly into any kitchen decor, providing a modern aesthetic. The PrintShield Finish helps to resist fingerprints and smudges, keeping the exterior looking pristine with minimal effort.

The models also feature an In-Door-Ice System, which maximizes usable space inside the refrigerator by freeing up shelf space. The ice maker is conveniently located in the door, making it easy to access while ensuring more room for food storage.

Smart technology is also an option in some models, allowing for remote monitoring and temperature adjustments through smartphone applications. This feature promotes convenience and ensures food safety by alerting users to any temperature changes.

Overall, the KitchenAid KFRS361T, KBNS361T, KFRS271T, KFRS365T, and KBNS271T models combine innovative technology with stylish design, making them a perfect addition to any kitchen looking for enhanced functionality and modern elegance. These refrigerators epitomize KitchenAid's focus on quality and reliability, catering to the needs of discerning home cooks.