
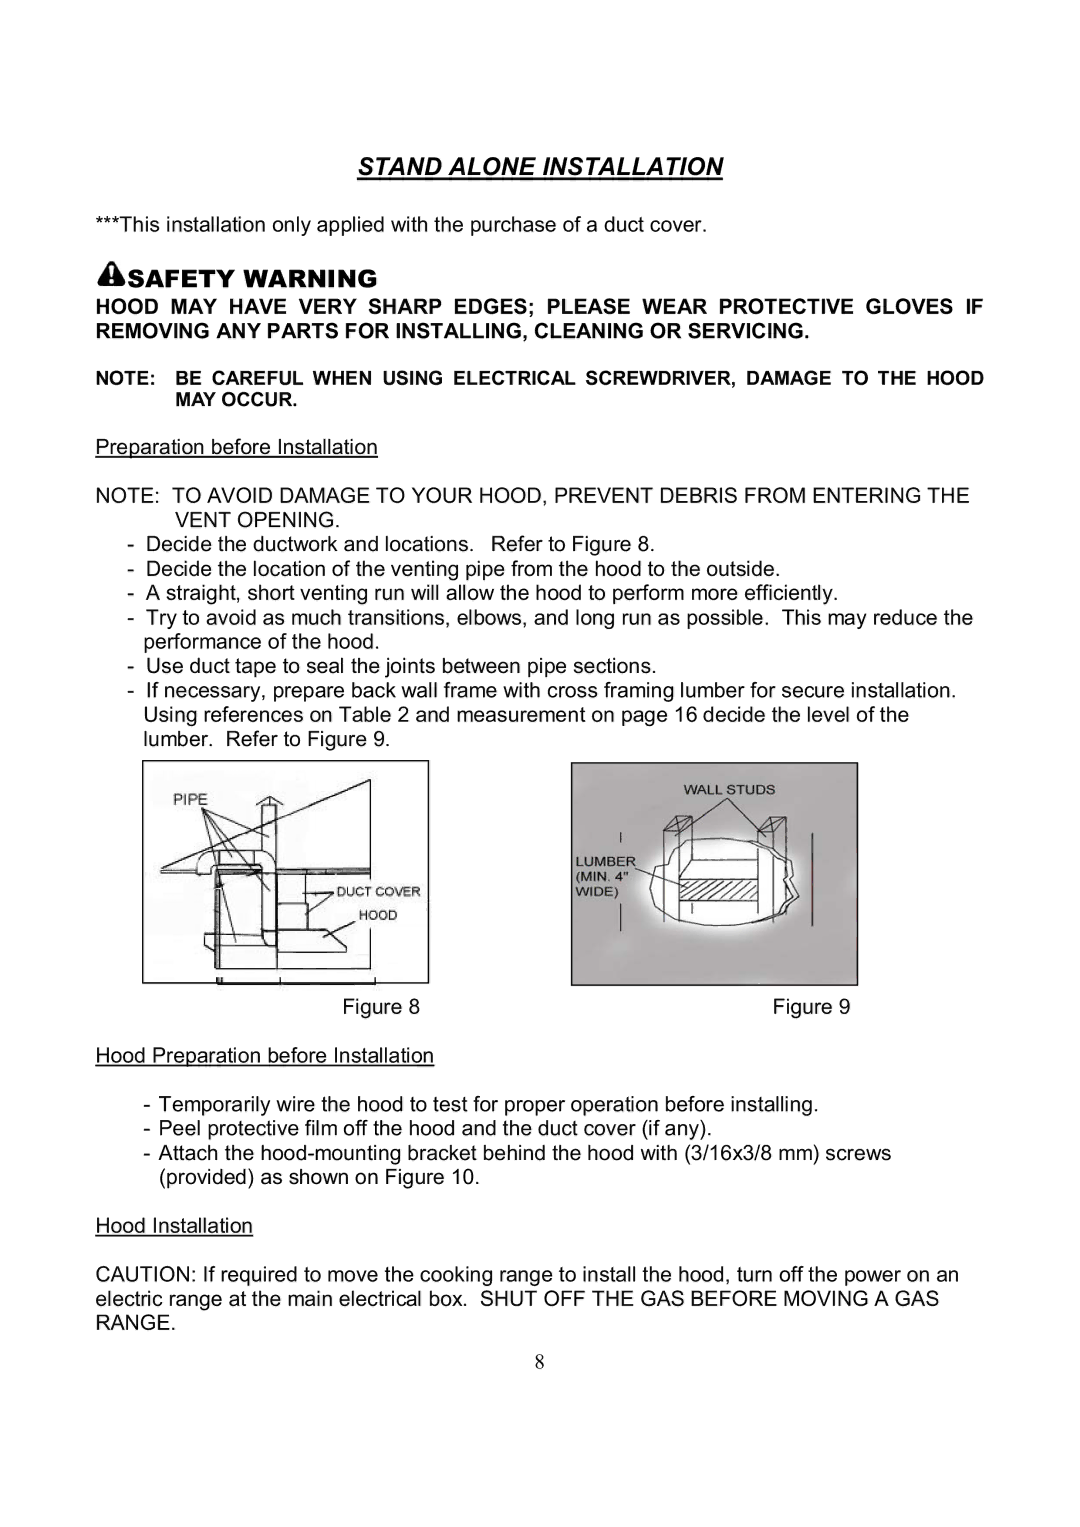
RA3830SQ, RA3836SQ specifications
Kobe Range Hoods has been a prominent name in the kitchen appliance industry, renowned for its dedication to quality, innovation, and advanced kitchen technologies. Among its impressive product line, the RA3836SQ and RA3830SQ range hoods stand out, offering remarkable features that elevate cooking experiences while ensuring a clean and ventilated space.The RA3836SQ and RA3830SQ are designed to fit seamlessly in a variety of kitchen styles, offering aesthetic appeal as well as functionality. Both models are constructed from high-quality stainless steel, which not only lends durability but also provides a sleek and modern appearance. The brushed finish helps to resist fingerprints and smudges, making maintenance a breeze.
One of the key features of these range hoods is their powerful ventilation system. With a blower capacity of up to 760 CFM (cubic feet per minute), they efficiently eliminate smoke, odors, and grease from the air, ensuring a clean cooking environment. The three-speed fan settings allow users to adjust the ventilation power according to the cooking needs, whether they are simmering or frying, ensuring that the air quality remains optimal.
Both the RA3836SQ and RA3830SQ models come equipped with quiet operation technology. This feature minimizes noise levels, allowing users to focus on their cooking without the distraction of a loud hood. With noise levels as low as 39 dB on the lowest setting, these range hoods enhance the cooking experience while providing effective ventilation.
Installation is made simple with a ducted or ductless option, catering to various kitchen layouts. The washable aluminum mesh filters are easy to clean, and they trap grease effectively, extending the lifespan of the range hood while promoting better air quality.
In addition, these models feature modern LED lighting, which provides bright, energy-efficient illumination to the cooking area. This not only enhances visibility while preparing meals but also adds to the overall aesthetic of the kitchen.
With thoughtful design, reliable performance, and advanced technologies, the Kobe Range Hoods RA3836SQ and RA3830SQ are excellent choices for those looking to enhance their cooking space. They are a testament to Kobe's commitment to quality and innovation, making them a worthwhile investment for any kitchen.