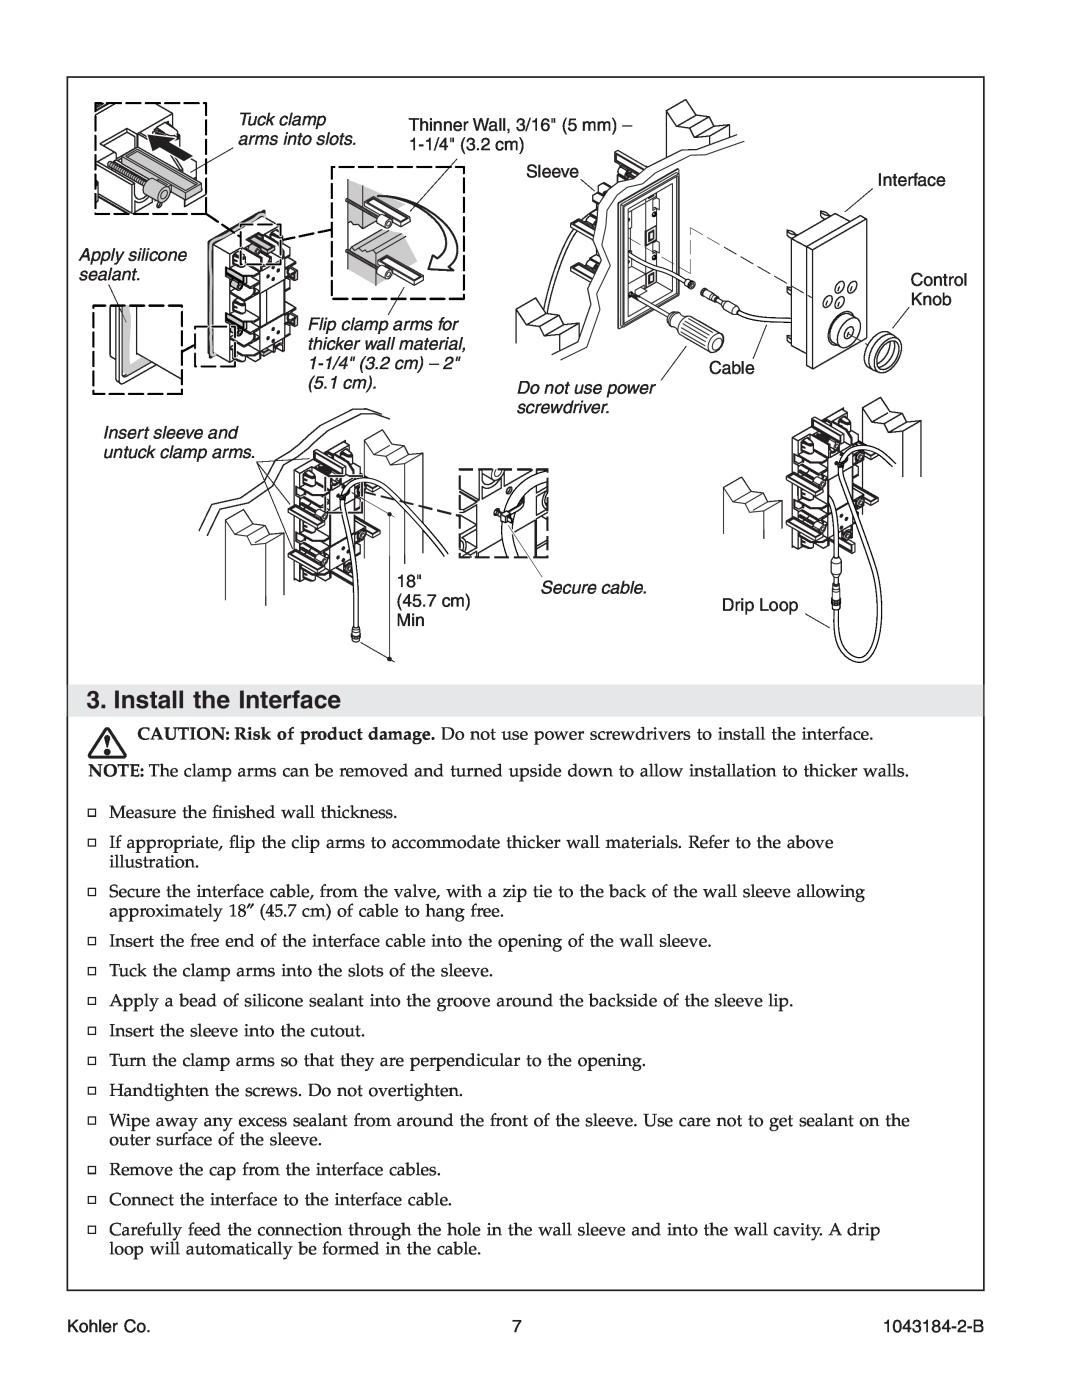
Tuck clamp | Thinner Wall, 3/16" (5 mm) – | |
arms into slots. | ||
Apply silicone sealant.
Flip clamp arms for thicker wall material,
Insert sleeve and untuck clamp arms.
Sleeve | Interface |
| |
| Control |
| Knob |
Cable
Do not use power screwdriver.
18" | Secure cable. | |
(45.7 cm) | ||
Drip Loop |
Min
3. Install the Interface
![]() CAUTION: Risk of product damage. Do not use power screwdrivers to install the interface. NOTE: The clamp arms can be removed and turned upside down to allow installation to thicker walls.
CAUTION: Risk of product damage. Do not use power screwdrivers to install the interface. NOTE: The clamp arms can be removed and turned upside down to allow installation to thicker walls.
Measure the finished wall thickness.
If appropriate, flip the clip arms to accommodate thicker wall materials. Refer to the above illustration.
Secure the interface cable, from the valve, with a zip tie to the back of the wall sleeve allowing approximately 18″ (45.7 cm) of cable to hang free.
Insert the free end of the interface cable into the opening of the wall sleeve.
Tuck the clamp arms into the slots of the sleeve.
Apply a bead of silicone sealant into the groove around the backside of the sleeve lip. Insert the sleeve into the cutout.
Turn the clamp arms so that they are perpendicular to the opening.
Handtighten the screws. Do not overtighten.
Wipe away any excess sealant from around the front of the sleeve. Use care not to get sealant on the outer surface of the sleeve.
Remove the cap from the interface cables.
Connect the interface to the interface cable.
Carefully feed the connection through the hole in the wall sleeve and into the wall cavity. A drip loop will automatically be formed in the cable.
Kohler Co. | 7 |