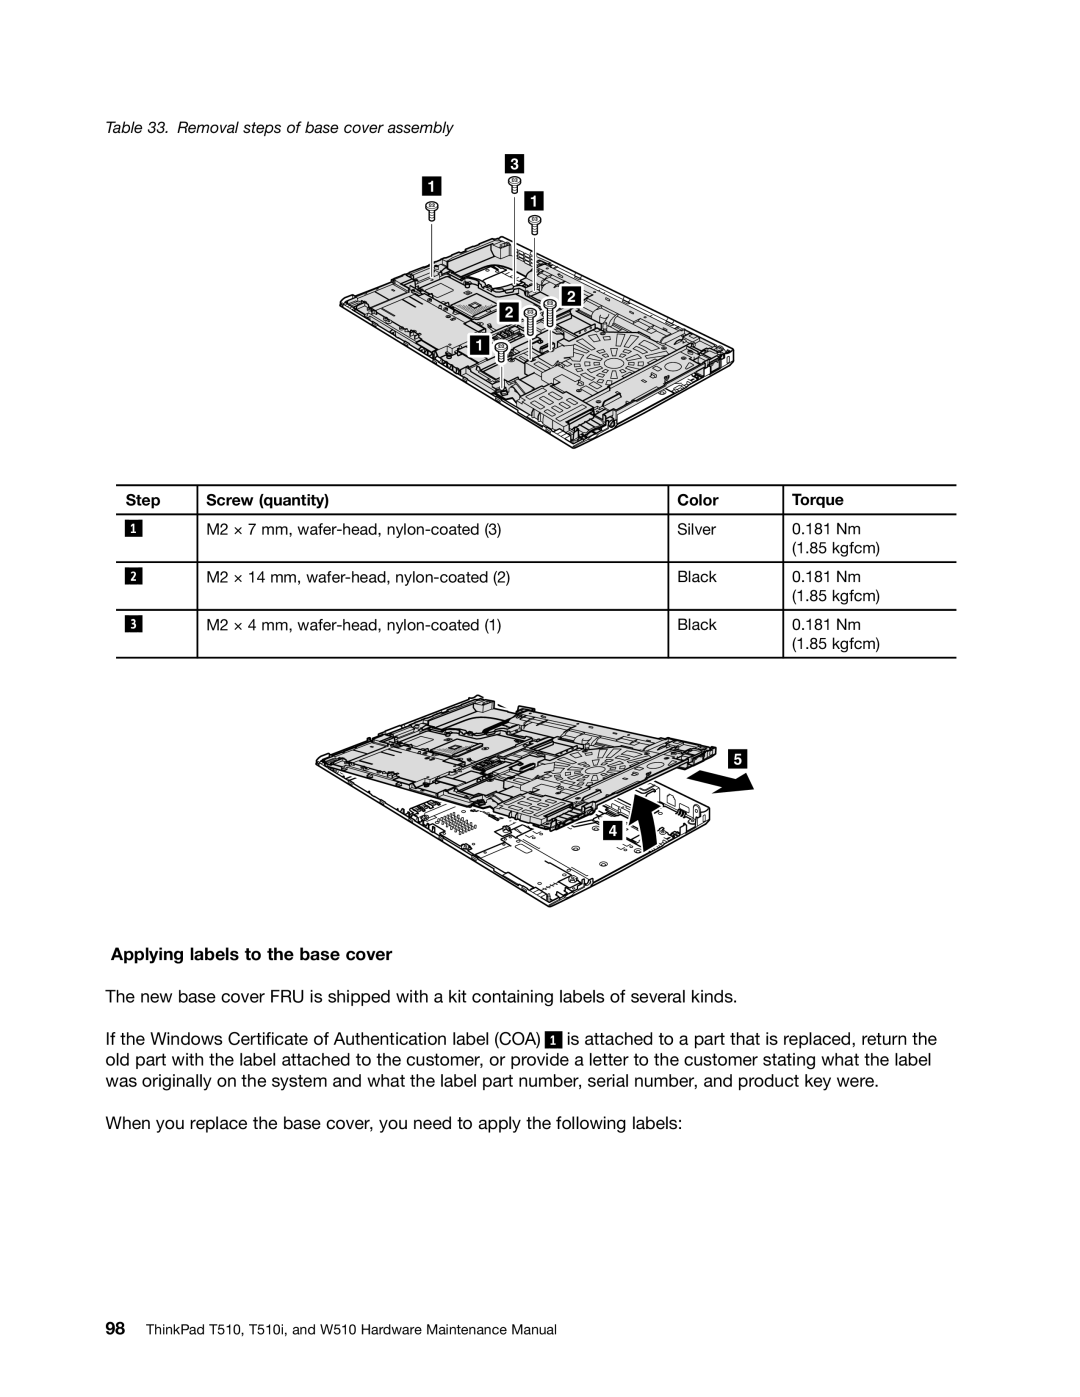
Table 33. Removal steps of base cover assembly
3
1
1
2 ![]()
![]()
![]()
![]()
![]()
![]()
![]()
![]()
![]()
![]()
![]()
![]()
![]()
![]()
![]()
![]() 2
2 ![]()
![]()
![]()
![]()
![]()
![]()
![]()
![]()
![]()
![]()
![]()
![]()
![]()
![]()
![]()
![]()
![]()
![]()
![]()
![]()
![]()
![]() 1
1![]()
![]()
![]()
![]()
![]()
![]()
![]()
![]()
![]()
![]()
![]()
![]()
![]()
![]()
![]()
![]()
![]()
![]()
![]()
![]()
![]()
![]()
![]()
| Step | Screw (quantity) | Color | Torque | ||
|
|
|
|
|
|
|
|
|
| M2 | × 7 mm, | Silver | 0.181 Nm |
| 1 |
| ||||
|
|
|
|
|
| (1.85 kgfcm) |
|
|
|
|
|
|
|
|
|
| M2 | × 14 mm, | Black | 0.181 Nm |
| 2 |
| ||||
|
|
|
|
|
| (1.85 kgfcm) |
|
|
|
|
|
|
|
|
|
| M2 | × 4 mm, | Black | 0.181 Nm |
| 3 |
| ||||
|
|
|
|
|
| (1.85 kgfcm) |
|
|
|
|
|
|
|
5
![]() 4
4![]()
![]()
![]()
![]()
![]()
![]()
![]()
![]()
![]()
Applying labels to the base cover
The new base cover FRU is shipped with a kit containing labels of several kinds.
If the Windows Certificate of Authentication label (COA) 1 is attached to a part that is replaced, return the old part with the label attached to the customer, or provide a letter to the customer stating what the label was originally on the system and what the label part number, serial number, and product key were.
When you replace the base cover, you need to apply the following labels: