Front Panel
a
l m
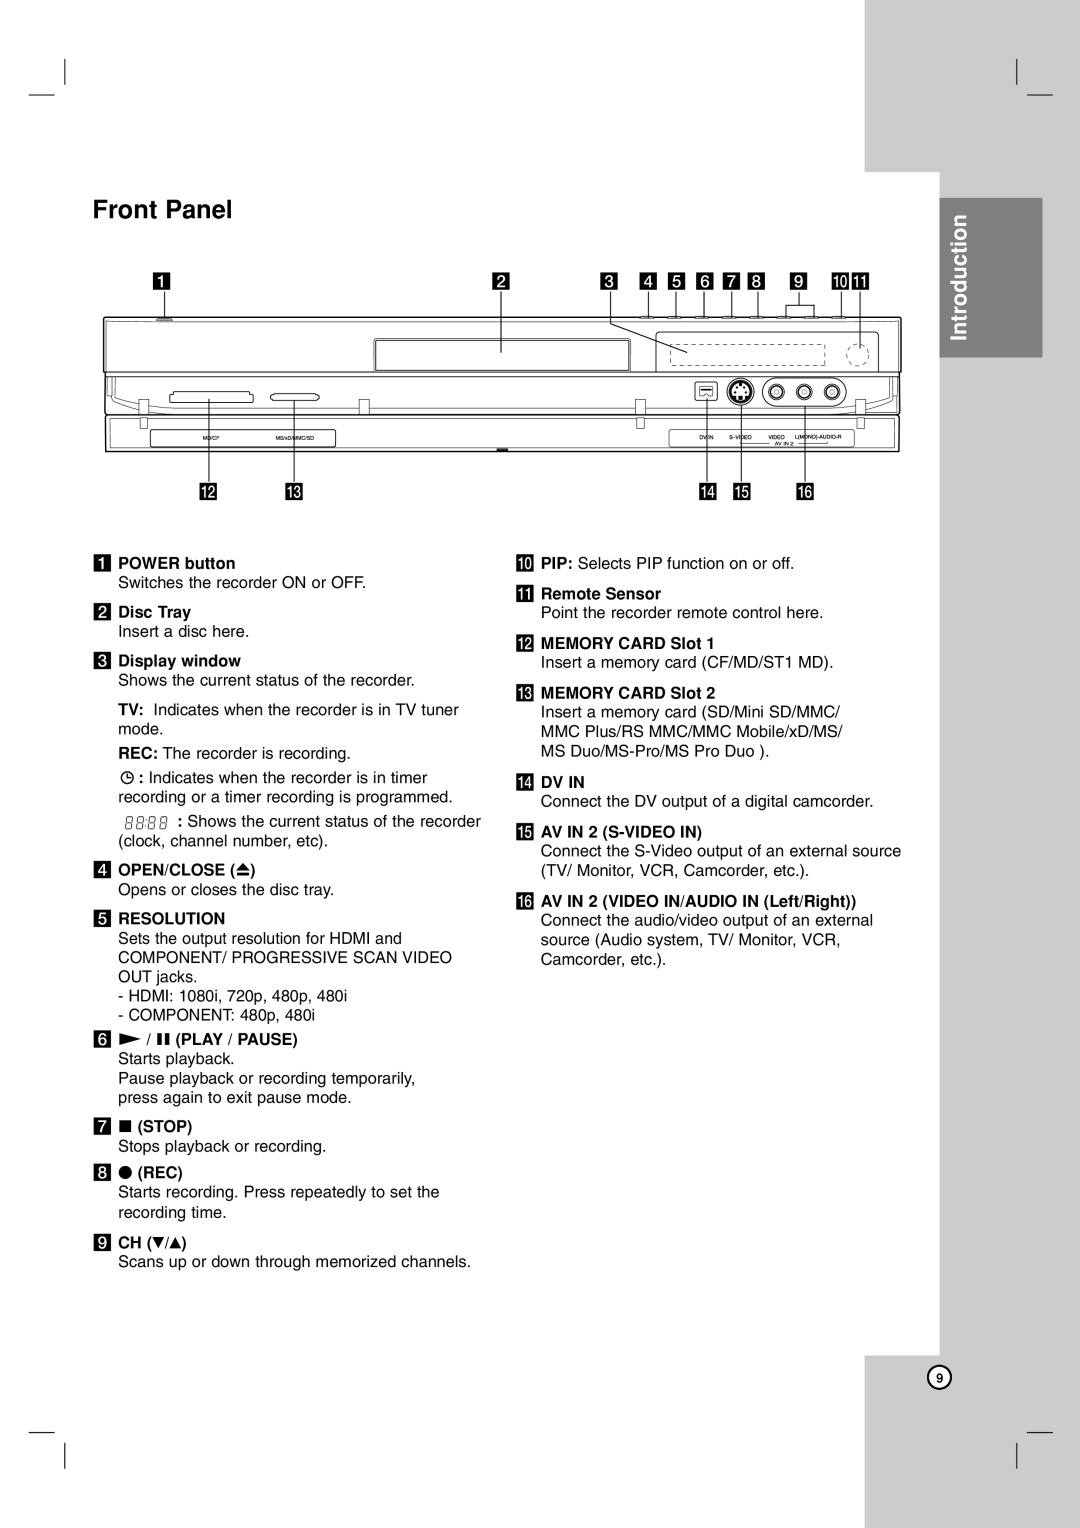
a POWER button
Switches the recorder ON or OFF.
b Disc Tray
Insert a disc here.
c Display window
Shows the current status of the recorder.
TV: Indicates when the recorder is in TV tuner mode.
REC: The recorder is recording.
![]() : Indicates when the recorder is in timer recording or a timer recording is programmed.
: Indicates when the recorder is in timer recording or a timer recording is programmed.
![]() : Shows the current status of the recorder (clock, channel number, etc).
: Shows the current status of the recorder (clock, channel number, etc).
d OPEN/CLOSE (Z)
Opens or closes the disc tray.
eRESOLUTION
Sets the output resolution for HDMI and
COMPONENT/ PROGRESSIVE SCAN VIDEO OUT jacks.
-HDMI: 1080i, 720p, 480p, 480i
-COMPONENT: 480p, 480i
fN / X (PLAY / PAUSE) Starts playback.
Pause playback or recording temporarily, press again to exit pause mode.
gx (STOP)
Stops playback or recording.
hz (REC)
Starts recording. Press repeatedly to set the recording time.
iCH (V/v)
Scans up or down through memorized channels.
b c d e f g h i jk
n o p
j PIP: Selects PIP function on or off.
k Remote Sensor
Point the recorder remote control here.
l MEMORY CARD Slot 1
Insert a memory card (CF/MD/ST1 MD).
m MEMORY CARD Slot 2
Insert a memory card (SD/Mini SD/MMC/
MMC Plus/RS MMC/MMC Mobile/xD/MS/
MS
n DV IN
Connect the DV output of a digital camcorder.
o AV IN 2
Connect the
p AV IN 2 (VIDEO IN/AUDIO IN (Left/Right)) Connect the audio/video output of an external source (Audio system, TV/ Monitor, VCR, Camcorder, etc.).
Introduction
9