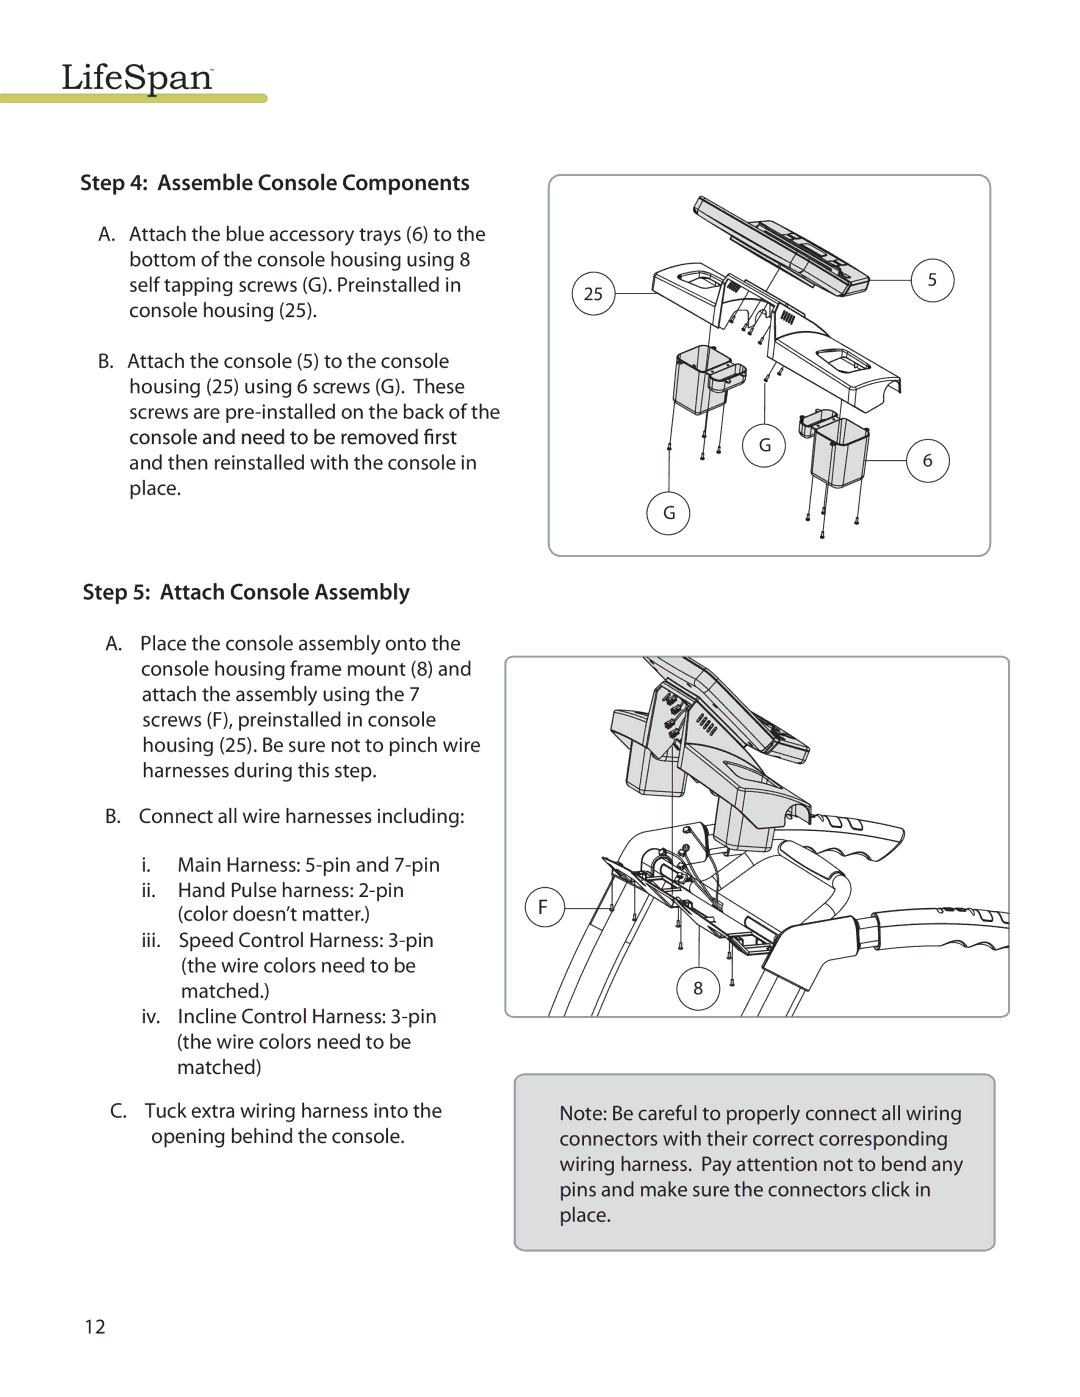
Step 4: Assemble Console Components
A.Attach the blue accessory trays (6) to the bottom of the console housing using 8 self tapping screws (G). Preinstalled in console housing (25).
B.Attach the console (5) to the console housing (25) using 6 screws (G). These screws are
and then reinstalled with the console in place.
25
G
5
G
6
Step 5: Attach Console Assembly
A.Place the console assembly onto the console housing frame mount (8) and attach the assembly using the 7 screws (F), preinstalled in console housing (25). Be sure not to pinch wire harnesses during this step.
B.Connect all wire harnesses including:
i.Main Harness:
ii.Hand Pulse harness:
iii.Speed Control Harness:
(the wire colors need to be matched.)
iv.Incline Control Harness:
C.Tuck extra wiring harness into the opening behind the console.
F
8
Note: Be careful to properly connect all wiring connectors with their correct corresponding wiring harness. Pay attention not to bend any pins and make sure the connectors click in place.
12