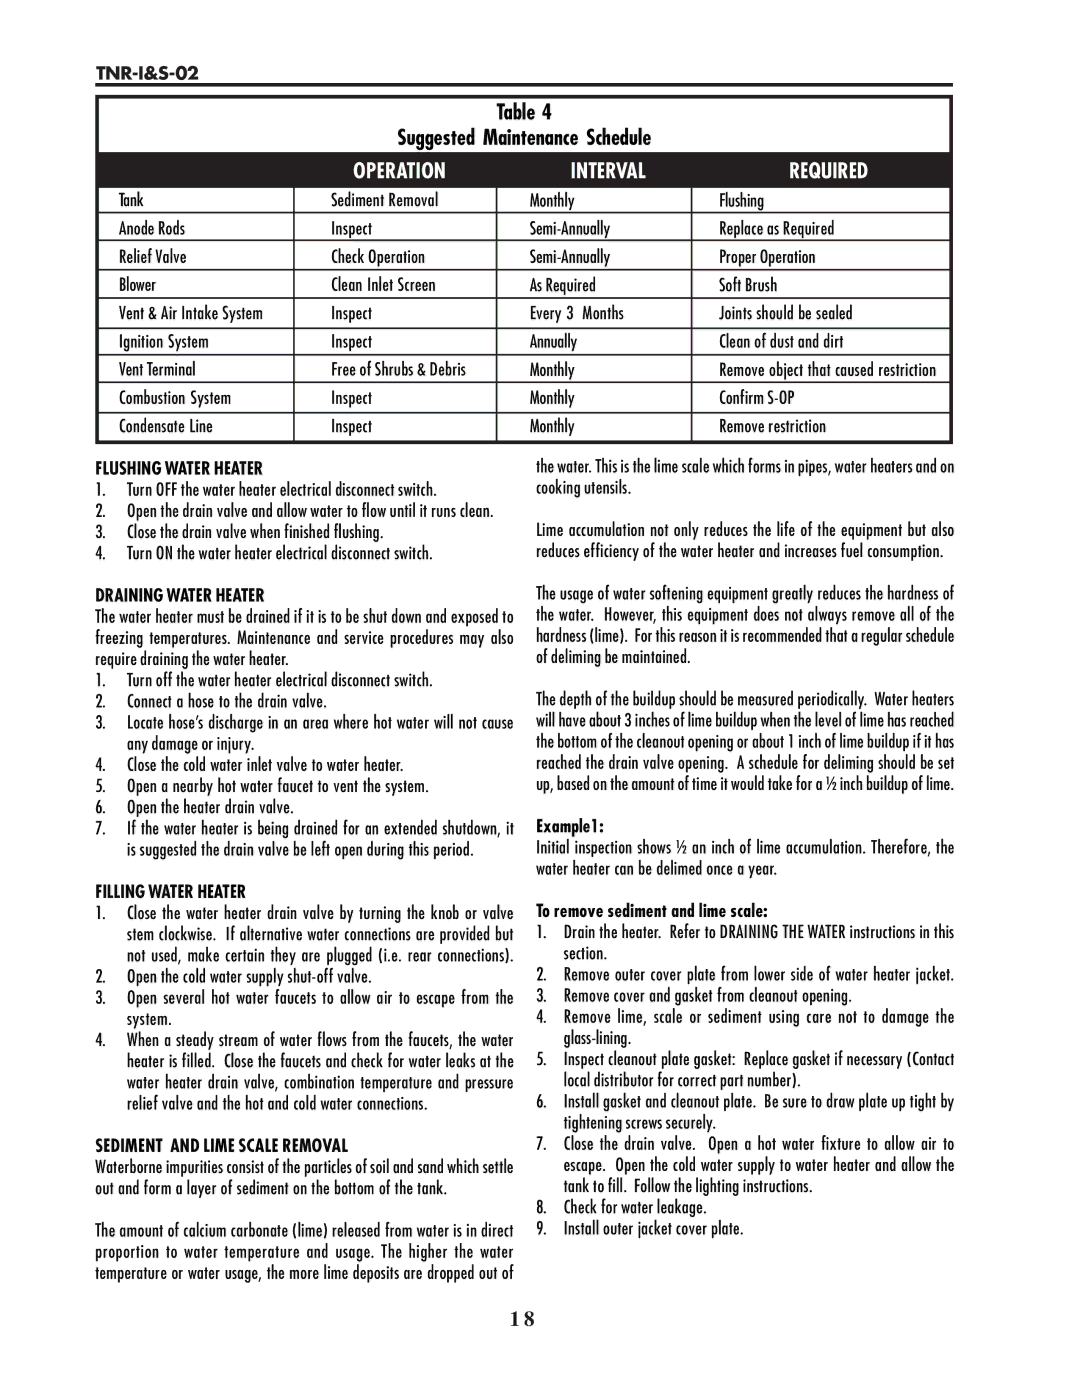
Table 4
Suggested Maintenance Schedule
COMPONENT | OPERATION | INTERVAL | REQUIRED |
Tank | Sediment Removal | Monthly | Flushing |
Anode Rods | Inspect | Replace as Required | |
Relief Valve | Check Operation | Proper Operation | |
Blower | Clean Inlet Screen | As Required | Soft Brush |
|
|
|
|
Vent & Air Intake System | Inspect | Every 3 Months | Joints should be sealed |
|
|
|
|
Ignition System | Inspect | Annually | Clean of dust and dirt |
|
|
|
|
Vent Terminal | Free of Shrubs & Debris | Monthly | Remove object that caused restriction |
Combustion System | Inspect | Monthly | Confirm |
|
|
|
|
Condensate Line | Inspect | Monthly | Remove restriction |
|
|
|
|
FLUSHING WATER HEATER
1.Turn OFF the water heater electrical disconnect switch.
2.Open the drain valve and allow water to flow until it runs clean.
3.Close the drain valve when finished flushing.
4.Turn ON the water heater electrical disconnect switch.
DRAINING WATER HEATER
The water heater must be drained if it is to be shut down and exposed to freezing temperatures. Maintenance and service procedures may also require draining the water heater.
1.Turn off the water heater electrical disconnect switch.
2.Connect a hose to the drain valve.
3.Locate hose’s discharge in an area where hot water will not cause any damage or injury.
4.Close the cold water inlet valve to water heater.
5.Open a nearby hot water faucet to vent the system.
6.Open the heater drain valve.
7.If the water heater is being drained for an extended shutdown, it is suggested the drain valve be left open during this period.
FILLING WATER HEATER
1.Close the water heater drain valve by turning the knob or valve stem clockwise. If alternative water connections are provided but not used, make certain they are plugged (i.e. rear connections).
2.Open the cold water supply
3.Open several hot water faucets to allow air to escape from the system.
4.When a steady stream of water flows from the faucets, the water heater is filled. Close the faucets and check for water leaks at the water heater drain valve, combination temperature and pressure relief valve and the hot and cold water connections.
SEDIMENT AND LIME SCALE REMOVAL
Waterborne impurities consist of the particles of soil and sand which settle out and form a layer of sediment on the bottom of the tank.
The amount of calcium carbonate (lime) released from water is in direct proportion to water temperature and usage. The higher the water temperature or water usage, the more lime deposits are dropped out of
the water. This is the lime scale which forms in pipes, water heaters and on cooking utensils.
Lime accumulation not only reduces the life of the equipment but also reduces efficiency of the water heater and increases fuel consumption.
The usage of water softening equipment greatly reduces the hardness of the water. However, this equipment does not always remove all of the hardness (lime). For this reason it is recommended that a regular schedule of deliming be maintained.
The depth of the buildup should be measured periodically. Water heaters will have about 3 inches of lime buildup when the level of lime has reached the bottom of the cleanout opening or about 1 inch of lime buildup if it has reached the drain valve opening. A schedule for deliming should be set up, based on the amount of time it would take for a ½ inch buildup of lime.
Example1:
Initial inspection shows ½ an inch of lime accumulation. Therefore, the water heater can be delimed once a year.
To remove sediment and lime scale:
1.Drain the heater. Refer to DRAINING THE WATER instructions in this section.
2.Remove outer cover plate from lower side of water heater jacket.
3.Remove cover and gasket from cleanout opening.
4.Remove lime, scale or sediment using care not to damage the
5.Inspect cleanout plate gasket: Replace gasket if necessary (Contact local distributor for correct part number).
6.Install gasket and cleanout plate. Be sure to draw plate up tight by tightening screws securely.
7.Close the drain valve. Open a hot water fixture to allow air to escape. Open the cold water supply to water heater and allow the tank to fill. Follow the lighting instructions.
8.Check for water leakage.
9.Install outer jacket cover plate.
1 8
