P 7/ 20
 Repair
[3]DISASSEMBLY/ASSEMBLY
[3]-2. Barrel Section (cont.)
ASSEMBLING
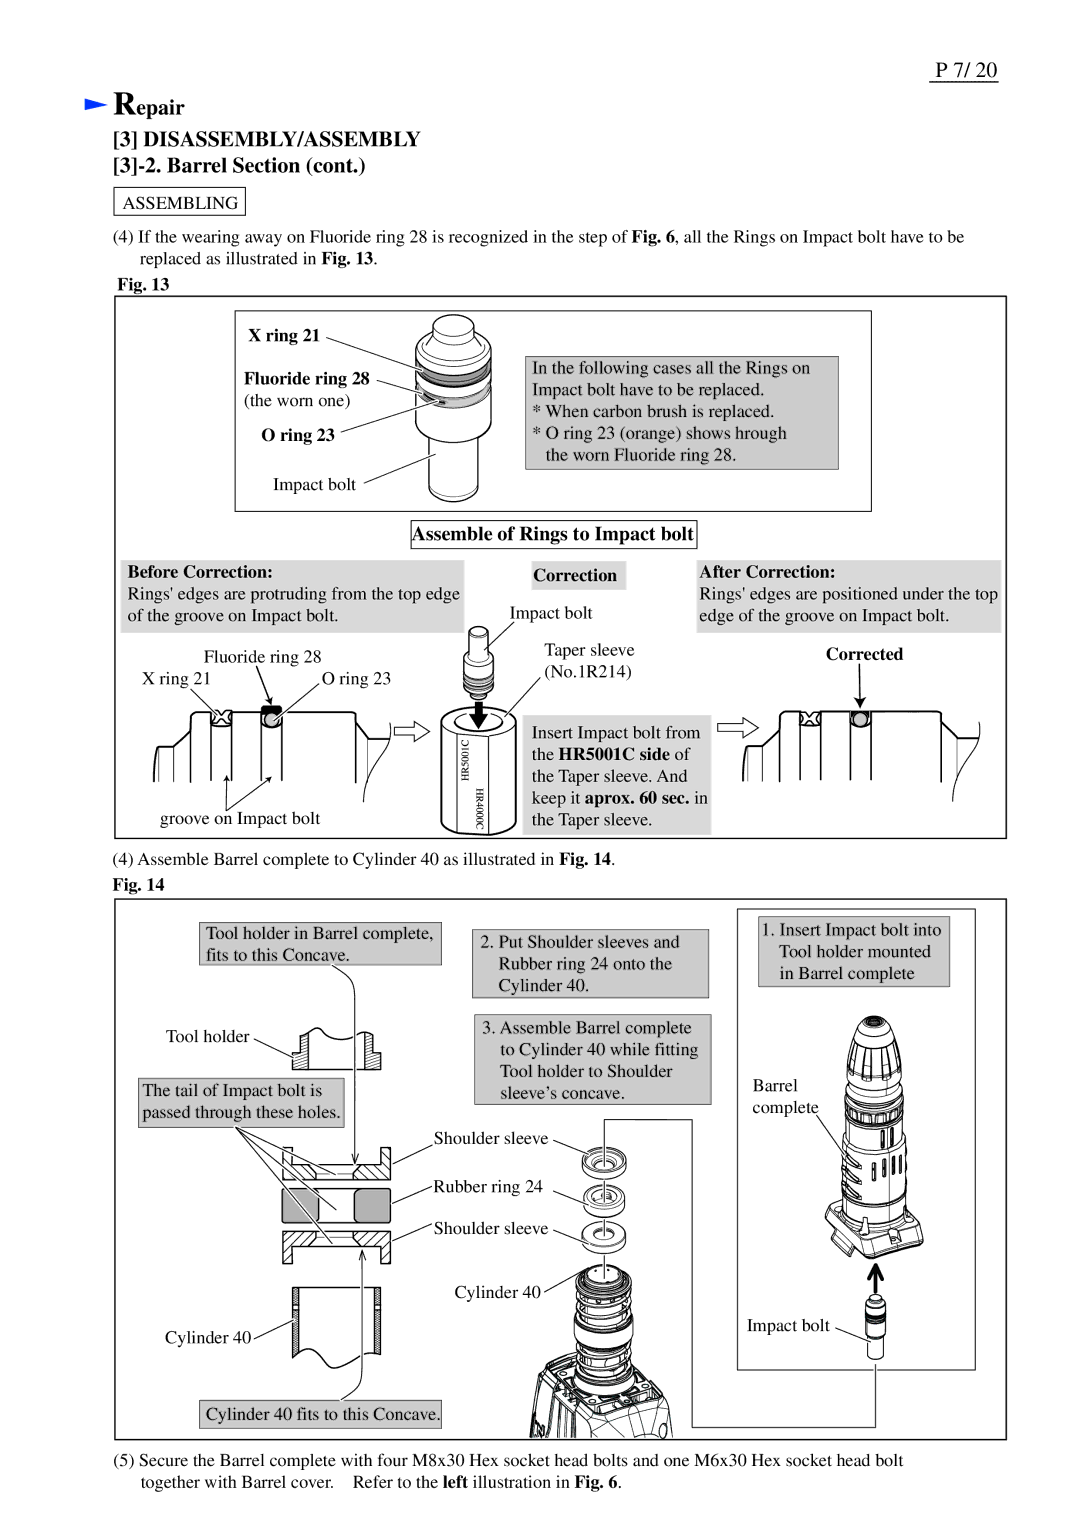
(4)If the wearing away on Fluoride ring 28 is recognized in the step of Fig. 6, all the Rings on Impact bolt have to be replaced as illustrated in Fig. 13.
Fig. 13
X ring 21
Fluoride ring 28 (the worn one)
O ring 23
Impact bolt ![]()
In the following cases all the Rings on Impact bolt have to be replaced.
*When carbon brush is replaced.
*O ring 23 (orange) shows hrough the worn Fluoride ring 28.
Assemble of Rings to Impact bolt
Before Correction:
Rings' edges are protruding from the top edge of the groove on Impact bolt.
Fluoride ring 28 |
|
X ring 21 | O ring 23 |
groove on Impact bolt
| Correction |
| After Correction: | |
|
|
| Rings' edges are positioned under the top | |
Impact bolt | ||||
edge of the groove on Impact bolt. | ||||
| Taper sleeve |
| ||
| Corrected | |||
| (No.1R214) |
| ||
Insert Impact bolt from the HR5001C side of
the Taper sleeve. And keep it aprox. 60 sec. in the Taper sleeve.
(4)Assemble Barrel complete to Cylinder 40 as illustrated in Fig. 14.
Fig. 14
Tool holder in Barrel complete, |
|
|
| 2. Put Shoulder sleeves and | |
fits to this Concave. |
| |
| Rubber ring 24 onto the | |
|
| |
|
| Cylinder 40. |
|
|
|
1.Insert Impact bolt into Tool holder mounted in Barrel complete
Tool holder
The tail of Impact bolt is passed through these holes.
Cylinder 40 ![]()
3.Assemble Barrel complete to Cylinder 40 while fitting Tool holder to Shoulder sleeve’s concave.
Shoulder sleeve
Rubber ring 24
![]() Shoulder sleeve
Shoulder sleeve
Cylinder 40 ![]()
Barrel complete
Impact bolt
Cylinder 40 fits to this Concave.
(5)Secure the Barrel complete with four M8x30 Hex socket head bolts and one M6x30 Hex socket head bolt together with Barrel cover. Refer to the left illustration in Fig. 6.
