P 15/ 20
 Repair
[3]DISASSEMBLY/ASSEMBLY [3]-5. Motor section
DISASSEMBLING
(1)Remove Rear cover (with “AVT” mark) from Crank housing complete (Re: the right illustration in Fig. 17)
(2)Disconnecting Carbon brush from Armature’s commutator, separate Motor housing from Crank housing complete. (Fig. 18)
(3)Disassemble Armature, by striking the edge of Crank housing complete. (Fig. 19)
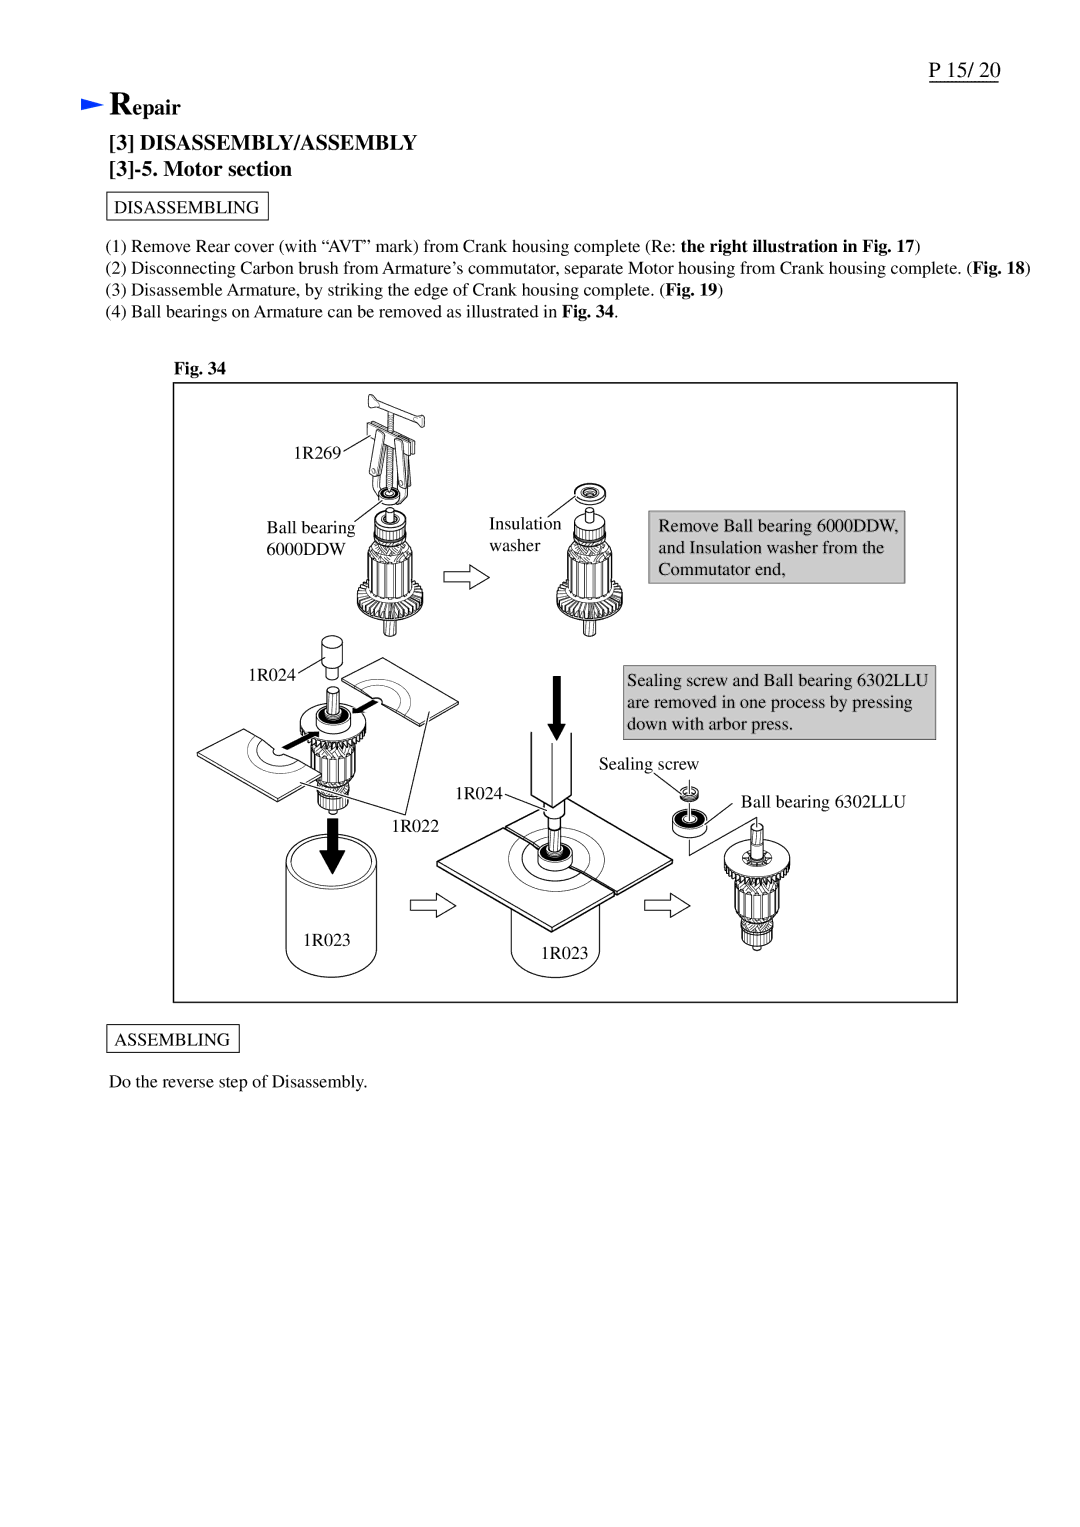
(4)Ball bearings on Armature can be removed as illustrated in Fig. 34.
Fig. 34
1R269![]()
![]()
![]()
![]()
Ball bearing 6000DDW
1R024 ![]()
Insulation ![]()
![]() washer
washer ![]()
![]()
Remove Ball bearing 6000DDW, and Insulation washer from the Commutator end,
Sealing screw and Ball bearing 6302LLU are removed in one process by pressing down with arbor press.
1R022
| Sealing screw |
1R024 | Ball bearing 6302LLU |
|
1R023
ASSEMBLING
1R023
Do the reverse step of Disassembly.