P 10/ 26
 Repair
[9] Mounting turn base to base
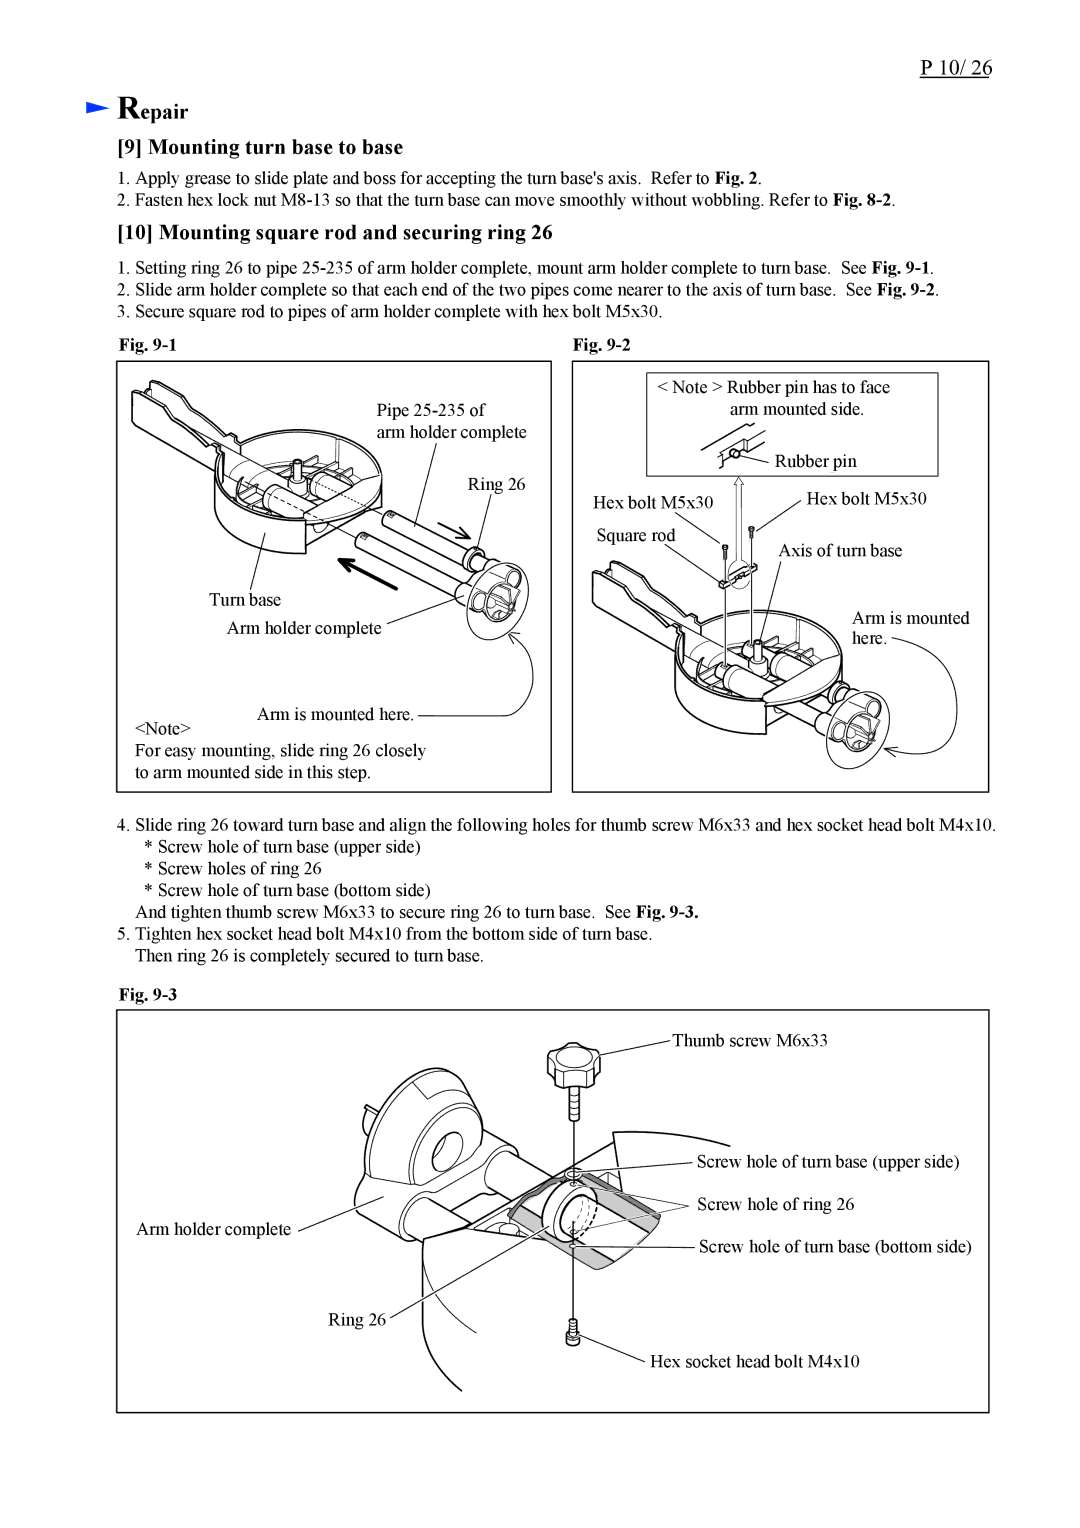
1.Apply grease to slide plate and boss for accepting the turn base's axis. Refer to Fig. 2.
2.Fasten hex lock nut
[10] Mounting square rod and securing ring 26
1.Setting ring 26 to pipe
2.Slide arm holder complete so that each end of the two pipes come nearer to the axis of turn base. See Fig.
3.Secure square rod to pipes of arm holder complete with hex bolt M5x30.
Fig.
Pipe
arm holder complete
Fig.
<Note > Rubber pin has to face arm mounted side.
![]() Rubber pin
Rubber pin
Ring 26
Turn base
Arm holder complete
<Note>
For easy mounting, slide ring 26 closely to arm mounted side in this step.
Hex bolt M5x30 Square rod![]()
Hex bolt M5x30
Axis of turn base
Arm is mounted here.
4.Slide ring 26 toward turn base and align the following holes for thumb screw M6x33 and hex socket head bolt M4x10.
*Screw hole of turn base (upper side)
*Screw holes of ring 26
*Screw hole of turn base (bottom side)
And tighten thumb screw M6x33 to secure ring 26 to turn base. See Fig.
5.Tighten hex socket head bolt M4x10 from the bottom side of turn base. Then ring 26 is completely secured to turn base.
Fig.
Arm holder complete
Thumb screw M6x33
![]() Screw hole of turn base (upper side)
Screw hole of turn base (upper side) ![]()
![]() Screw hole of ring 26
Screw hole of ring 26
![]()
![]()
![]() Screw hole of turn base (bottom side)
Screw hole of turn base (bottom side)
Ring 26
![]() Hex socket head bolt M4x10
Hex socket head bolt M4x10
