P 19/ 26
 Repair
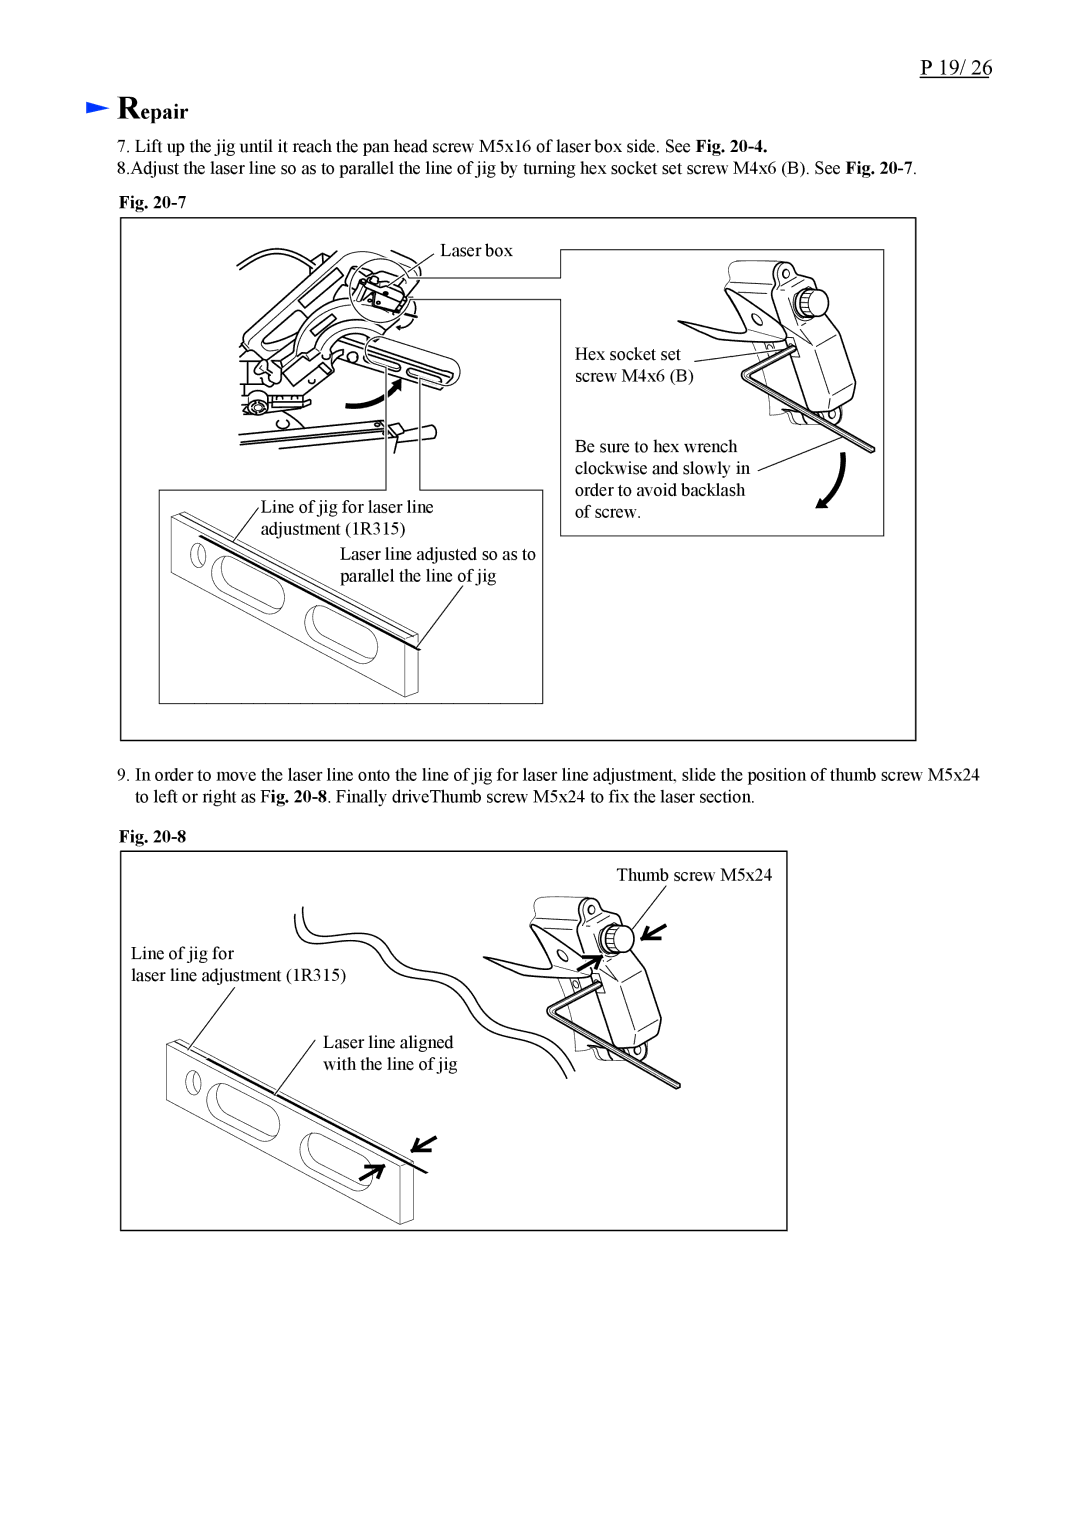
7. Lift up the jig until it reach the pan head screw M5x16 of laser box side. See Fig.
8.Adjust the laser line so as to parallel the line of jig by turning hex socket set screw M4x6 (B). See Fig.
Fig.
Laser box
Hex socket set ![]() screw M4x6 (B)
screw M4x6 (B)
Line of jig for laser line adjustment (1R315)
Laser line adjusted so as to parallel the line of jig
Be sure to hex wrench ![]() clockwise and slowly in
clockwise and slowly in
order to avoid backlash of screw.
9.In order to move the laser line onto the line of jig for laser line adjustment, slide the position of thumb screw M5x24 to left or right as Fig.
Fig.
Thumb screw M5x24
Line of jig for
laser line adjustment (1R315)
Laser line aligned with the line of jig