Disassembly Procedures
!WARNING
To avoid the risk of electrical shock, personal injury or death; disconnect power to oven and discharge capacitors before following any disassembly procedure.
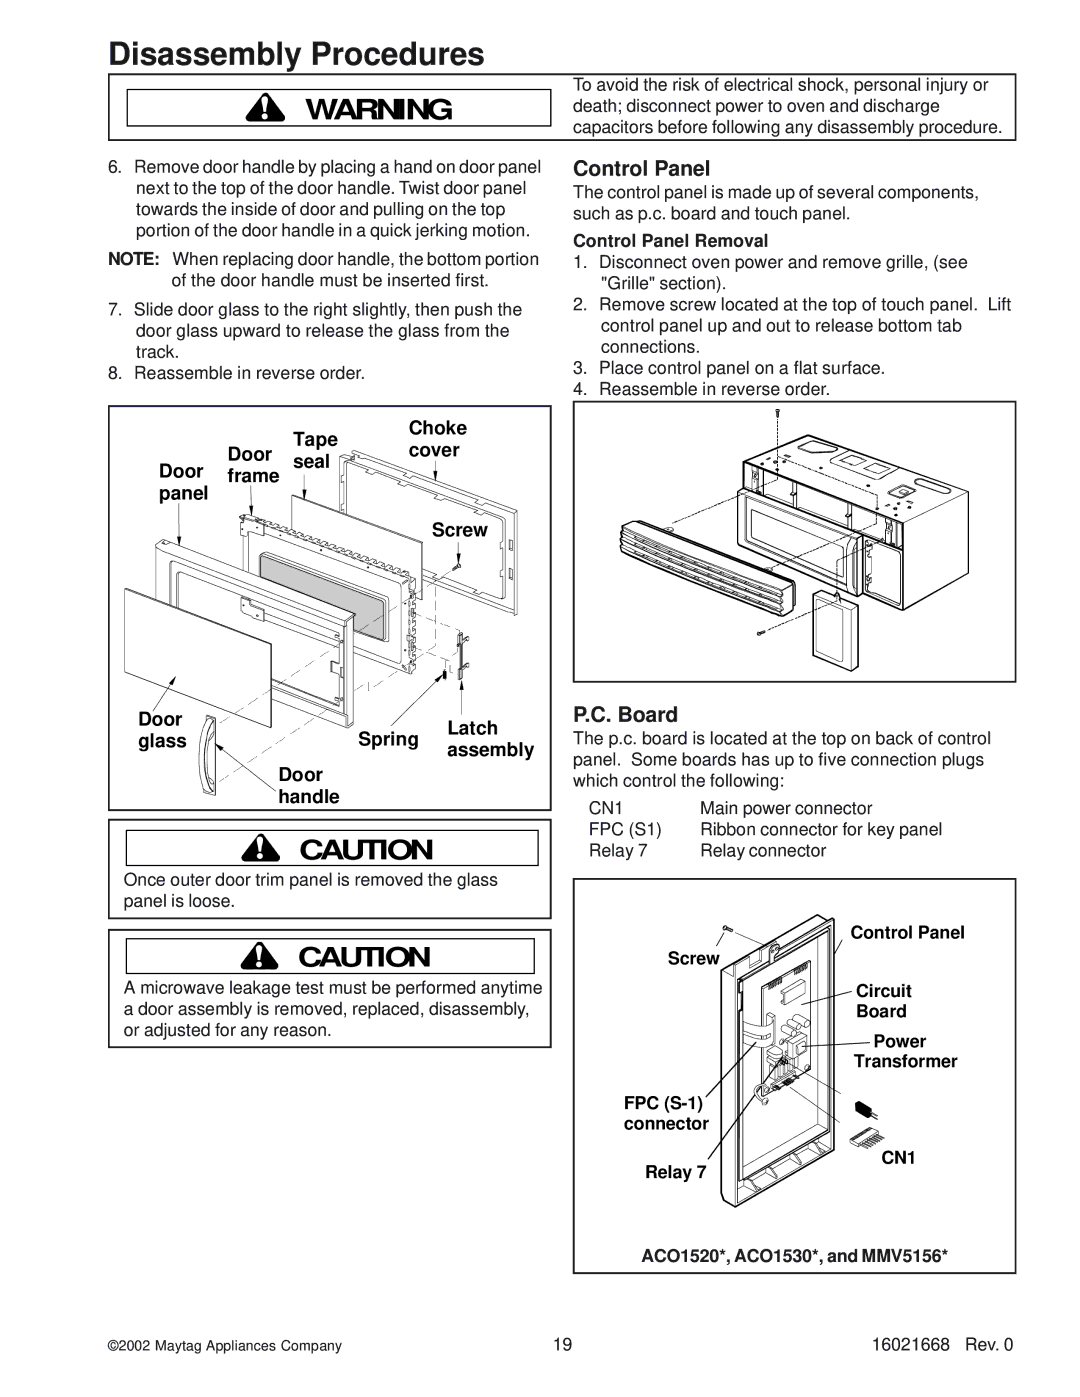
6.Remove door handle by placing a hand on door panel next to the top of the door handle. Twist door panel towards the inside of door and pulling on the top portion of the door handle in a quick jerking motion.
NOTE: When replacing door handle, the bottom portion of the door handle must be inserted first.
7.Slide door glass to the right slightly, then push the door glass upward to release the glass from the track.
8.Reassemble in reverse order.
Control Panel
The control panel is made up of several components, such as p.c. board and touch panel.
Control Panel Removal
1.Disconnect oven power and remove grille, (see "Grille" section).
2.Remove screw located at the top of touch panel. Lift control panel up and out to release bottom tab connections.
3.Place control panel on a flat surface.
4.Reassemble in reverse order.
|
| Tape | Choke | ||
| Door | cover | |||
Door | seal | ||||
|
| ||||
frame |
|
| |||
panel |
|
|
|
| |
|
|
| Screw | ||
Door |
|
| Spring | Latch | |
glass |
|
| |||
|
| assembly | |||
|
|
|
| ||
|
| Door |
|
| |
|
| handle |
|
| |
| ! | CAUTION |
| ||
Once outer door trim panel is removed the glass panel is loose.
!CAUTION
A microwave leakage test must be performed anytime a door assembly is removed, replaced, disassembly, or adjusted for any reason.
P.C. Board
The p.c. board is located at the top on back of control panel. Some boards has up to five connection plugs which control the following:
CN1 | Main power connector |
FPC (S1) | Ribbon connector for key panel |
Relay 7 | Relay connector |
Control Panel
Screw![]()
Circuit
Board
![]()
![]()
![]() Power
Power
Transformer
FPC
CN1
Relay 7
ACO1520*, ACO1530*, and MMV5156*
©2002 Maytag Appliances Company | 19 | 16021668 Rev. 0 |
