Installation Instruction
Preparing Electrical Connection
!WARNING
To avoid risk of electrical shock, this appliance must be grounded.
1.Locate grounded electrical outlet for oven in the cabinet above the oven.
NOTE: Outlet should be on a circuit dedicated to the microwave oven (120 VAC, 60 Hz) with a 20 Amp fused electrical supply.
NOTE: If proper wall outlet is not present, one must be installed by a qualified electrician.
2.Power supply cord hole will be cut later when preparing the wall and upper cabinet.
Upper
Cabinet
![]() Grounded Outlet
Grounded Outlet ![]()
![]() (inside upper cabinet)
(inside upper cabinet)
Power Supply Cord Hole
NOTE: Do not use extension cord. Keep power cord dry and do not pinch or crush.
Preparing Venting System
Oven may be vented in one of three ways.
NOTE: Do not vent oven into a wall cavity, an attic or an unused area.
!WARNING
To avoid risk of fire, personal injury or property damage, oven must be properly vented.
NOTE: Duckwork needed for outside ventilation is not included with oven.
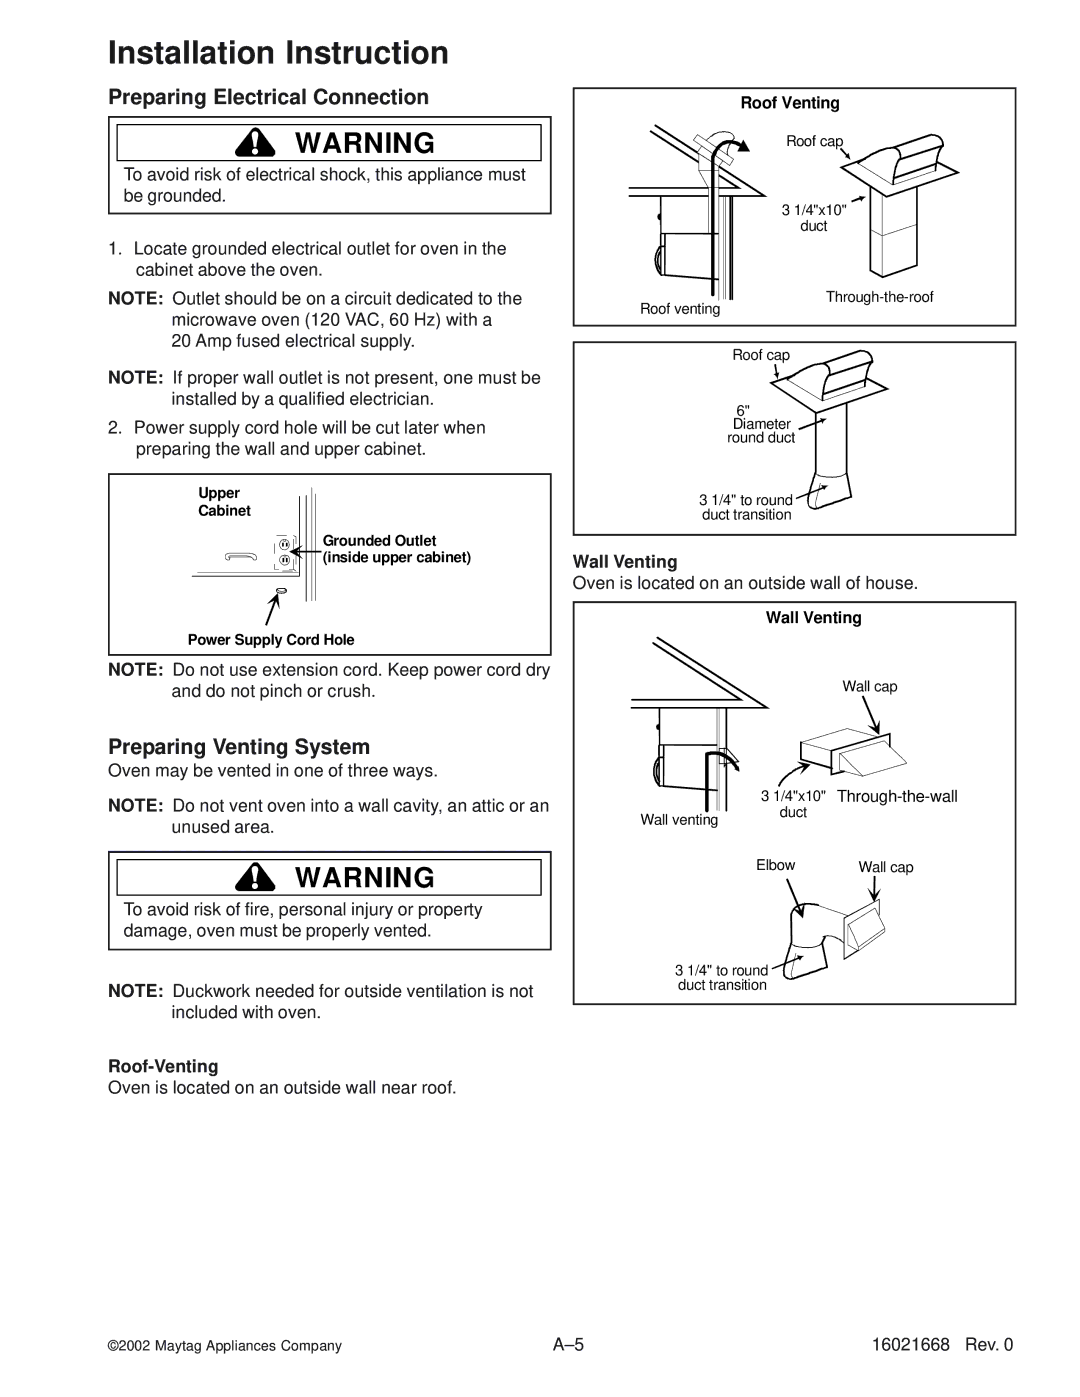
Roof-Venting
Oven is located on an outside wall near roof.
Roof Venting
Roof cap
3 1/4"x10"
duct
Roof venting
Roof cap
6" Diameter ![]() round duct
round duct
3 1/4" to round duct transition
Wall Venting
Oven is located on an outside wall of house.
Wall Venting
Wall cap
| 3 1/4"x10" | |
| duct |
|
Wall venting |
| |
|
| |
| Elbow | Wall cap |
3 1/4" to round duct transition
©2002 Maytag Appliances Company | 16021668 Rev. 0 |