Installation Instruction
Preparing Venting Blower
!WARNING
To avoid risk of electrical shock or personal injury, disconnect power to unit before working on vent blower.
NOTE: Do not pull or stretch blower wiring. Pulling or stretching blower wiring could result in electrical wiring damage.
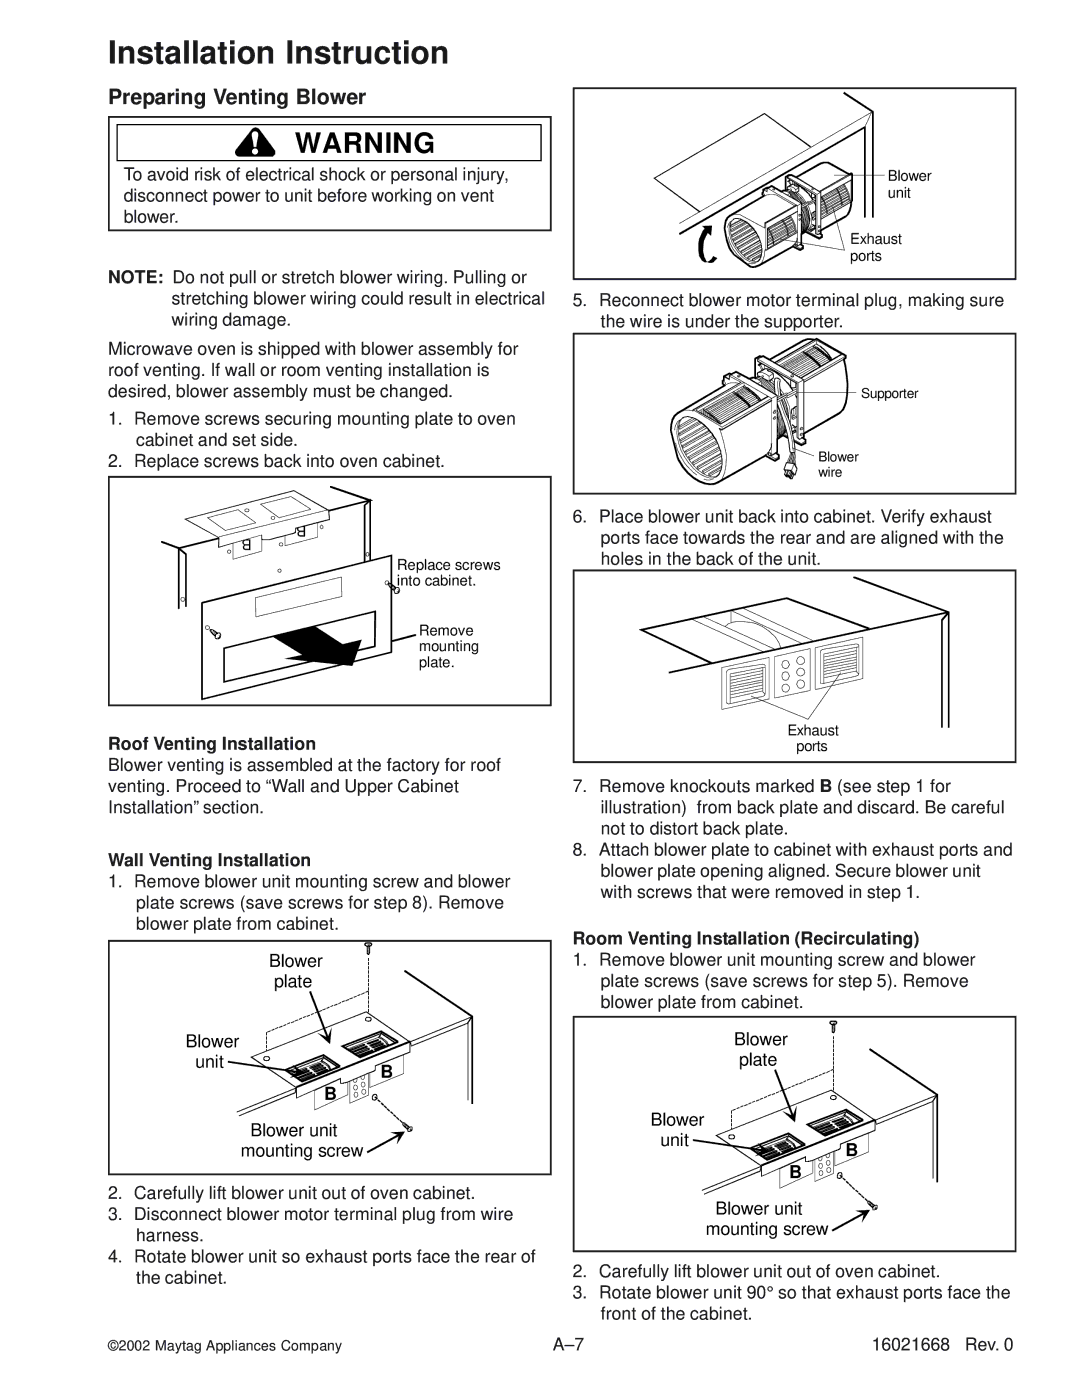
Microwave oven is shipped with blower assembly for roof venting. If wall or room venting installation is desired, blower assembly must be changed.
1.Remove screws securing mounting plate to oven cabinet and set side.
2.Replace screws back into oven cabinet.
B
Replace screws
![]() into cabinet.
into cabinet.
Remove mounting plate.
Roof Venting Installation
Blower venting is assembled at the factory for roof venting. Proceed to “Wall and Upper Cabinet Installation” section.
Wall Venting Installation
1.Remove blower unit mounting screw and blower plate screws (save screws for step 8). Remove blower plate from cabinet.
Blower
| plate |
Blower |
|
unit | B |
| |
| B |
| Blower unit |
| mounting screw |
2.Carefully lift blower unit out of oven cabinet.
3.Disconnect blower motor terminal plug from wire harness.
4.Rotate blower unit so exhaust ports face the rear of
the cabinet.
Blower unit
Exhaust ports
5.Reconnect blower motor terminal plug, making sure the wire is under the supporter.
Supporter
Blower wire
6.Place blower unit back into cabinet. Verify exhaust ports face towards the rear and are aligned with the holes in the back of the unit.
Exhaust ports
7.Remove knockouts marked B (see step 1 for illustration) from back plate and discard. Be careful not to distort back plate.
8.Attach blower plate to cabinet with exhaust ports and blower plate opening aligned. Secure blower unit with screws that were removed in step 1.
Room Venting Installation (Recirculating)
1.Remove blower unit mounting screw and blower plate screws (save screws for step 5). Remove blower plate from cabinet.
Blower
| plate |
Blower |
|
unit | B |
| |
| B |
| Blower unit |
| mounting screw |
2.Carefully lift blower unit out of oven cabinet.
3.Rotate blower unit 90° so that exhaust ports face the front of the cabinet.
©2002 Maytag Appliances Company | 16021668 Rev. 0 |
