27
Manually Lighting the Grill
!WARNING
To reduce the risk of serious bodily injury or death from fire or explosion:
• Open Hood before lighting the grill to prevent an explosion from gas
1.Open the Hood.
2.IMPORTANT: Make sure Control Knobs are turned “Off.” (Fig. 4 - P.26)
3.Turn the LP Gas Cylinder valve open counterclockwise until it stops. (Fig. 5- P.26)
4.Locate
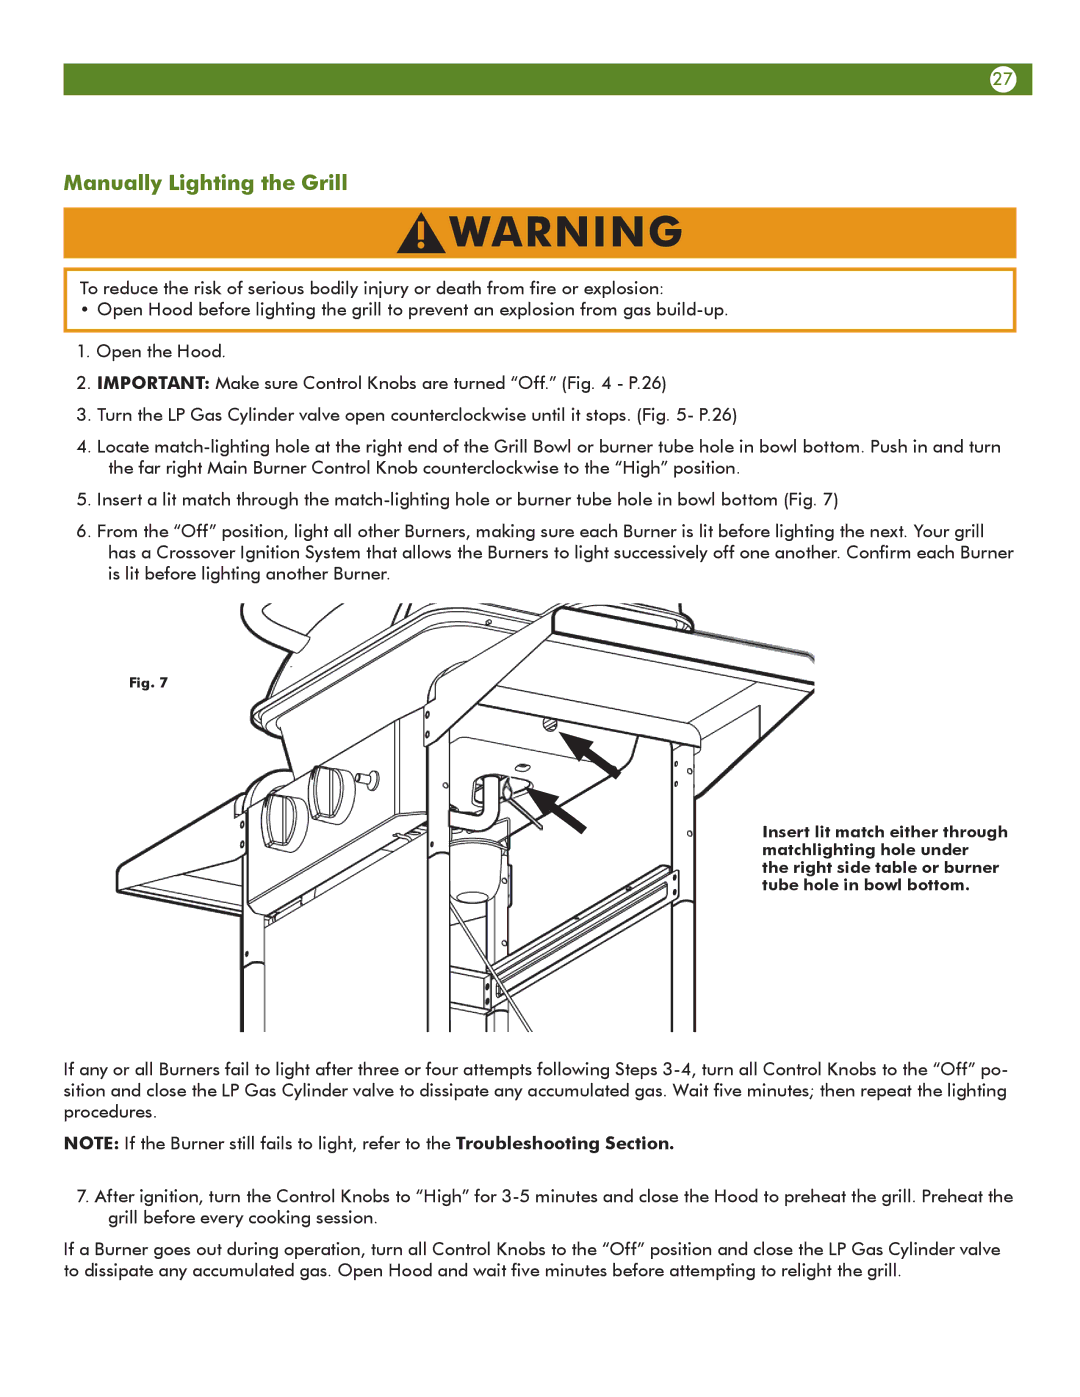
5.Insert a lit match through the
6.From the “Off” position, light all other Burners, making sure each Burner is lit before lighting the next. Your grill has a Crossover Ignition System that allows the Burners to light successively off one another. Confirm each Burner is lit before lighting another Burner.
Fig. 7
Insert lit match either through matchlighting hole under the right side table or burner tube hole in bowl bottom.
If any or all Burners fail to light after three or four attempts following Steps
NOTE: If the Burner still fails to light, refer to the Troubleshooting Section.
7.After ignition, turn the Control Knobs to “High” for
If a Burner goes out during operation, turn all Control Knobs to the “Off” position and close the LP Gas Cylinder valve to dissipate any accumulated gas. Open Hood and wait five minutes before attempting to relight the grill.