SETUP MENU (CONTINUED)
CLOCK SETUP MENU:
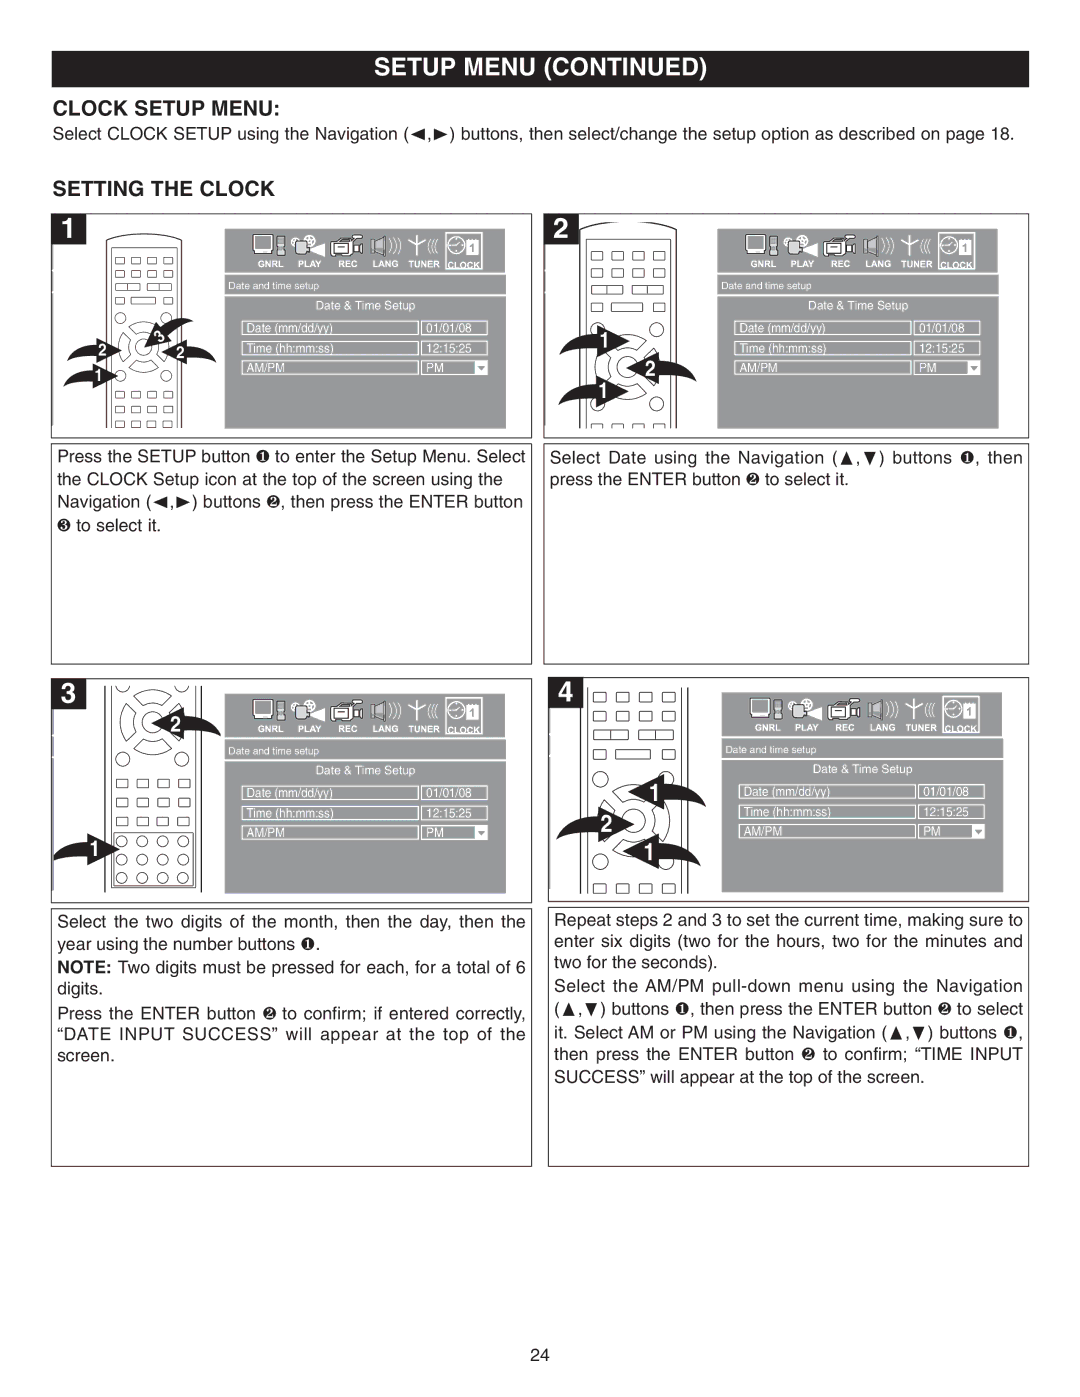
Select CLOCK SETUP using the Navigation (Ã,¨) buttons, then select/change the setup option as described on page 18.
SETTING THE CLOCK |
|
|
|
|
| ||
1 |
|
|
| 2 |
|
|
|
|
| Date and time setup |
|
|
| Date and time setup |
|
|
| Date & Time Setup |
|
|
| Date & Time Setup |
|
|
| Date (mm/dd/yy) | 01/01/08 | 1 |
| Date (mm/dd/yy) | 01/01/08 |
2 | 2 | Time (hh:mm:ss) | 12:15:25 |
| Time (hh:mm:ss) | 12:15:25 | |
| 2 | ||||||
1 |
| AM/PM | PM |
| AM/PM | PM | |
|
|
|
| ||||
|
|
|
| 1 |
|
|
|
Press the SETUP button ❶ to enter the Setup Menu. Select the CLOCK Setup icon at the top of the screen using the Navigation (Ã,¨) buttons ❷, then press the ENTER button 3 to select it.
Select Date using the Navigation (¹, ) buttons 1, then press the ENTER button 2 to select it.
3 |
| 4 |
|
|
2 |
|
|
|
|
Date and time setup |
|
| Date and time setup |
|
Date & Time Setup |
|
| Date & Time Setup |
|
Date (mm/dd/yy) | 01/01/08 | 1 | Date (mm/dd/yy) | 01/01/08 |
Time (hh:mm:ss) | 12:15:25 | 2 | Time (hh:mm:ss) | 12:15:25 |
AM/PM | PM | AM/PM | PM | |
1 |
| 1 |
|
|
Select the two digits of the month, then the day, then the year using the number buttons 1.
NOTE: Two digits must be pressed for each, for a total of 6 digits.
Press the ENTER button 2 to confirm; if entered correctly, “DATE INPUT SUCCESS” will appear at the top of the screen.
Repeat steps 2 and 3 to set the current time, making sure to enter six digits (two for the hours, two for the minutes and two for the seconds).
Select the AM/PM
24
