CONNECTION-IN
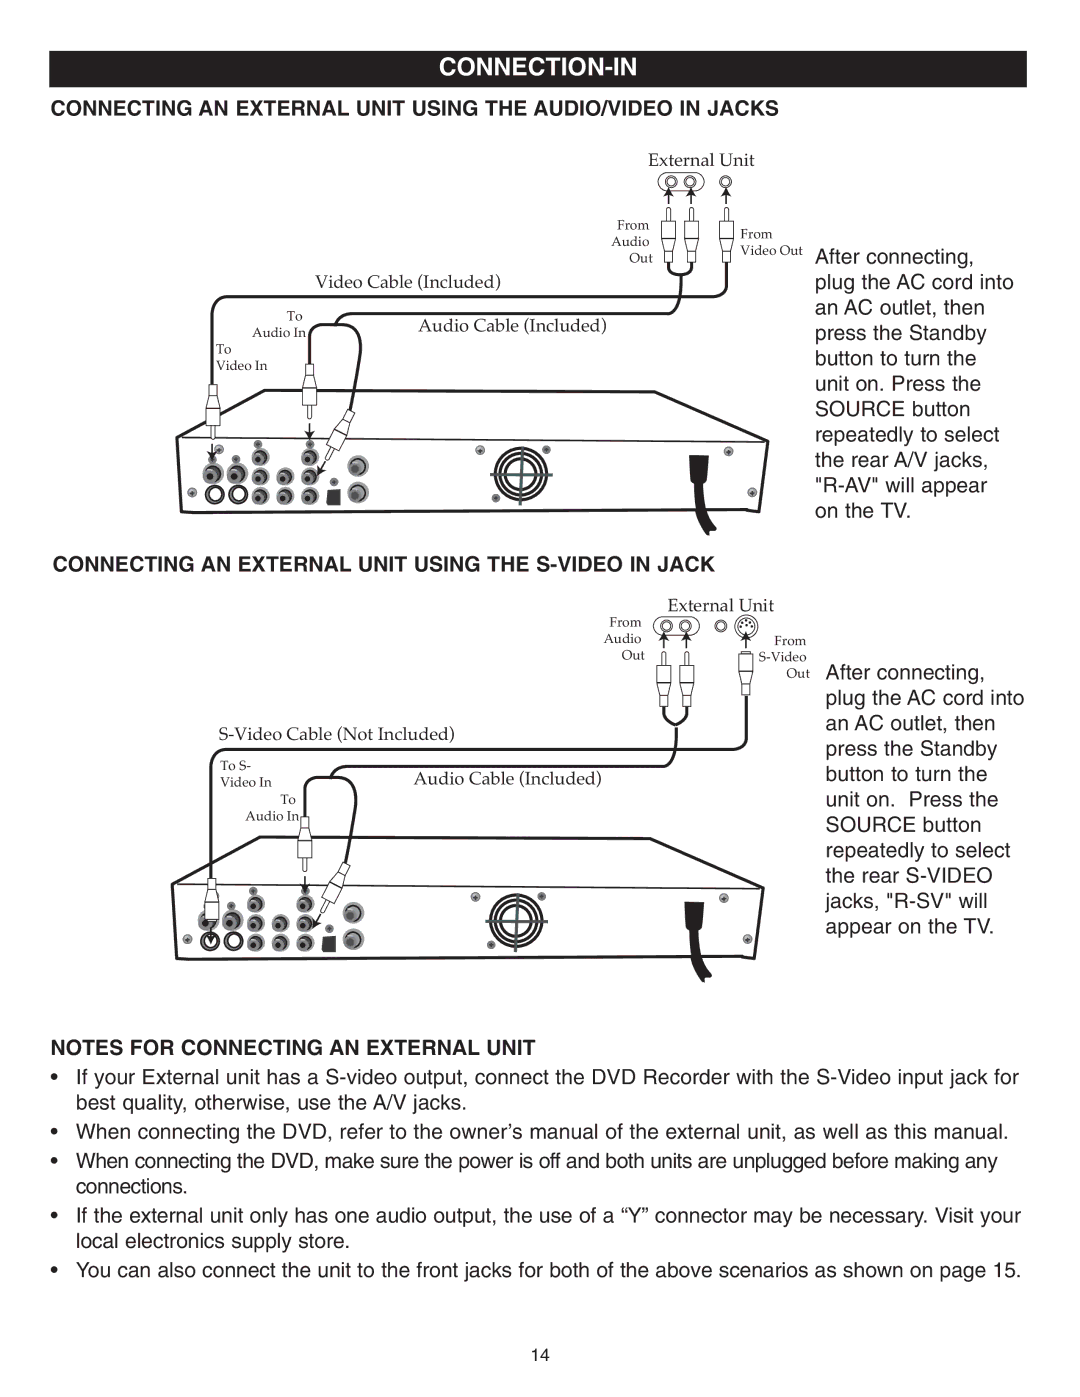
CONNECTING AN EXTERNAL UNIT USING THE AUDIO/VIDEO IN JACKS
External Unit
|
|
|
| From |
|
|
|
| Audio |
|
|
| Video Cable (Included) | Out |
| To |
| ||
To | Audio Cable (Included) |
| ||
Audio In |
| |||
Video In |
|
|
| |
|
|
| ||
![]() From
From ![]() Video Out
Video Out
After connecting, plug the AC cord into an AC outlet, then press the Standby button to turn the unit on. Press the SOURCE button repeatedly to select the rear A/V jacks,
CONNECTING AN EXTERNAL UNIT USING THE S-VIDEO IN JACK
External Unit
From
AudioFrom
Out |
Out
To S- |
| Audio Cable (Included) |
Video In |
| |
To |
|
|
Audio In |
|
|
|
| |
|
|
|
After connecting, plug the AC cord into an AC outlet, then press the Standby button to turn the unit on. Press the SOURCE button repeatedly to select the rear
NOTES FOR CONNECTING AN EXTERNAL UNIT
•If your External unit has a
•When connecting the DVD, refer to the owner’s manual of the external unit, as well as this manual.
•When connecting the DVD, make sure the power is off and both units are unplugged before making any connections.
•If the external unit only has one audio output, the use of a “Y” connector may be necessary. Visit your local electronics supply store.
•You can also connect the unit to the front jacks for both of the above scenarios as shown on page 15.
14