Screen Masking
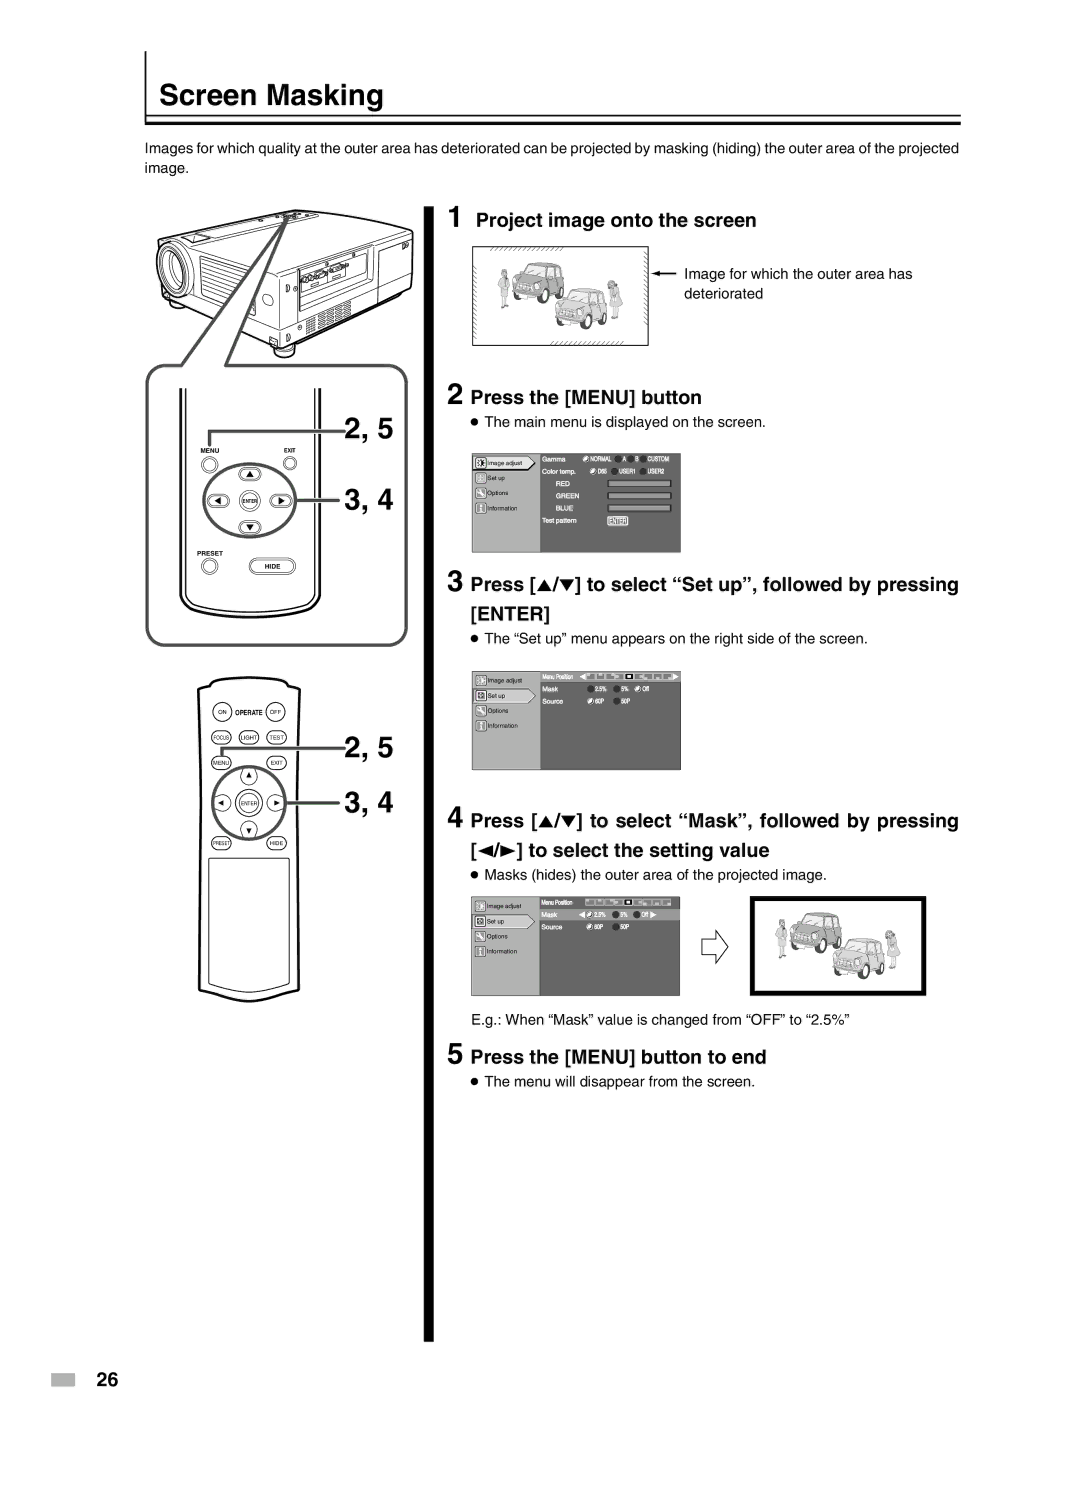
Images for which quality at the outer area has deteriorated can be projected by masking (hiding) the outer area of the projected image.
MENUEXIT
ENTER
PRESET
HIDE
ON OPERATE OFF
FOCUS LIGHT TEST
MENUEXIT
ENTER
PRESETHIDE
2, 5
3, 4
2, 5 3, 4
1 Project image onto the screen
Image for which the outer area has deteriorated
2 Press the [MENU] button
●The main menu is displayed on the screen.
Image adjust | Gamma | NORMAL | A B | CUSTOM |
|
|
|
| |
Set up | Color temp. | D65 | USER1 | USER2 |
RED |
|
|
| |
|
|
|
| |
Options | GREEN |
|
|
|
|
|
|
| |
Information | BLUE |
|
|
|
| Test pattern | ENTER |
| |
3 Press [5/∞] to select “Set up”, followed by pressing
[ENTER]
●The “Set up” menu appears on the right side of the screen.
Image adjust | Menu Position |
|
|
|
|
|
|
| |
Set up | Mask | 2.5% | 5% | Off |
Source | 60P | 50P |
| |
|
| |||
Options |
|
|
|
|
Information |
|
|
|
|
4 Press [5/∞] to select “Mask”, followed by pressing [2/3] to select the setting value
●Masks (hides) the outer area of the projected image.
Image adjust
Menu Position
Mask | 2.5% | 5% | Off |
Set up | 60P | 50P |
|
Source |
|
![]() Options
Options
![]() Information
Information
E.g.: When “Mask” value is changed from “OFF” to “2.5%”
5 Press the [MENU] button to end
●The menu will disappear from the screen.
26
