If users cannot see the access point, please click ‘Rescan’ button to scan for access point again, until the one preferred is displayed on the interface. Users may have to click ‘Rescan’ for more than two times before the access point wish to connect appears. If user still cannot see the access point after clicking ‘Rescan’ for more than five times, please move the computer closer to the wireless access point.
If users wish to see detailed information for a specific access point, please
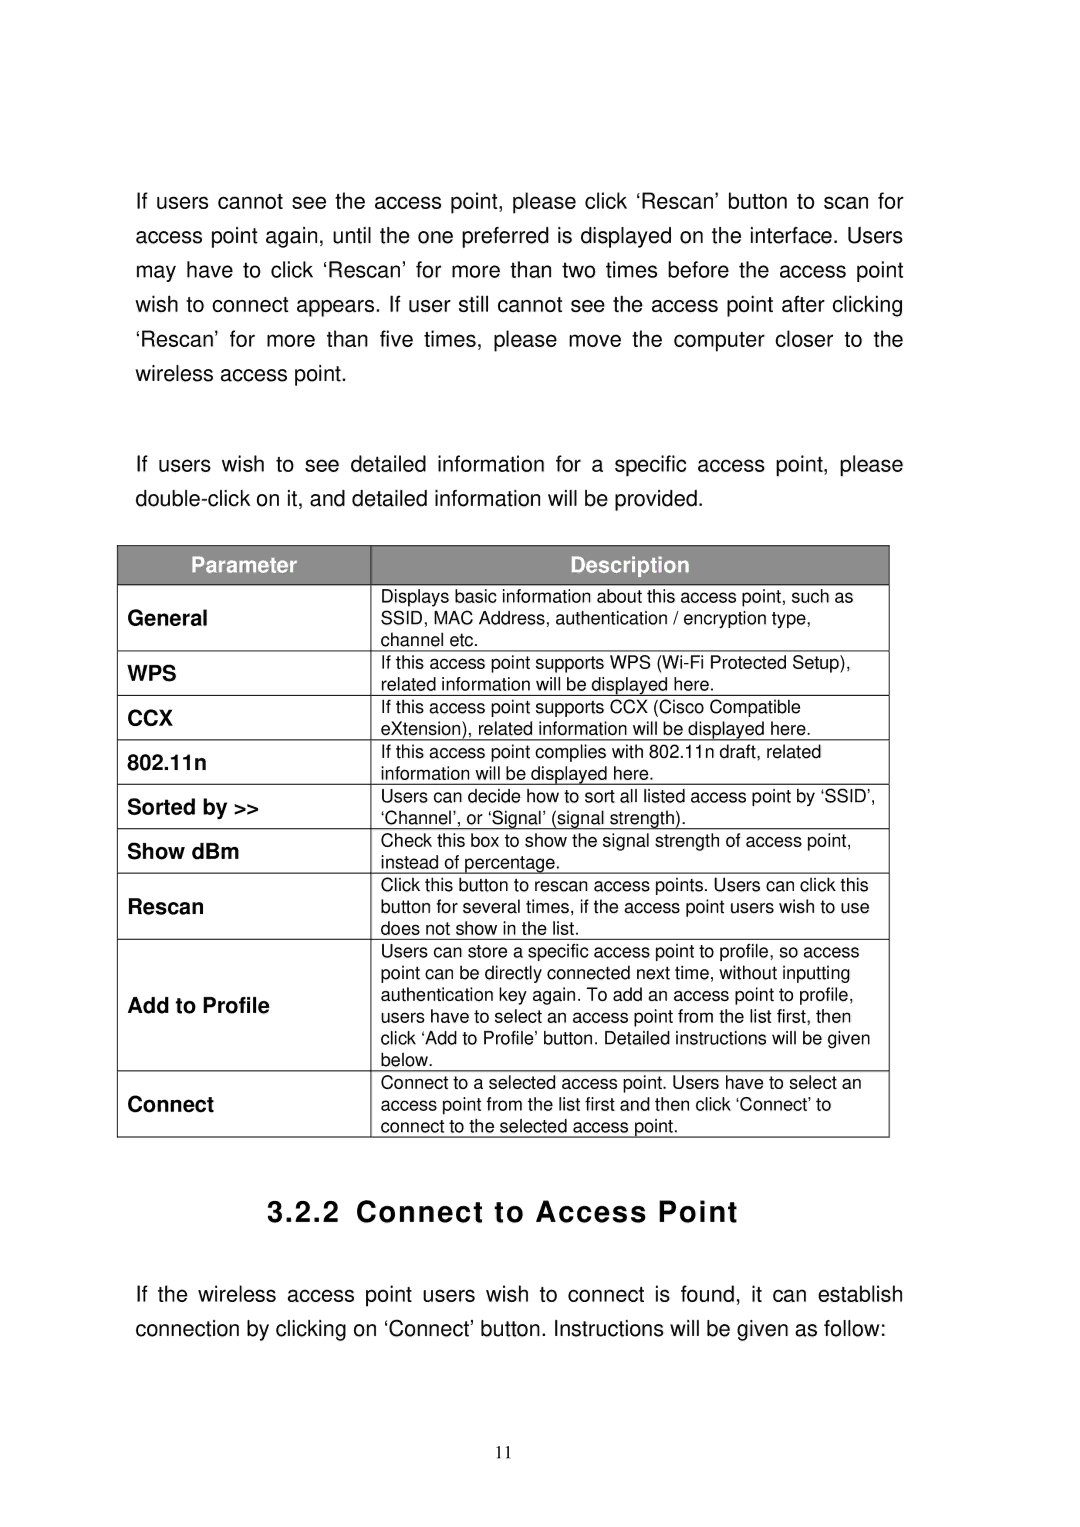
| Parameter |
| Description |
|
|
|
|
| General |
| Displays basic information about this access point, such as |
|
| SSID, MAC Address, authentication / encryption type, | |
|
|
| channel etc. |
| WPS |
| If this access point supports WPS |
|
| related information will be displayed here. | |
|
|
| |
| CCX |
| If this access point supports CCX (Cisco Compatible |
|
| eXtension), related information will be displayed here. | |
|
|
| |
| 802.11n |
| If this access point complies with 802.11n draft, related |
|
| information will be displayed here. | |
|
|
| |
| Sorted by >> |
| Users can decide how to sort all listed access point by ‘SSID’, |
|
| ‘Channel’, or ‘Signal’ (signal strength). | |
|
|
| |
| Show dBm |
| Check this box to show the signal strength of access point, |
|
| instead of percentage. | |
|
|
| |
| Rescan |
| Click this button to rescan access points. Users can click this |
|
| button for several times, if the access point users wish to use | |
|
|
| does not show in the list. |
|
|
| Users can store a specific access point to profile, so access |
|
|
| point can be directly connected next time, without inputting |
| Add to Profile |
| authentication key again. To add an access point to profile, |
|
| users have to select an access point from the list first, then | |
|
|
| |
|
|
| click ‘Add to Profile’ button. Detailed instructions will be given |
|
|
| below. |
| Connect |
| Connect to a selected access point. Users have to select an |
|
| access point from the list first and then click ‘Connect’ to | |
|
|
| connect to the selected access point. |
3.2.2 Connect to Access Point
If the wireless access point users wish to connect is found, it can establish connection by clicking on ‘Connect’ button. Instructions will be given as follow:
11