]öConversion to alternative types of gas
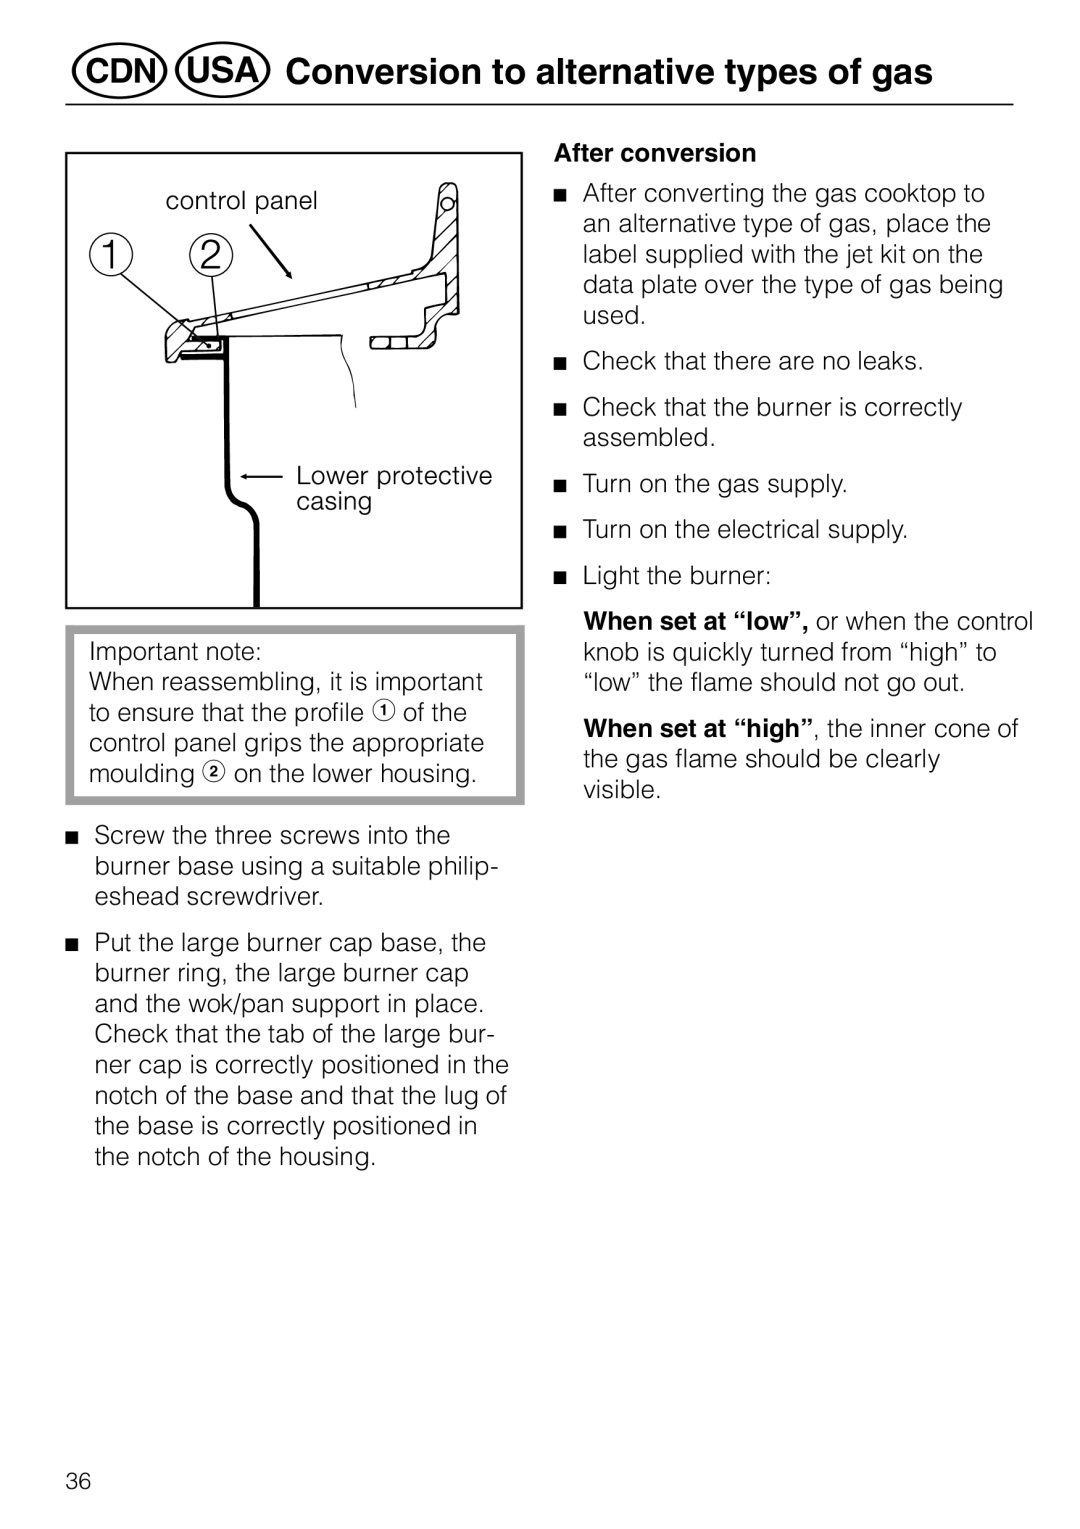
Important note:
When reassembling, it is important to ensure that the profile b of the control panel grips the appropriate moulding c on the lower housing.
Screw the three screws into the burner base using a suitable philip- eshead screwdriver.
Put the large burner cap base, the burner ring, the large burner cap and the wok/pan support in place. Check that the tab of the large bur- ner cap is correctly positioned in the notch of the base and that the lug of the base is correctly positioned in the notch of the housing.
After conversion
After converting the gas cooktop to an alternative type of gas, place the label supplied with the jet kit on the data plate over the type of gas being used.
Check that there are no leaks.
Check that the burner is correctly assembled.
Turn on the gas supply.
Turn on the electrical supply.
Light the burner:
When set at “low”, or when the control knob is quickly turned from “high” to “low” the flame should not go out.
When set at “high”, the inner cone of the gas flame should be clearly visible.
36
