Connecting an HDMI device
You should use an HDMI cable when making connection between the projector and HDMI devices.
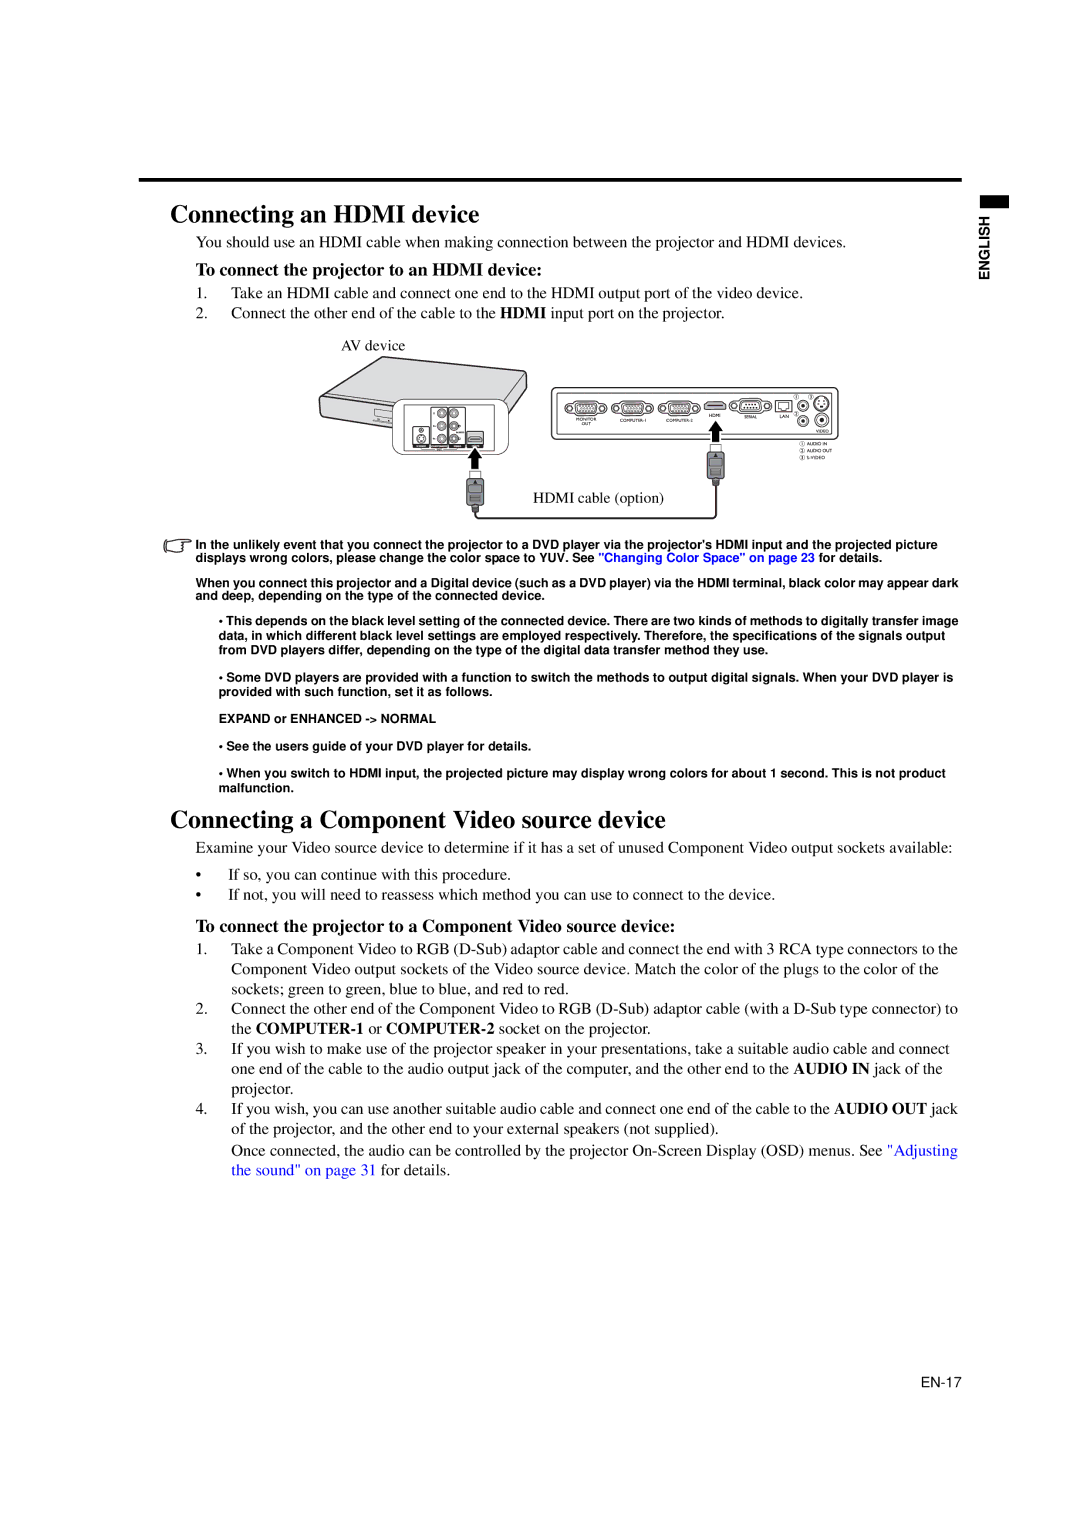
To connect the projector to an HDMI device:
1.Take an HDMI cable and connect one end to the HDMI output port of the video device.
2.Connect the other end of the cable to the HDMI input port on the projector.
AV device
HDMI cable (option)
ENGLISH
In the unlikely event that you connect the projector to a DVD player via the projector's HDMI input and the projected picture displays wrong colors, please change the color space to YUV. See "Changing Color Space" on page 23 for details.
When you connect this projector and a Digital device (such as a DVD player) via the HDMI terminal, black color may appear dark and deep, depending on the type of the connected device.
•This depends on the black level setting of the connected device. There are two kinds of methods to digitally transfer image data, in which different black level settings are employed respectively. Therefore, the specifications of the signals output from DVD players differ, depending on the type of the digital data transfer method they use.
•Some DVD players are provided with a function to switch the methods to output digital signals. When your DVD player is provided with such function, set it as follows.
EXPAND or ENHANCED
•See the users guide of your DVD player for details.
•When you switch to HDMI input, the projected picture may display wrong colors for about 1 second. This is not product malfunction.
Connecting a Component Video source device
Examine your Video source device to determine if it has a set of unused Component Video output sockets available:
•If so, you can continue with this procedure.
•If not, you will need to reassess which method you can use to connect to the device.
To connect the projector to a Component Video source device:
1.Take a Component Video to RGB
2.Connect the other end of the Component Video to RGB
3.If you wish to make use of the projector speaker in your presentations, take a suitable audio cable and connect one end of the cable to the audio output jack of the computer, and the other end to the AUDIO IN jack of the projector.
4.If you wish, you can use another suitable audio cable and connect one end of the cable to the AUDIO OUT jack of the projector, and the other end to your external speakers (not supplied).
Once connected, the audio can be controlled by the projector