To operate projector power ON
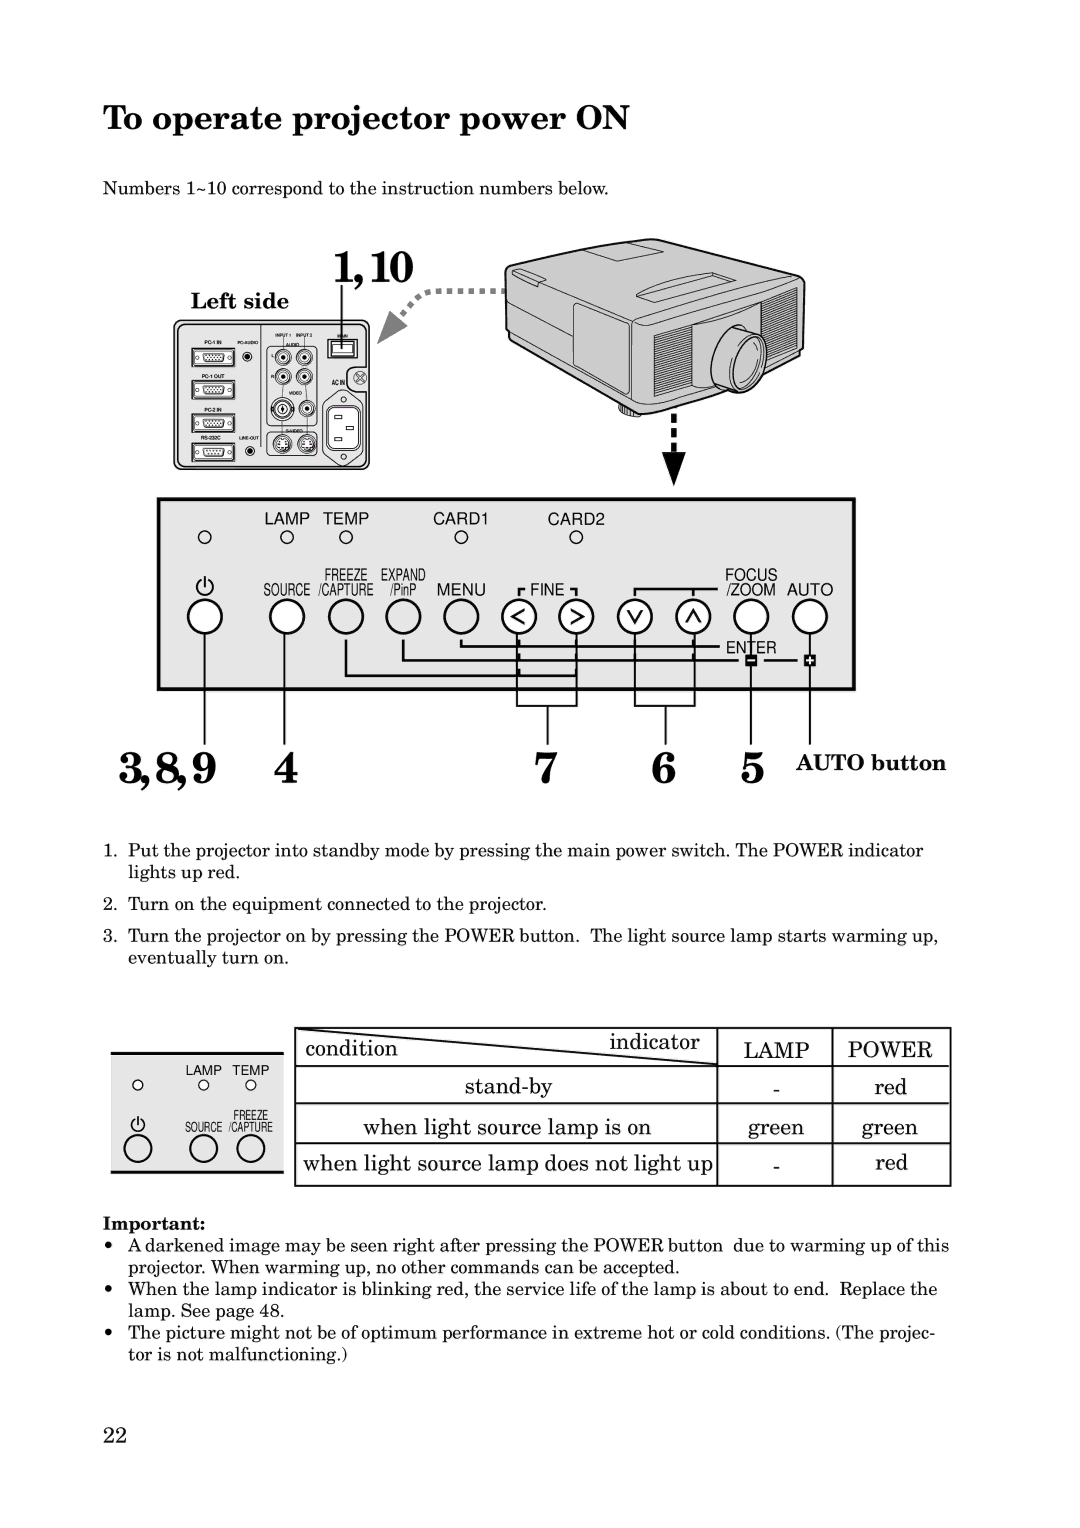
Numbers 1~10 correspond to the instruction numbers below.
1,10
Left side
|
|
| |
INPUT 1 INPUT 2 | MAIN |
AUDIO
L
R
AC IN
VIDEO
4 |
LAMP TEMP | CARD1 | CARD2 |
|
FREEZE | EXPAND | FINE | FOCUS |
SOURCE /CAPTURE | /PinP MENU | /ZOOM AUTO |
ENTER
3,8,9 4 | 7 | 6 5 AUTO button |
1.Put the projector into standby mode by pressing the main power switch. The POWER indicator lights up red.
2.Turn on the equipment connected to the projector.
3.Turn the projector on by pressing the POWER button. The light source lamp starts warming up, eventually turn on.
LAMP TEMP
FREEZE SOURCE /CAPTURE
condition | indicator | LAMP | POWER |
| - | red | |
when light source lamp is on | green | green | |
|
|
| |
when light source lamp does not light up | - | red | |
|
|
|
|
Important:
•A darkened image may be seen right after pressing the POWER button due to warming up of this projector. When warming up, no other commands can be accepted.
•When the lamp indicator is blinking red, the service life of the lamp is about to end. Replace the lamp. See page 48.
•The picture might not be of optimum performance in extreme hot or cold conditions. (The projec- tor is not malfunctioning.)
22
