MAINTENANCE
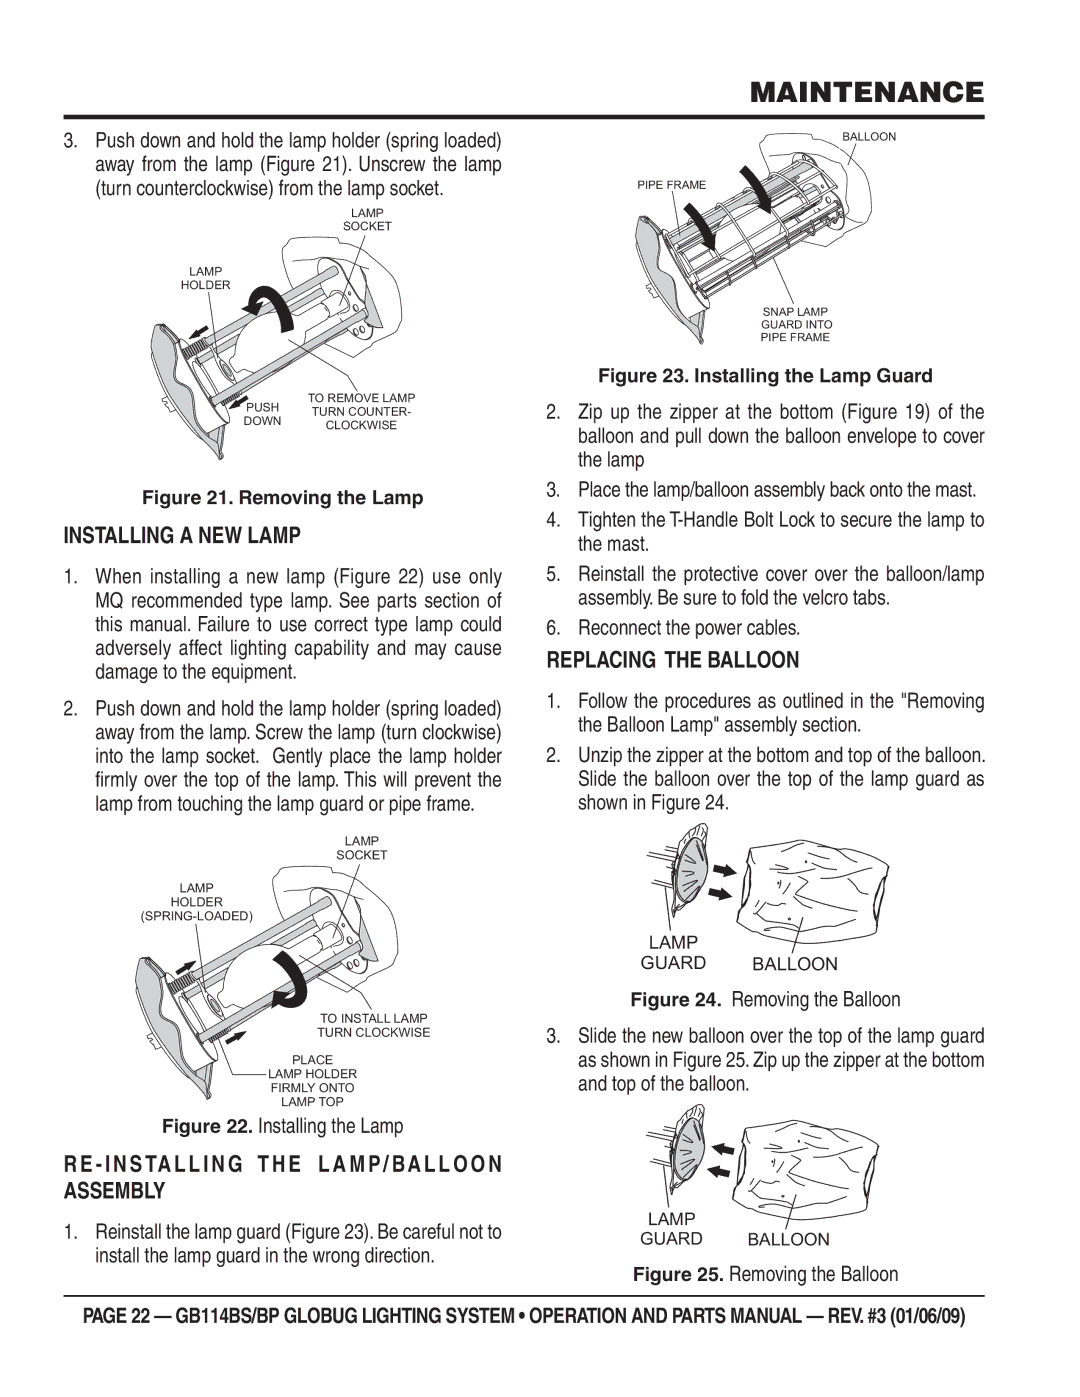
3.Push down and hold the lamp holder (spring loaded) away from the lamp (Figure 21). Unscrew the lamp (turn counterclockwise) from the lamp socket.
LAMP
SOCKET
LAMP
HOLDER
TO REMOVE LAMP
PUSH TURN COUNTER-
DOWN CLOCKWISE
Figure 21. Removing the Lamp
INSTALLING A NEW LAMP
1.When installing a new lamp (Figure 22) use only MQ recommended type lamp. See parts section of this manual. Failure to use correct type lamp could adversely affect lighting capability and may cause damage to the equipment.
2.Push down and hold the lamp holder (spring loaded) away from the lamp. Screw the lamp (turn clockwise) into the lamp socket. Gently place the lamp holder fi rmly over the top of the lamp. This will prevent the lamp from touching the lamp guard or pipe frame.
LAMP
SOCKET
LAMP
HOLDER
TO INSTALL LAMP
TURN CLOCKWISE
PLACE
LAMP HOLDER
FIRMLY ONTO
LAMP TOP
Figure 22. Installing the Lamp
R E - I N S TA L L I N G T H E L A M P / BA L L O O N ASSEMBLY
1.Reinstall the lamp guard (Figure 23). Be careful not to install the lamp guard in the wrong direction.
BALLOON
PIPE FRAME
SNAP LAMP
GUARD INTO
PIPE FRAME
Figure 23. Installing the Lamp Guard
2.Zip up the zipper at the bottom (Figure 19) of the balloon and pull down the balloon envelope to cover the lamp
3.Place the lamp/balloon assembly back onto the mast.
4.Tighten the
5.Reinstall the protective cover over the balloon/lamp assembly. Be sure to fold the velcro tabs.
6.Reconnect the power cables.
REPLACING THE BALLOON
1.Follow the procedures as outlined in the "Removing the Balloon Lamp" assembly section.
2.Unzip the zipper at the bottom and top of the balloon. Slide the balloon over the top of the lamp guard as shown in Figure 24.
LAMP
GUARD BALLOON
Figure 24. Removing the Balloon
3.Slide the new balloon over the top of the lamp guard as shown in Figure 25. Zip up the zipper at the bottom and top of the balloon.
LAMP
GUARD BALLOON
Figure 25. Removing the Balloon
PAGE 22 — GB114BS/BP GLOBUG LIGHTING SYSTEM • OPERATION AND PARTS MANUAL — REV. #3 (01/06/09)
