STORAGE
NOTICE
Allow a sufficient amount of time
LOWERING THE EXTENSION POLE
1.Using the supplied 19 mm wrench, loosen extension clamp bolt (Figure
2.Carefully pull down on the adjustable extension pole (Figure
3.Remove wingnut (Figure
REMOVING LAMP ASSEMBLY
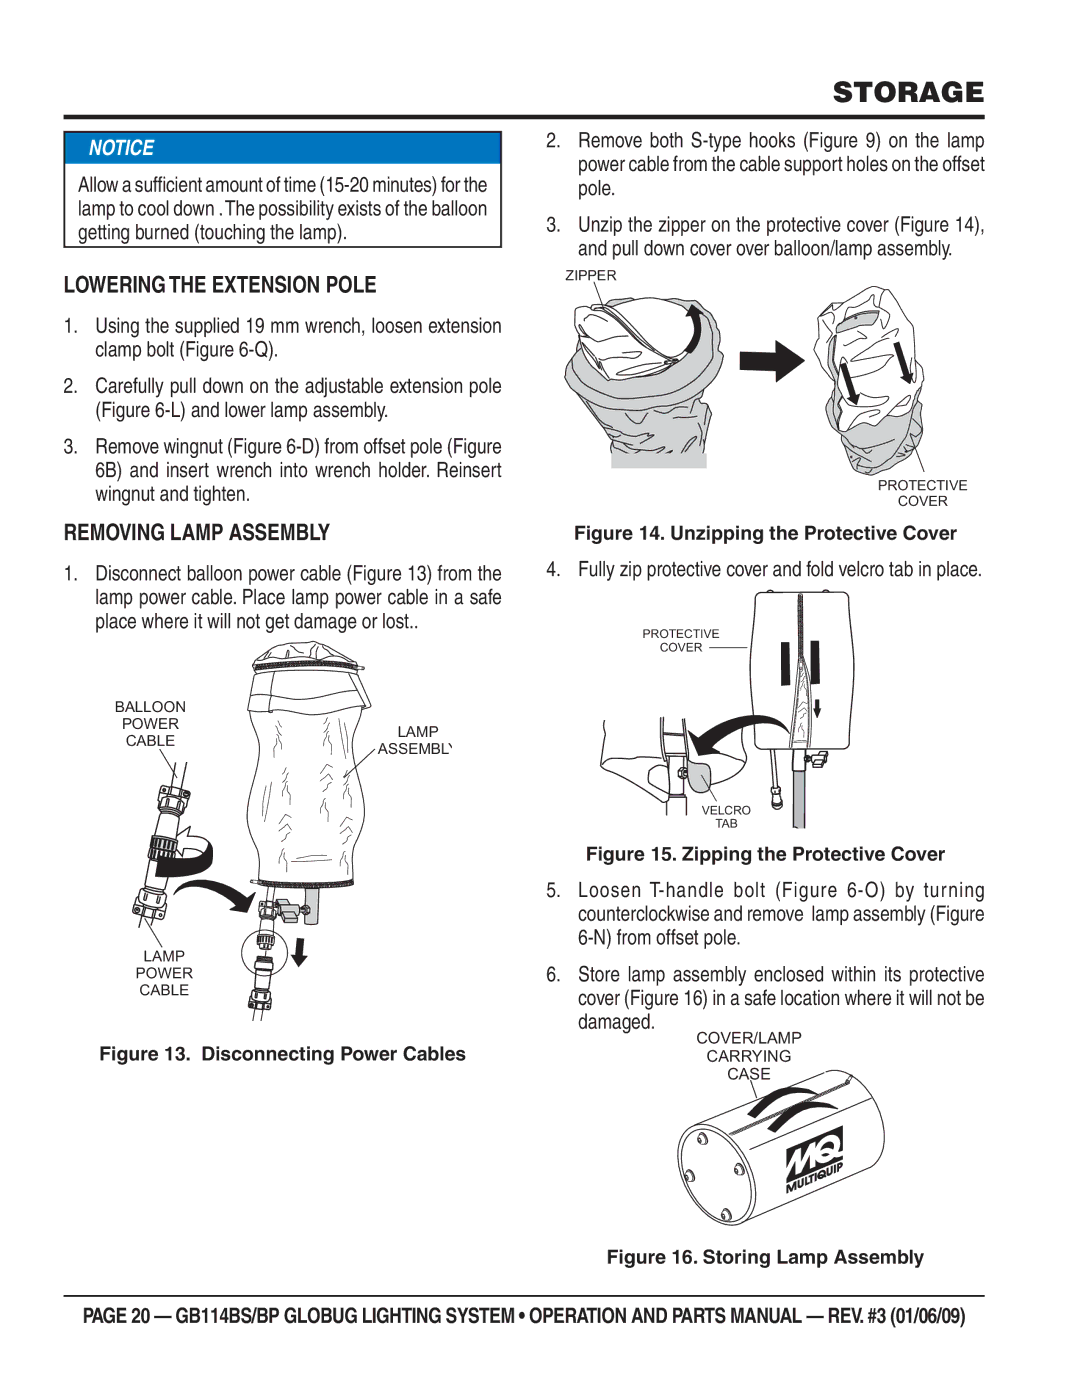
1.Disconnect balloon power cable (Figure 13) from the lamp power cable. Place lamp power cable in a safe place where it will not get damage or lost..
BALLOON |
| |
POWER | LAMP | |
CABLE | ||
ASSEMBLY | ||
|
LAMP
POWER
CABLE
Figure 13. Disconnecting Power Cables
2.Remove both
3.Unzip the zipper on the protective cover (Figure 14), and pull down cover over balloon/lamp assembly.
ZIPPER
PROTECTIVE
COVER
Figure 14. Unzipping the Protective Cover
4. Fully zip protective cover and fold velcro tab in place.
PROTECTIVE
COVER
VELCRO
TAB
Figure 15. Zipping the Protective Cover
5.Loosen
6.Store lamp assembly enclosed within its protective cover (Figure 16) in a safe location where it will not be
damaged.
COVER/LAMP
CARRYING
CASE
Figure 16. Storing Lamp Assembly
PAGE 20 — GB114BS/BP GLOBUG LIGHTING SYSTEM • OPERATION AND PARTS MANUAL — REV. #3 (01/06/09)
