Navini Networks, Inc. | Ripwave MX Modem User Guide |
Installing NavDiag, continued
Step | Action | Illustration |
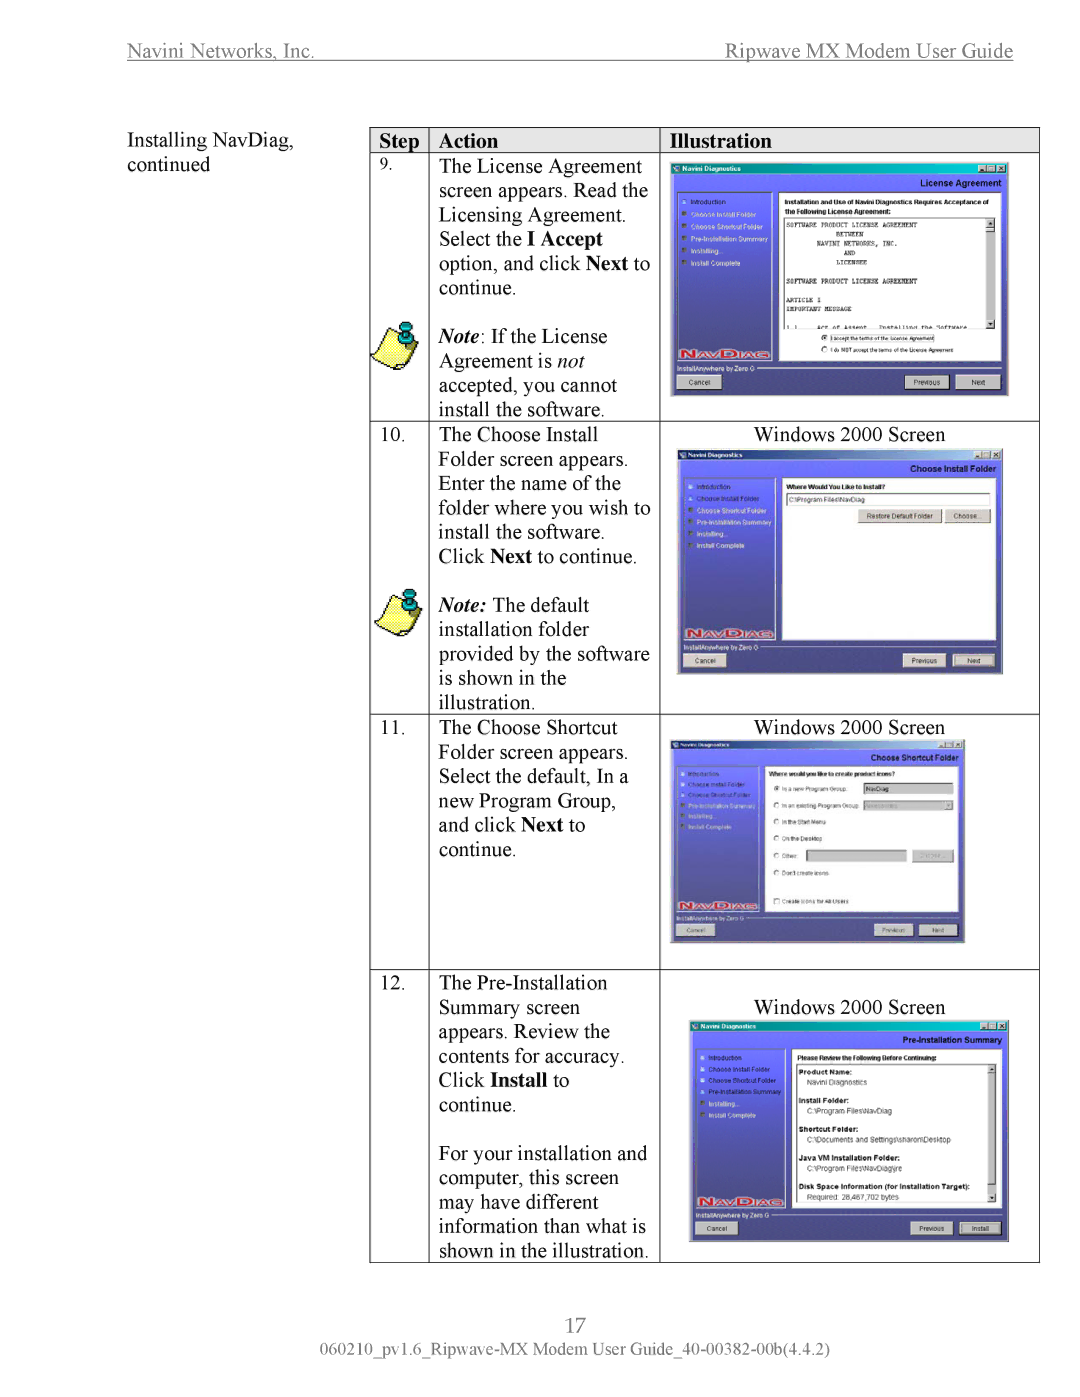
9.The License Agreement screen appears. Read the Licensing Agreement.
Select the I Accept option, and click Next to continue.
|
| Note: If the License |
|
|
|
| |
|
| Agreement is not |
|
|
| accepted, you cannot |
|
|
| install the software. |
|
10. | The Choose Install | Windows 2000 Screen | |
|
| Folder screen appears. |
|
|
| Enter the name of the |
|
|
| folder where you wish to |
|
|
| install the software. |
|
|
| Click Next to continue. |
|
|
| Note: The default |
|
|
| installation folder |
|
|
| provided by the software |
|
|
| is shown in the |
|
|
| illustration. |
|
11. | The Choose Shortcut | Windows 2000 Screen | |
|
| Folder screen appears. |
|
|
| Select the default, In a |
|
|
| new Program Group, |
|
|
| and click Next to |
|
|
| continue. |
|
12. The | Windows 2000 Screen |
Summary screen | |
appears. Review the |
|
contents for accuracy. |
|
Click Install to |
|
continue. |
|
For your installation and |
|
computer, this screen |
|
may have different |
|
information than what is |
|
shown in the illustration. |
|
17