8. Select LPR (TCP/IP) and then click OK.
9.Type in the NB620W's IP address or host name (print server's IP address) in the Host name or IP address of the print server field and give it a name in the field Logical printer name. Click OK.
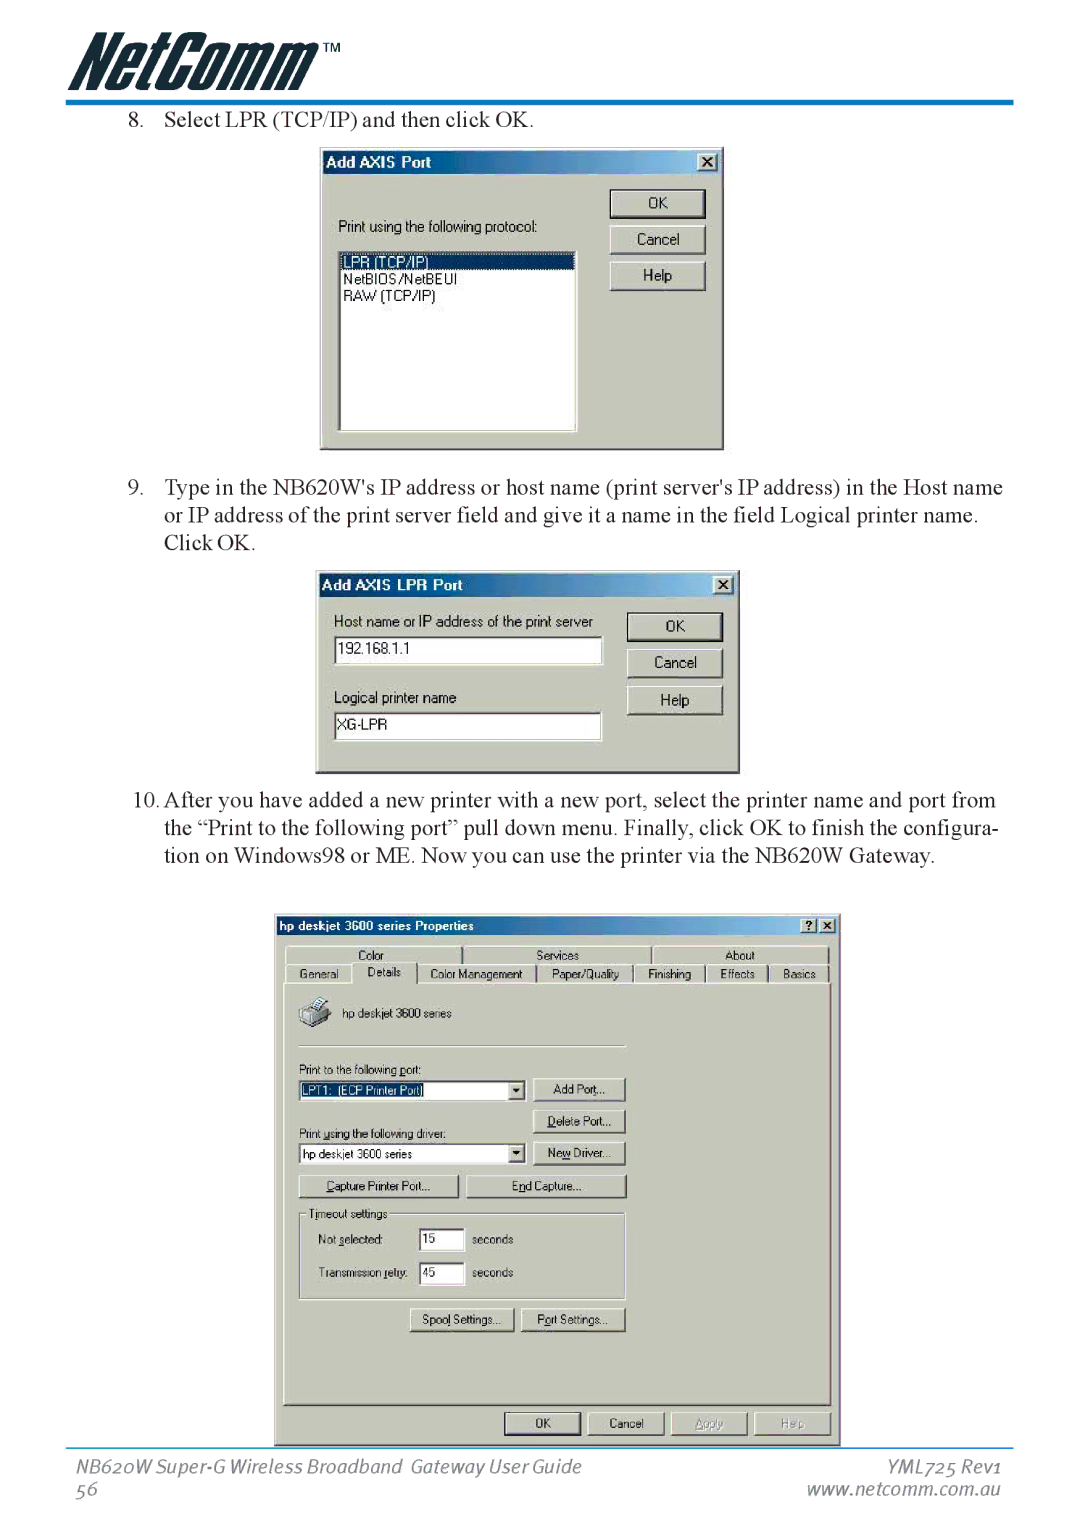
10.After you have added a new printer with a new port, select the printer name and port from the “Print to the following port” pull down menu. Finally, click OK to finish the configura- tion on Windows98 or ME. Now you can use the printer via the NB620W Gateway.
NB620W | YML725 Rev1 |
56 | www.netcomm.com.au |